background image

Downloaded from www.vandenborre.be

Using the oven

1. Place the baking rack in a position that will accommodate the 

height of the food to be cooked. 

2. Place the food on the rack. Make sure that you always use an 

ovenproof container in the oven, never use plastic or cardboard 

containers in the oven. 

3. Never use glass or ceramic pans or lids in the oven. 

4. DO NOT let juices run to the bottom of the oven. Use the Drip 

Tray or Crumb Tray when cooking. 

5.  Set the temperature suggested by the recipe, or as desired. 

6.  Securely shut the door and set the time to begin cooking. 


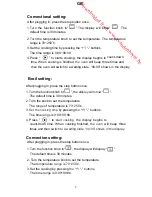
Setting the clock: : 

1.When plugged in, the display will show: “0:00”. 


“ 00:00”

displa yed


.

To


set


the hour,adjust the time  u sing the  + ,  -  buttons,  

“ ” “ ”

 when the desired hour is reached,press 

2. Press “

minutes using the “+”, “-” buttons.

 “

” to


confirm the minute setting. 

4. To set the minute,adjust the 

5. The time range is “00:00~24:00”. 


Cooki ing timer:

1.Turn the function knob to “ 

  ”.The default time is 30 minutes

Which can be reduced to 00:00 if required.

2. By pressing the “+”/ “-” buttons, you can set the timer to the minutes

 required.

3. Press “

” to  start

the display will begins to count down the time.

  When the timer reaches" 0 " the display shows"30:00",then the oven will

 cooking, 

tes, the display will return to the 

time of day.


4. If there is no operation within 3 minu


” button is pressed.

6

GB

and

.

is

.

3.

 when the desired minutes has been reached,press

” to confirm the 

confirm the hour setting. 

beep for 1minute 30 seconds,or until the 

Summary of Contents for ESO955

Page 1: ...w v a n d e n b o r r e b e FR EN NL CZ SK IT ES 13 21 22 30 39 46 47 55 56 63 1 12 Operating Instructions Instructions Gebruiksaanwijzing Istruczioni Instrucciones N vod K Obsluze á 31 38 N vod Na Pou á žívanie Convection Oven ESO955 ...

Page 2: ...es or lack of experience and knowledge unless they have been given supervision or instruction concerning use of the appliances by a person responsible for their safety This appliance is intended for indoor use only do not use outdoors Do not use an appliance for any purpose other than its intended use To protect against electric shock do not immerse cord plugs or appliance in water or other liquid...

Page 3: ...n the oven 2 GB a surface or touch hot surfaces Unplug from outlet when not in use and before cleaning Allow to cool before cleaning the appliance Do not operate the appliance with a damaged cord or plug or after the appliance malfunctions or has been damaged in any way Consult the retail store where you bought the appliance for advice manufacturer its service agent or similarly qualified person t...

Page 4: ...ed the plug must not be used until a replacement cover has been obtained If the mains plug is unsuitable for the socket outlet in your home or is removed for any other reason then the fuse should be removed and the cut off plug disposed of safely to prevent the hazard of electric shock There is a danger of electric shock if the cut off plug is inserted into any 13 amp socket outlet How to wire a 1...

Page 5: ... 2 Digital display 3 4 5 Oven feet X 4 6 Door handle 7 8 6 7 8 9 10 9 Baking rack 10 Baking tray 11 Crumb tray Rotisserie forks Rotisserie helper handle 9 Pizza pan Caution hot surfaces 4 1 2 3 4 5 11 Control knobs Control panel GB Parts description Control knobs ...

Page 6: ...to 15 minutes This will burn any oils still on the oven NOTE The oven may smoke during this process This is normal for a new oven and will not last more than 10 15 minutes perfect for baking rib steak T bone steak pork chops lamb chops chicken legs fish filets and salmon steaks during this function It is perfect for baking pizza bread cookies cooking pork and steaks motor fan are working It is per...

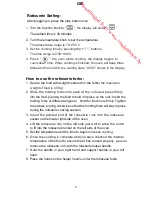
Page 7: ...splay will show 0 00 00 00 displayed To set the hour adjust the time using the buttons when the desired hour is reached press 2 Press minutes using the buttons to confirm the minute setting 4 To set the minute adjust the 5 The time range is 00 00 24 00 Cooki ing timer 1 Turn the function knob to The default time is 30 minutes Which can be reduced to 00 00 if required 2 By pressing the buttons you ...

Page 8: ...ll show The default time is 30 minutes 2 Turn the knob to set the temperature The range of temperature is 70 250 3 the buttons Set the cooking time by pressing The time range is 0 00 99 00 4 Press to start cooking the display begins to count down time When cooking finished the oven will beep three times and then switch to a waiting state 00 00 shows in the display Convection setting 1 Turn the fun...

Page 9: ...ime When cooking is finished the oven will beep three times and then switch to a waiting state 00 00 shows in the display will start and display C Delay start 1 Press the oven will display A 1 to A 9 The default is A 1 weight is 0 6kg 2 Press to select the Press button to confirm desired setting from the menu P ress to select the weight of food you are cooking Press DELAY START then TIMER then DEL...

Page 10: ... rods Insert the hold the food more firmly Tighten the screws turning clockwise so that the holding forks will stay in place during the rotisserie cooking session forks onto each of the holding forks at different angles to 3 Insert the pointed end of the rotisserie rods into the rotisserie socket on the inside right side of the oven 4 Lift the rotisserie rods on the left side just a bit to allow t...

Page 11: ... of the food and off of the rotisserie rods 13 Gently slide the food off of one side of the rods holding the food onto the heat safe plate or dish Stop function 1 the display shows the count down time button and the display flashes to resume cooking During the cooking process Press In the pause mode press again the oven stops cooking the display shows 00 00 3 hange the function setting press butto...

Page 12: ... 1 5 1 5 2 5 0 6 1 1 5 0 6 1 1 5 1 1 5 2 2 5 0 6 1 1 5 0 8 1 2 1 5 0 6 1 1 5 0 8 1 2 1 5 2 2 2 3 3 2 2 2 2 2 2 2 2 2 2 2 2 2 2 2 2 2 2 2 2 2 2 220 220 220 70 70 220 220 220 220 220 220 250 250 250 250 220 220 200 220 220 220 220 220 220 240 240 240 17 20 23 30 40 17 20 21 24 27 32 60 62 66 68 15 18 20 15 20 25 26 30 33 22 27 31 Auto menu Weight kg Shelf position Time min Temp O C 11 GB Tables and ...

Page 13: ...eansers scrubbing brushes or chemical cleaner as this will cause damage to the coating baking tray 4 Use a wet cloth to wipe the inner of the oven 5 To clean the door us detergent or soap e a wet cloth saturated with 6 Never immerse the appliance in water or other liquid any of 12 We apologise for any inconvenience caused by minor inconsistencies in these instructions which may occur as a result o...

Page 14: ...éloger des aliments lorsque le four est en marche attendez que l appareil refroidisse Débranchez le câble d alimentation de la prise secteur lorsque l appareil n est pas utilisé et avant de le nettoyer Laissez l appareil refroidir avant de le nettoyer Ne faites pas fonctionner l appareil si le câble ou la prise est endommagé e si l appareil dysfonctionne ou a été endommagé d une manière ou d une a...

Page 15: ... la broche Lèchefrite AVERTISSEMENTS Cet appareil est uniquement conçue pour un usage domestique des ménages Un usage commercial ou tout autre usage pour lequel la machine n est pas conçue pourrait annuler la garantie et pourrait être dangereux Si le câble d alimentation est endommagé il doit être remplacé par le fabricant son service après vente ou des personnes de qualification similaire afin d ...

Page 16: ...E D ALIMENTATION SUR LE MEME CIRCUIT QU UN AUTRE APPAREIL 4 Positionnez le four afin qu il reste distant d au moins 4 pouces 10 cm de tout autre objet Assurez vous qu aucun objet ne soit placé sur le four 5 Vérifiez que la l utiliser La première fois seulement réglez le bouton de température sur 250 C réglez la fonction sur Four traditionnel et réglez le minuteur sur 15 minutes Cela permettra de b...

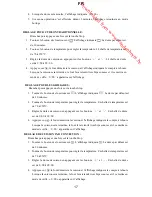
Page 17: ...er un plat approprié pour une cuisson au four ne placez jamais de récipient en plastique ou en carton dans le four 3 N utilisez jamais de casseroles ou de couvercles en verre ou en céramique 4 NE laissez PAS de sauce ou de jus s écouler vers le bas du four 5 Réglez la température 6 Fermez la porte du four et réglez la durée de cuisson REGLAGE DE L HORLOGE Lorsque vous branchez le four à une prise ...

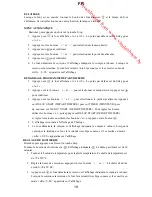
Page 18: ... température pour régler la température L échelle de température est de 70 à 250 C 3 Réglez la durée de cuisson en appuyant sur les boutons et L échelle de durée est de 0 00 à 99 00 4 Appuyez sur le four démarrera la cuisson et l affichage indiquera le compte à rebours Lorsque la cuisson sera terminée le four fera retentir trois bips sonores et il se mettra en mode de veille 0 00 apparaitra sur l ...

Page 19: ...START DEPART DIFFERE puis sur TIMER MINUTEUR puis de nouveau sur DELAY START DEPART DIFFERE Pour régler les heures utilisez les boutons et puis appuyez sur DELAY START DEPART DIFFERE et réglez les minutes en utilisant les boutons et et appuyez sur le bouton 4 L affichage retournera à l affichage de l horloge 5 Le four démarrera la cuisson et l affichage indiquera le compte à rebours Lorsque la cui...

Page 20: ...accroché entre les broches hors du four 11 Placez l aliment sur un plat ou une assiette résistante à la chaleur Laissez refroidir l aliment avant de tenter d enlever les broches et la tige de rôtisserie 12 Pour enlever les broches tournez les vis dans la sens et retirez les broches de l aliment et de la tige 13 Faites glisser doucement l aliment sur un côté de la tige en maintenant l aliment sur l...

Page 21: ...1 5 2 220 25 0 6 2 220 26 1 2 220 30 A 8 Poisson épais 1 5 2 220 33 A 9 Gratin 0 8 2 240 22 1 2 2 240 27 1 5 2 240 31 ENTRETIEN ET NETTOYAGE 1 Avant de nettoyer le four débranchez le câble d alimentation de la prise secteur et laissez le refroidir complètement 2 Lavez tous les accessoires avec de l eau chaude et savonneuse y compris la grille et la 3 N utilisez pas de nettoyants abrasifs de brosse...

Page 22: ...xcusons d avance pour les désagréments causés par les quelques erreurs mineures que vous pourriez rencontrer généralement dues à un décalage entre la mise à jour du manuel et les constantes améliorations que nous apportons à nos produits 21 FR Electricals HU1 3AU 10 11 10 ...

Reviews: