


9
Before cleaning always allow the cooling fan to
cool the oven down before switching off at the
electricity supply.
This appliance cannot be cleaned with steam or
with a steam cleaning machine.
The oven should be kept clean at all times. A
build-up of fats or other foodstuffs could result in
a fire, especially in the grill pan.
Cleaning materials
Before using any cleaning materials on your oven, check
that they are suitable and that their use is recommended
by the manufacturer.
Cleaners that contain bleach should NOT be used as
they may dull the surface finishes. Harsh abrasives should
also be avoided.
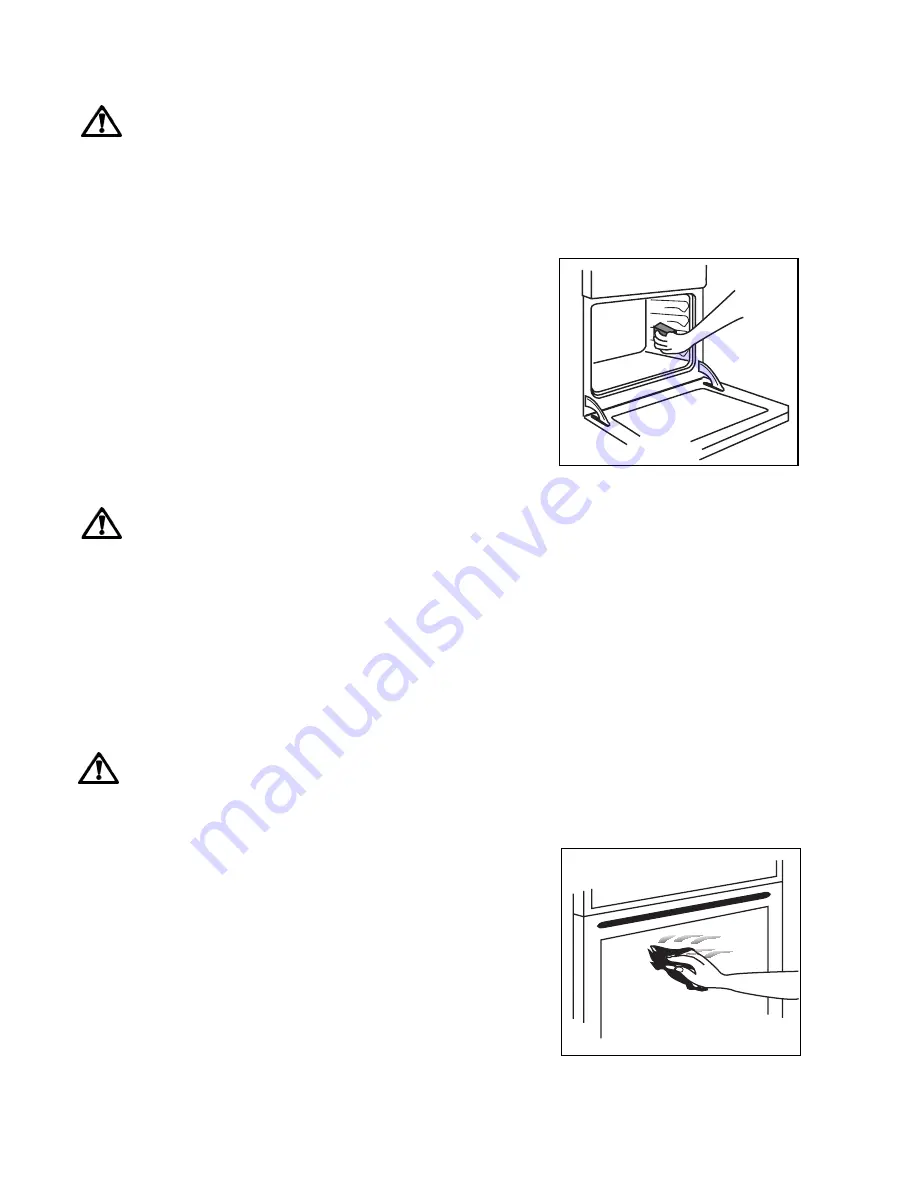
External cleaning
Regularly wipe over the control panel, oven door and door
seal using a soft cloth well wrung out in warm water to
which a little washing up liquid has been added.
To prevent damaging or weakening the door glass
panels avoid the use of the following:
• Household detergent and bleaches
• Impregnated pads unsuitable for non-
stick saucepans
• Brillo/Ajax pads or steel wool pads
• Chemical oven pads or aerosols
• Rust removers
• Bath/Sink stain removers
Clean the outer and inner door glass using warm soapy
water. Should the inner door glass become heavily soiled
it is recommended that a cleaning product such as Hob
Brite is used.
DO NOT
clean the oven door while the glass
panels are warm. If this precaution is not observed
the glass panel may shatter.
If the door glass panel becomes chipped or has
deep scratches, the glass will be weakened and
must be replaced to prevent the possibility of the
panel shattering. Contact your local Service Centre
who will be pleased to advise further.
Models in stainless steel or
aluminium
We recommend to clean the oven door using only a wet
sponge and dry it up after cleaning with a soft cloth.
Never use steel wool, acids or abrasive products as they
can damage the oven surface.
Clean the oven control panel following the same
precautions.
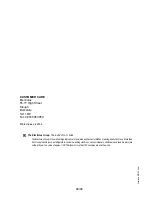
Cleaning the Oven
Oven Cavity
The enamelled oven cavity is best cleaned whilst the
oven is still warm.
Wipe the oven over with a soft cloth soaked in warm
soapy water after each use. From time to time it will be
necessary to do a more thorough cleaning, using a
proprietary oven cleaner.
Oven Shelves
To clean the oven shelves, soak in warm soapy water
and remove stubborn marks with a well wetted soap
impregnated pad. Rinse well and dry with a soft cloth.
Summary of Contents for ESOGBR
Page 2: ......


