background image

31

Electrolux 818 14 92-02/9

Hints and Tips

GB

Saving energy

·

Pay careful attention to where the cabinet is
placed. See the section "Installation". When
installed correctly, the cabinet will consume less
energy.

·

Try to avoid keeping the door open for long
periods, or opening the door to frequently as
warm air will enter the cabinet, and cause the
compressor to switch on unnecessarily often.

·

Ensure there are no obstructions prevending the
door from cloosing properly.

·

Thaw frozen food in the fridge. This will ensure
safer defrosting of foods and reduce the work of
the refridgeration unit

·

It is advisable to periodically clean the
refrigeration systemat the back of the appliance
with a duster or vacuum cleaner.

·

Food which is to be frozen (when cool) should
be placed in the fridge before being transfered to
the freezer.

·

Avoid unnecessary frosting in the cabinet by
packing all foodstuffs into airtight packages
before placing them in the freezer.

·

Carefully follow the advice on freezing products
in the section "Using the freezer". This will
prevent wasting energy.

·

Do not set the temperature too low in the freezer.
A suitable temperature is in the range of -18°C
to -20°C .

·

Defrost the freezer when the frost layer reaches a
thickness of 3-5 mm.

·

Make sure the door gasket is complete and
always clean.

Food Storage

·

To obtain the best results from your appliance,

neither hot foods nor liquids which may evaporate,
should be placed in the larder compartment.

·

Avoid buying frozen food if you can not store it

straight away. The use of an isulated container is
advisable. When you arrive home place the frozen
food in the freezer immediately.

·

Ensure that food placed in the freezer is dated and

labelled and used in date order to ensure that food is
consumed at its best.
Remove suspect food from you refrigerator and
clean, refer to cleaning and maintenance.

Protect the environment

·

Hand over the cabinet packaging and discarded
fridges and freezers to a recycling station.
Contact your local city office or your closest
dealer for more information.

·

Keep foodstuff in re-usable containers. Cut down
on disposable material as much as possible.

·

When cleaning the cabinet, use a mild
washing-up detergent.

·

Follow the advice in the section "Saving energy"

·

The door gasket and coolant used in this
cabinet will not harm the ozone layer.

·

All parts in the packaging can be recycled.

·

The cabinet has been designed for easy
dismantling and subsequent recycling.

Maintenance and Cleaning

GB

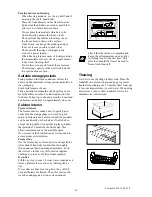
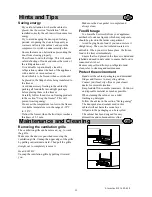
Removing the ventilation grille

The ventilation grille can be removed, e.g. to wash
the grille.
Make sure the door is open when removing the
ventilation grille. Unsnap the upper edge of the grille
by pulling outward/downward. Then pull the grille
straight out to completely remove it.

Model EU8203C

Unsnap the ventilation grille by pulling it toward
you.

Summary of Contents for EU7702C

Page 1: ...c o n g e l a d o r c o n g e l a d o r f r e e z e r INSTRUCCIONES DE USO INSTRUÇÕES DE USO INSTRUCTION BOOKLET 818 14 92 02 9 GB EU7702C EU8202C EU8203C PO ES ...

Page 2: ...ay break The cabinet is heavy The edges and projecting parts of the cabinet may be sharp Be careful when moving the cabinet and always use gloves Child Safety Pay attention so that small children do not gain access to the operating controls or the inside of the cabinet Scrapping old cabinets When discarding the cabinet hand it over to a recycling station For more information call your local city o...

Page 3: ...2 5 3 3 3 3 3 4 Model EU7702C 1 Freezing tray 2 Freezershelf with flap 3 Freezer basket 4 Ventilation grill 5 Freezer calendar 1 2 5 Model EU8202C EU8203C 1 Freezing tray 2 Freezershelf with flap 3 Freezer basket 4 Ventilation grill 5 Freezer calendar 4 3 3 3 3 3 3 ...

Page 4: ...tlet and switching on the cabinet for the first time leave it standing upright for about 30 minutes or for 4 hours if it was transported horizontally Otherwise the compressor may sustain damage This time will allow the oil sufficient time to return to the compressor Using the freezer GB To start the freezer and set the correct temperature Turn the thermostat control to the desired position MIN The...

Page 5: ...ition to H Unplug the power supply plug from the wall socket or alternatively remove the fuse Alarms and other features Temperature alarm The warning lamp lights and an alarm sounds if it gets warmer than 10 C Switching off the audible alarm Press the switch off button The red warning lamp goes out when it becomes colder than 9 C The temperature alarm can start also at colder than 9 C if e g the d...

Page 6: ...r drawers The freezer drawers make it easy to quickly and easily find the food package you want To gain space the drawers can be removed and the products can be put directly on the shelves On all shelves except the top shelf it is possible to place products that protrude 20 mm from the front edge This allows maximum use of the available space Do not remove the bottom drawer It is required to assur...

Page 7: ...ge To obtain the best results from your appliance neither hot foods nor liquids which may evaporate should be placed in the larder compartment Avoid buying frozen food if you can not store it straight away The use of an isulated container is advisable When you arrive home place the frozen food in the freezer immediately Ensure that food placed in the freezer is dated and labelled and used in date ...

Page 8: ... Defrosting the freezer A certain amount of frost will always form on the freezer shelves and around the top compartment Defrost the freezer when the frost layer reaches a thickness of about 3 5 mm Remove the freezer drawers and place them on top of each other by turning every other drawer one half turn Put insulating material around the drawers e g blankets or newspapers The frozen products can a...

Page 9: ... temperature still being too high See the chapter Switching on and setting the temperature The door may have been open for so long that the door open alarm was triggered It is too warm inside the freezer Set a lower temperature Make sure that the door is completely closed and that the insulating strip is complete and clean If warm food products have been put inside the freezer wait for a couple of...

Page 10: ...zen products are still hard following the power cut they may be immediately refrozen If the food products have thawed but are still fresh they may be used however they should be prepared before re freezing or eating them Guarantee Conditions See Guarantee Conditions on the Registration Card Customer Care Department For general enquiries concerning your Electrolux appliance or futher information on...

Page 11: ...d check that it is in good condition and free of any transport damage Notify the dealer immediately of any damage Hand the packaging over for recycling For more information contact your local city office or the dealer Do not allow children to play with the packaging The plastic film can cause suffocation Before installing the cabinet Affix the supplied plastic peaces at the rear of the cabinet Cle...

Page 12: ...op cupboard In this case the space behind the cupboard must be at least 50 mm deep Cabinet is placed at a location whose ambient temperature corresponds to the climate classification for which the appliance is designed See on the raiting plate on the inside of the appliance The following table shows which ambient temperature is correct for each climate classifacition Climate classification for an ...

Page 13: ...en attach the supplied door closing fitting 6 a Remove the door closing fitting from the bottom of the door b Remove the plastic plug from the corresponding hole on the other side Use a screwdriver to rock the plug loose Then secure the supplied door closing fitting c Secure the lower hinge 7 Raise the cabinet and replace the ventilation grille 8 To transfer the handle Unscrew the screws Fit the h...

Page 14: ...the board 4 On the upper part of the cabinet Put the hinge pin on the other side On the lower part of the cabinet Unscrew the hinge Move the hinge pin and plastic cover Secure the hinge on the other side 5 Raise the cabinet and replace the ventilation grille 6 Unscrew the handle Carefully press in the plastic plugs on the opposite side using a drift Secure the handle in the plug holes Then press t...

Page 15: ...ïë åÇ ä ïå ãçïÉêëF êÉ ëçäÇ É ÅÜ óÉ ê íç î äìÉ çÑ ééêçñK rpa NQ Äáääáçå áå ãçêÉ íÜ å NRM ÅçìåíêáÉë êçìåÇ íÜÉ ïçêäÇK bä dêìéç bäÉÅíêçäìñ Éë Éä ã óçê Ñ ÄêáÅ åíÉ ÇÉä ãìåÇç ÇÉ é ê íçë é ê ä ÅçÅáå I äáãéáÉò ó ìëç ÉñíÉêáçêK j ë ÇÉ RR ãáääçåÉë ÇÉ éêçÇìÅíçë ÇÉä dêìéç bäÉÅíêçäìñ EÑêáÖçêáÑáÅçëI ÅçåÖÉä ÇçêÉëI ÅçÅáå ëI ä î Ççê ëI ëéáê ÇçêÉëI ãçíçëáÉêê ë ó Åçêí Å ëéÉÇÉëF ëÉ îÉåÇÉå Å Ç ç éçê ìå î äçê éêçñáã Çç Ç...

Reviews: