7
Food Storage
•
To obtain the best results from the appliance
neither hot foods nor liquids which may
evaporate, should be placed in the larder
compartment.
•
Keep the time between buying chilled food and
placing it in your refrigerator as short as possible.
•
Do not push food together too much, try to allow
air to circulate around each item.
•
Do not store food uncovered.
•
Remove suspect food from your appliance and
clean, refer to Maintenance and Cleaning.
Energy Saving Advice
•
Do not install the appliance close to sources of
heat, such as a boiler or radiator.
•
Locate the appliance in a cool well ventilated
room and make sure that the air openings of the
appliance are not obstructed.
•
Always leave warm food to cool down to room
temperature before placing in the fridge.
•
Try to avoid keeping the door open for long
periods or opening the door too frequently as
warm air will enter the cabinet and cause the
compressor to switch on unnecessarily often.
•
Ensure there are no obstructions preventing the
door from closing properly.
•
It is advisable to peridocally clean the
refrigeration system at the back of the appliance
with a duster or vacuum cleaner.
HINTS AND TIPS
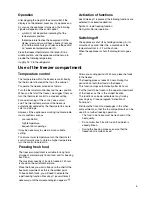
Excessive temperature alarm
An increase in the temperature in the freezer
compartment (for example due to an power failure)
is indicated by:
- flashing temperature;
- freezer compartment flashing (symbol 2);
- red illumination of display;
- sounding of buzzer.
- alarm symbol.
When normal conditions are restored:
- the acoustic signal shuts off;
- the temperature value continues to flash;
- the display illumination remains red.
When you press key "C" to de-activate the alarm,
the highest temperature reached in the compartment
appears on indicator 2 for approximately 5 seconds.
At this point the flashing stops and the display
illumination changes over from red to white.
Door open acoustic alarm
An acoustic alarm will sound when the door is left
open for more than 1 minute.
The door open alarm conditions are indicated by:
- flashing symbol (1);
- red display illumination;
- beeping sound.
Press the button (C) to stop the acoustic alarm.
When normal conditions are restored (door closed):
- the acoustic alarm will stop.
14
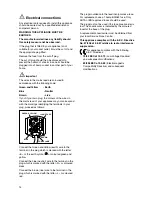
Electrical connections
Any electrical work required to install this appliance
should be carried out by a qualified electrician or
competent person.
WARNING: THIS APPLIANCE MUST BE
EARTHED.
The manufacturer declines any liability should
this safety measure not be observed.
If the plug that is fitted to your appliance is not
suitable for your socket outlet, it must be cut off and
the appropriate plug fitted.
Remove the fuse from the cut off plug.
The cut off plug should then be disposed of to
prevent the hazard of shocks in case it should be
plugged into a 13amp socket in another part of your
home.
Important
The wires in the mains lead are coloured in
accordance with the following code:
Green and Yellow - Earth
Blue - Neutral
Brown - Live
If you fit your own plug, the colours of the wires in
the mains lead of your appliance may not correspond
with the markings identifying the terminals in your
plug, proceed as follows:
Connect the Green and Yellow (earth) wire to the
terminal in the plug which is marked with the letter
«E» or the earth symbol
or coloured green and
yellow.
Connect the blue (neutral) wire to the terminal in the
plug which is marked with the letter «N» or coloured
black.
Connect the brown (live) wire to the terminal in the
plug which is marked with the letter «L» or coloured
red.
D207
GREEN & YELLOW
13 AMP. FUSE
BROWN
CORD CLAMP
BLUE
13
AMP
The plug moulded onto the lead incorporates a fuse.
For replacement, use a 13amp BSI362 fuse. Only
ASTA or BSI approved fuses should be used.
The plug must not be used if the fuse cover/carrier is
lost. The cover/carrier is indicated by the coloured
insert at the base of the plug.
A replacement cover/carrier must be obtained from
your local Service Force Centre.
This appliance complies with the E.E.C. Directive
No. 87/308 of 2.6.87 relative to radio interference
suppression.
This appliance complies with the following
E.E.C. Directives:
-
73/23 EEC of 19.2.73
(Low Voltage Directive)
and subsequent modifications;
-
89/336 EEC of 3.5.89
(Electromagnetic
Compatibility Directive) and subsequent
modifications.
Summary of Contents for EUF 2320
Page 1: ...f r e e z e r INSTRUCTION BOOK 2223 383 11 EUF 2320 ...
Page 19: ......
Page 20: ... Electrolux plc 2005 ...


