background image

Warning

Before any maintenance or cleaning work is
carried out, DISCONNECT the appliance
from the ELECTRICITY supply.

Important

This appliance contains hydrocarbons in its
cooling unit maintenance and recharging
must therefore only be carried out by autho-
rised technicians.

Internal cleaning

Clean the inside and accessories with warm water
and bicarbonate of soda (5ml to 0.5 litre of water).
Rinse and dry thoroughly.
NEVER USE DETERGENTS, ABRASIVE POW-
DERS, HIGHLY PERFUMED CLEANING PROD-
UCTS OR WAX POLISHES, TO CLEAN THE INTE-
RIOR AS THESE WILL DAMAGE THE SURFACE
AND LEAVE A STRONG SMELL.

Important

Do not use abrasive products.

Periodic cleaning

The appliance is equipped with a ventilation grid.
Keep clean to guarantee good ventilation and good
working order of the appliance.

An accumulation of dust will affect the performance of
the appliance and cause excessive electricity con-
sumption.
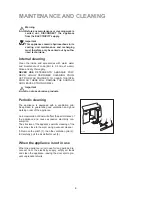
The structure of the appliance permits cleaning of the
rear zone close to the wall, using a vacuum cleaner.

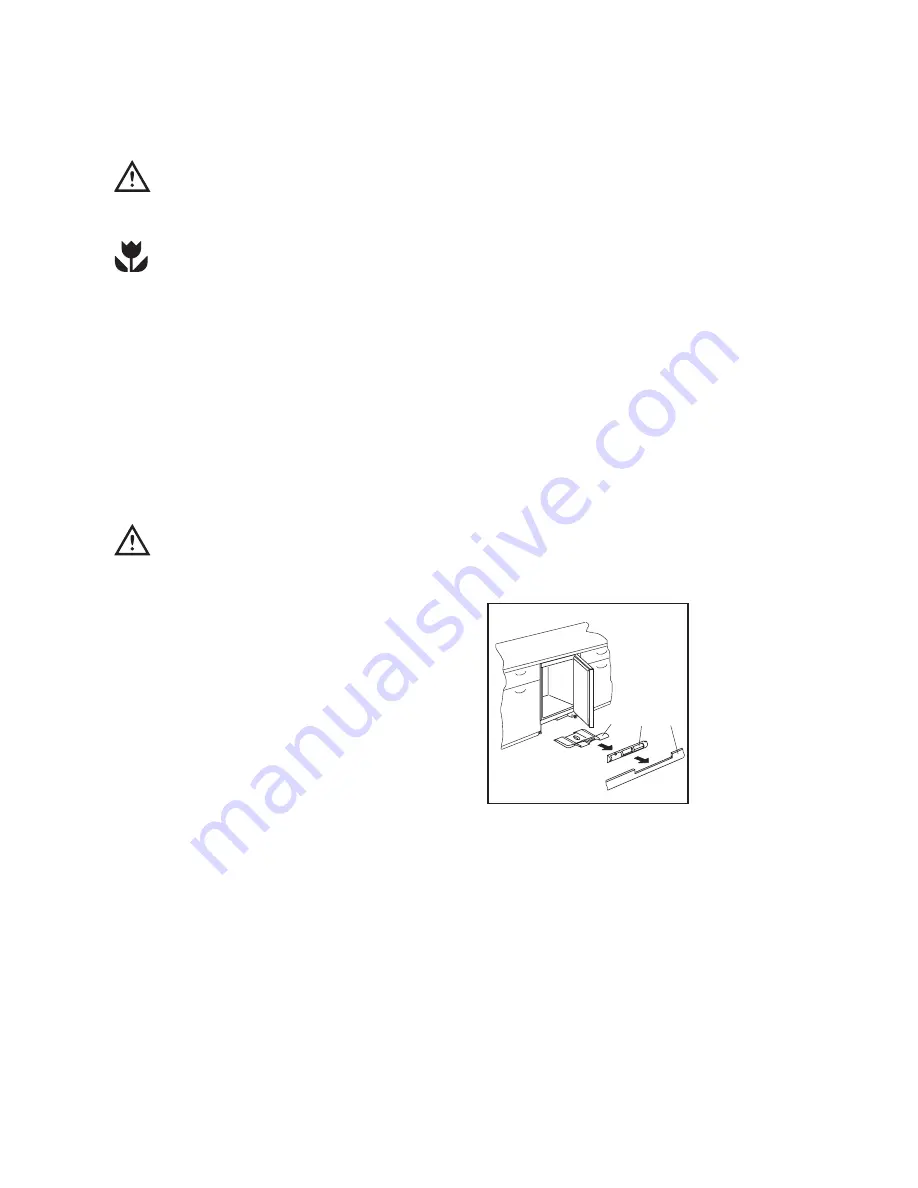
1. Remove the plinth (1), then the ventilation grid (2);

2. Carefully pull the air deflector out (3).

When the appliance is not in use

When the appliance is not in use for long periods, dis-
connect from the electricity supply, empty all foods
and clean the appliance, leaving the door ajar to pre-
vent unpleasant smells.

9

S.I.013

3

2

1

MAINTENANCE AND CLEANING

Summary of Contents for EUU 1172

Page 1: ...INSTRUCTION BOOKLET 2222 740 55 EUU 1172 EUU 6174 f r e e z e r UK ...

Page 2: ...guidelines 7 Defrosting 8 Maintenance and Cleaning 9 Internal cleaning 9 Periodic cleaning 9 When the appliance is not in use 9 Something Not Working 10 Service and Spare Parts 11 Customer Care Departments 11 Guarantee Conditions 12 Instructions for the Installer Technical Specifications 13 Installation 13 Positioning 13 Electrical Connection 14 Building in Instructions 15 Grid preparation 15 Door...

Page 3: ... hydrocarbons in its cooling unit maintenance and recharging must therefore only be carried out by authorised technicians Take utmost care when handling your appliance so as not to cause any damages to the cooling unit with consequent possible fluid leakages The appliance must not be located close to radi ators or boilers Avoid prolonged exposure of the appliance to direct sunlight Do not use othe...

Page 4: ...ir the appliance yourself Repairs carried out by inexperienced persons may cause injury or serious malfunctioning Contact your local Service Force Centre At the end of the Appliance Life When disposing of your appliance use an autho rised disposal site Remove the plug and ensure that any locks or catches are removed to prevent young children being trapped inside ...

Page 5: ...ure of the freezer is auto matically adjusted by the thermostat to ensure safe food storage However if the appliance is working in unfavourable room conditions such as high tempera ture and frequent door openings it may be necessary to select a more suitable setting To obtain a lower temperature turn the thermostat control knob towards max to obtain a higher temper ature turn the control knob towa...

Page 6: ...ore storing frozen food To obtain the best performance from this appliance we strongly recommend that you make sure that the commercially frozen foodstuffs were adequately stored by the retailer and furthermore be sure that these frozen foodstuffs are transferred from the food store to the consumer in the shortest possible time a temperature increase of the frozen food could shorten its storage pe...

Page 7: ... handling food Keep work surfaces clean and avoid cross contam ination by not using the same work surface or knife without washing them thoroughly in between The foods to be frozen must be fresh and of the best quality The size of each pack should be small enough to ensure that it is used in one go Small packs freeze more quickly and uniformly and give better results Frozen food once thawed must n...

Page 8: ...dium setting and after letting the appliance run for at least two hours in the fast freeze mode replace the previously removed food into the compartments Important A temperature rise of the frozen food packs during defrosting may shorten their storage life Never use sharp metal tools to scrape off frost from the evaporator as you could damage the appliance beyond repair Important In the event of a...

Page 9: ... A STRONG SMELL Important Do not use abrasive products Periodic cleaning The appliance is equipped with a ventilation grid Keep clean to guarantee good ventilation and good working order of the appliance An accumulation of dust will affect the performance of the appliance and cause excessive electricity con sumption The structure of the appliance permits cleaning of the rear zone close to the wall...

Page 10: ...nt conditions Check the ambient temperature is within the appliances operating limits of 10 C to 38 C Has door just been opened If so leave for a few minutes to allow the air pressure to equalise Adjust the thermostat control knob to give correct tem perature control See page 5 Check that the door is closed Large quantities of food have recently been placed in the cabinet and or door is frequently...

Page 11: ... Force Centre you will need to give the following details 1 Your name address and post code 2 Your telephone number 3 Clear and concise details of the fault 4 The model and serial number of the appliance found on the rating plate 5 The purchase date Please note that a valid purchase receipt or guaran tee documentation is required for in guarantee ser vice calls CUSTOMER CARE DEPARTMENT For general...

Page 12: ... glass or plastic Costs incurred for calls to put right an appliance which is improperly installed or calls to appliances outside the United Kingdom Appliances found to be in use within a commercial environment plus those which are subject to rental agree ments Products of Electrolux manufacture which are not marketed by Electrolux European Guarantee If you should move to another country within Eu...

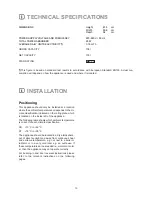
Page 13: ...mbient temperature corresponds to the cli mate classification indicated on the rating plate which is located on the inside left of the appliance The following table shows which ambient temperature is correct for each climate classification SN 10 C to 32 C ST 18 C to 38 C The appliance should be located in a dry atmosphere out of direct sunlight and away from continuous heat and extreme temperature...

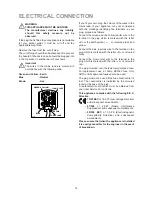
Page 14: ...er E or the earth symbol or coloured green and yellow Connect the blue neutral wire to the terminal in the plug which is marked with the letter N or coloured black Connect the brown live wire to the terminal in the plug which is marked with the letter L or coloured red The plug moulded onto the lead incorporates a fuse For replacement use a 13amp BS1362 fuse Only ASTA or BSI approved fuses should ...

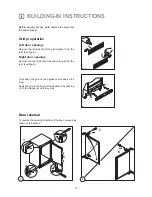
Page 15: ... socket Grid preparation Left door opening Remove the left side A of the grid cutting it from the rear see figure Right door opening Remove the right side B of the grid cutting it from the rear see figure To position the grid on the appliance proceed as fol lows Apply the grid to the base of the appliance by pushing on to the clasps a until they click DO002 2 A B DO001 a a 1 1 2 3 4 5 ...

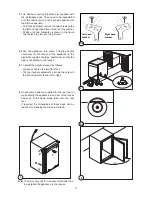
Page 16: ... fit perfectly to the cabinet In that case wait for the natural fit ting of the gasket or accelerate this process by heating up the part involved with a normal hairdryer on a low setting Building the appliance in under a worktop DO013 600 550 min 600 1 1xA 12 1xB 2xC 2 2 1 1 2 1 The dimensions of the recessed installation area must correspond with those indicated in the figure 2 Installation kit ...

Page 17: ...cess 596 555 max Li89 4 Push the appliance into place The plug socket necessary for connection of the appliance to the electricity supply should be positioned so that the plug is not placed in the recess 5 To adjust the height proceed as follows Loosen or tighten the two front feet The rear feet are adjusted by turning the screw in the front kick plate to the left or right 6 If necessary pads are ...

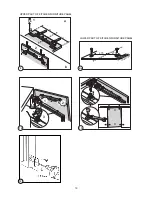
Page 18: ...place and retain the cabinet with screws through the securing brackets into the worktop or adjacent woodwork as necessary 8 To mount the furniture door proceed as shown in the figures 6 a b 10 1 2 3 4 C 7 8 a b clic clic c C C 5 ...

Page 19: ...19 9 b a 1 2 10 1 2 3 45 9 a 275 275 max 100 11 10 UPPER PART OF KITCHEN FURNITURE PANEL LOWER PART OF KITCHEN FURNITURE PANEL 12 ...

Page 20: ...e applies to an opening height dimension B 870 mm and a plinth height dimension b 150 mm For plinth heights greater than a 100 mm b 150 mm a cut should be made in the plinth 580 mm wide in the centre of the appliance posi tion leaving a remaining height of a 100 mm b 150 mm Attach plinth to the kitchen units Important The plinth must be positioned at a minimun dis tance of 25 mm from the door DO00...

Page 21: ......

Page 22: ......

Page 23: ......

Page 24: ... Electrolux plc 2003 ELECTROLUX HOME PRODUCTS OPERATIONS EUROPE 922 822 666 922 822 667 ...

Reviews: