
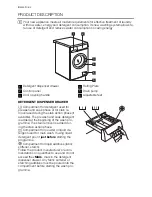
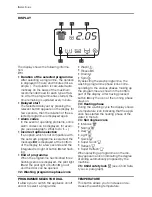


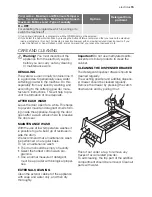

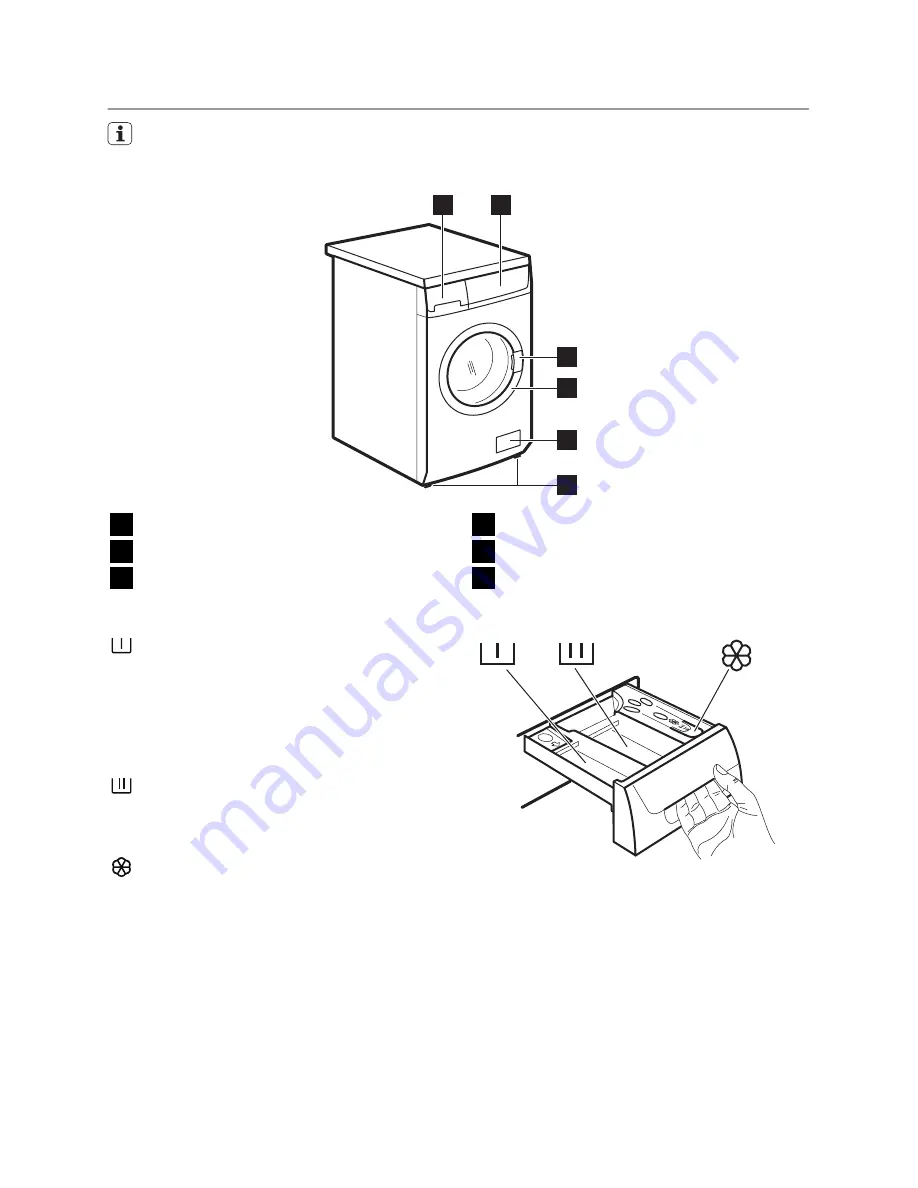
PRODUCT DESCRIPTION
Your new appliance meets all modern requirements for effective treatment of laundry
with low water, energy and detergent consumption. Its new washing system allows to-
tal use of detergent and reduces water consumption so saving energy.
4
5
1
2
3
6
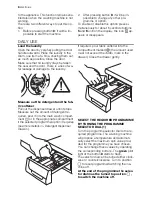
1
Detergent dispenser drawer
2
Control panel
3
Door opening handle
4
Rating Plate
5
Drain pump
6
Adjustable feet
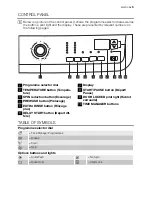
DETERGENT DISPENSER DRAWER
Compartment for detergent used for
prewash and soak phase or for stain re-
mover used during the stain action phase (if
available). The prewash and soak detergent
is added at the beginning of the wash pro-
gramme. The stain remover is added dur-
ing the stain action phase.
Compartment for powder or liquid de-
tergent used for main wash. If using liquid
detergent pour it
just before
starting the
programme.
Compartment for liquid additives (fabric
softener, starch).
Follow the product manufacturer’s recom-
mendations on quantities to use and do not
exceed the
«MAX»
mark in the detergent
dispenser drawer. Any fabric softener or
starching additives must be poured into the
compartment before starting the wash pro-
gramme.
4
electrolux
Summary of Contents for EWF 129442 W
Page 1: ...user manual Washing Machine EWF 129442 W ...
Page 26: ...26 electrolux ...
Page 27: ...electrolux 27 ...


