background image

6

-   +

A
U
T
O

A
U
T
O

-   +

A
U
T
O

A
U
T
O

F

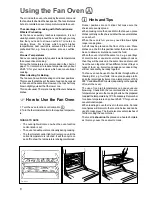
TO SET THE TIMER TO
SWITCH OFF ONLY

This is useful if you want to begin cooking immediately

but have the oven switch off automatically.

1. Set the oven function control knob and the thermostat

control knob on the required settings.

2. Place food in the oven.
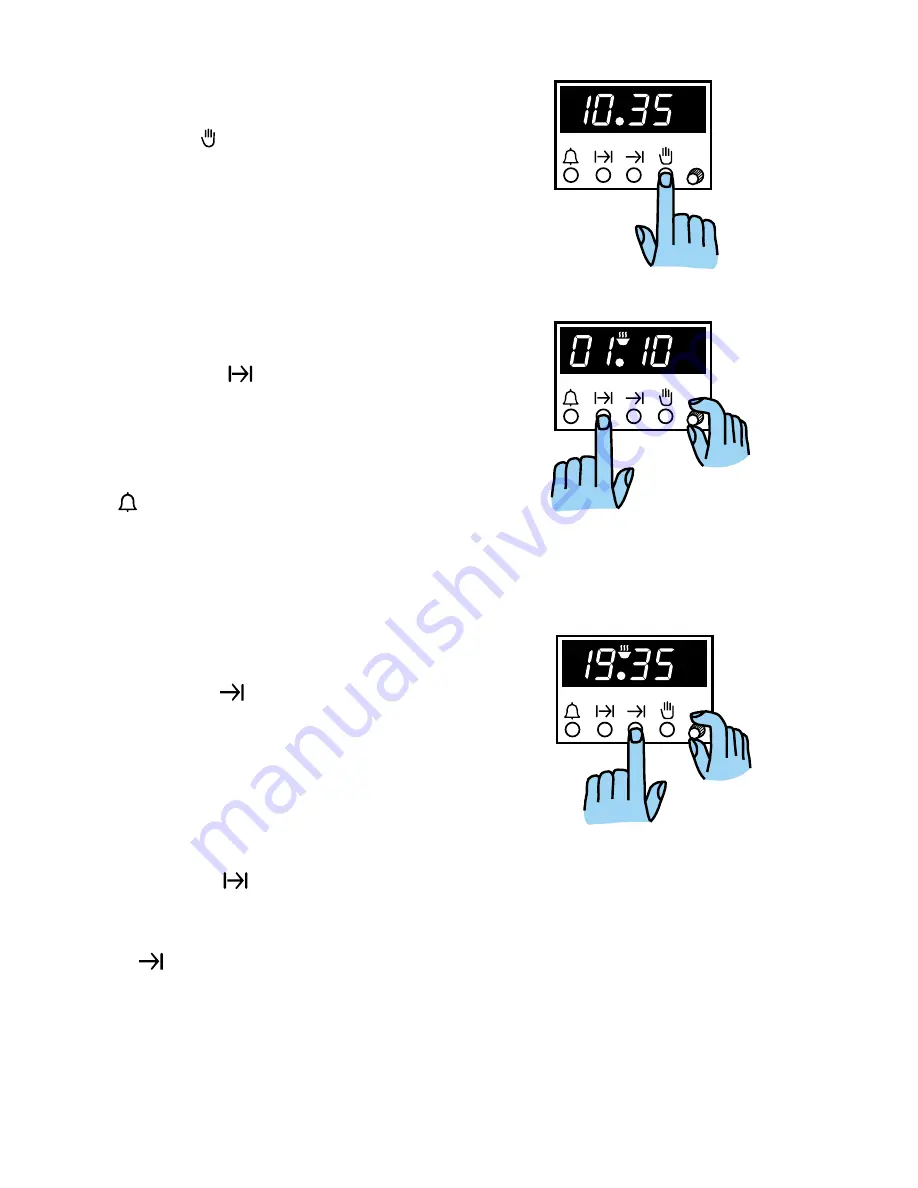
3. Press button  

 and, at the same time, turn the

time setting knob until the required cooking duration

is displayed.

Our diagram shows the timer set for 1 hour 10 minutes.

At the end of the cooking time the oven will switch off, an

alarm will sound. Turn the oven function and thermostat

control knob to zero. To switch off the alarm press button

.

F

TO SET THE TIMER TO SWITCH

THE OVEN ON AND OFF

1. Ensure the clock is showing the right time of day.
2. Carry out steps 1, 2 and 3 as explained in "To set the

timer to switch off only".

3. Press button 

 and at the same time turn the time

setting knob until the end cooking time is displayed.

Our diagram shows the end cooking time set for 7:35

pm.
At the end of the cooking time turn the oven function and

thermostat control knob to zero.

F

TO CANCEL A PROGRAMME

1. Press button 

  and, at the same time, turn the

time setting knob until the cooking duration is set on

"zero".

2. If the end cooking time has been set too, press button

 and at the same time turn the time setting knob

until the end cooking time is set on "zero".

-   +

F

MANUAL FUNCTION

Press button   to set the oven for manual function.

Summary of Contents for Premier EPSOM

Page 1: ...EPSOM GB Electric ovens INSTRUCTION BOOKLET Please read this instruction booklet before using the appliance 35675 0201 ...

Page 2: ...eoven Ensure that all control knobs are in the OFF position when not in use Donotleavecookwarecontainingfoodstuffs e g fator oil in or on the oven in case it is inadvertently switched ON When using other electrical appliances ensure the cable does not come into contact with the hot surfaces oftheoven Maintenance and Cleaning Onlycleanthisoveninaccordancewiththeinstructions Theovenshouldbekeptclean...

Page 3: ...der to ensure the highest safety level and avoid small children to be exposed to the heat when the appliance is operated it is possible to fit a special protection device to the oven door This device can be purchased in our Service Force Centres specifying the relevant code 35791 and the Product No shown on the rating plate Electrical Connection 18 Technical Data 18 Building In 19 Description of t...

Page 4: ... The mains on light will come on when the oven function control knob is set Thermostat Control Light The thermostat control light will come on when the thermostatcontrolknobisturned Thelightwillremainon until the correct temperature is reached It will then cycle on and off to show the temperature is being maintained The Safety Thermostat This oven is provided with a safety thermostat In case of ma...

Page 5: ...time of day is displayed F TO SET THE MINUTE MINDER Press button and at the same time turn the setting time knob until the duration time is displayed maximum 23 hours 59 minutes Our diagram shows the timer set for 35 minutes After a few seconds the time of day will show in the display To check the number of minutes remaining press the button At the end of the timed period an alarm will sound To sw...

Page 6: ...ch off the alarm press button F TO SET THE TIMER TO SWITCH THE OVEN ON AND OFF 1 Ensure the clock is showing the right time of day 2 Carry out steps 1 2 and 3 as explained in To set the timer to switch off only 3 Press button and at the same time turn the time setting knob until the end cooking time is displayed Our diagram shows the end cooking time set for 7 35 pm At the end of the cooking time ...

Page 7: ...may be emitted This is quite normal 1 Set the programmer to manual function 2 Switchtheovenfunctioncontrolknobtofancooking 3 Set the thermostat control knob to MAX 4 Openawindowforventilation 5 Allow the oven to run empty for approximately 45 minutes This procedure should be repeated with the grill function for approximately 5 10 minutes Using the Oven Always cook with the oven door closed Standcl...

Page 8: ...It will then cycle on and off to show the temperature is being maintained FO 0061 Runner positions are not critical but make sure the shelvesareevenlyspread When cooking more than one dish in the fan oven place dishescentrallyontheshelvesratherthanseveraldishes on one shelf When the oven is full you may need to allow slightly longer cooking time A shelf may be placed on the floor of the oven Place...

Page 9: ... chart is intended as a guide only It may be necessary to increase or decrease the temperature to suit your individual requirements Only experience will enable you to determine the correct setting for your personal requirements When roasting ensure the meat is cooked thoroughly use a meat thermometer if preferred to check the centre temperature has reached the required temperature see table below ...

Page 10: ...ly joints of meat and poultry up to 2 kg 4 lb are suitable for defrosting in this way Refer to the following table for approximate defrosting times Chicken 1000 g 100 140 20 30 Place the chicken on an inverted saucer on a large plate Defrost open and turn at half time or defrost coveredwithfoil Removegiblets as soon as possible Meat 1000 g 100 140 20 30 Defrost open and turn at half time or cover ...

Page 11: ...tion to allow for different thicknesses of food and follow the instructions for grilling Grilling Grilling must be carried out with the oven door closed The grill pan handles must be removed from the pan F How to Use the Grill 1 Turn the oven control function knob on 2 Turn the thermostat control knob on the required temperature 3 Adjust the grid and grill pan runner position to allow for differen...

Page 12: ... Time Mins Temp C Time Mins per side Temp C FOOD Grill and Inner Grill Element Thermal Grill Bacon Rashers 210 2 3 200 8 12 Beefburgers 200 6 10 190 10 15 Chicken Joints 170 10 15 160 35 45 Chops Lamb 180 7 10 170 20 25 Pork 180 10 15 170 25 35 Fish Whole Trout Herring 170 8 12 170 10 20 Fillets Plaice Cod 170 4 6 170 10 20 Kebabs 180 10 15 170 20 30 Kidneys Lamb Pig 170 4 6 180 10 15 Liver Lamb P...

Page 13: ...urn the glass cover anticlockwise 3 Remove the faulty bulb and replace with the new one 4 Refit the glass cover and restore the electrical supply FO 0287 Before cleaning always allow the cooling fan to cool the cooker down before switching off at the electricity supply Theovenshouldbekeptcleanatalltimes Abuild up of fats or other foodstuffs could result in a fire especially in the grill pan Cleani...

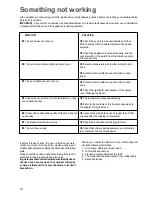
Page 14: ...5 20 minutes after the cooking is completed u Check the instructions for the programmer u Check that shelves and bakeware are not vibrating in contact with the oven back panel If after all these checks the oven still does not work contact your local Service Force Centre quoting your modelandserialnumber whichcanbefoundontherating plate Please note that it will be necessary to provide proof of purc...

Page 15: ...ts may be available outside these hours in which case a premium will be charged Exclusions This guarantee does not cover Damage or calls resulting from transportation improper use or neglect the replacement of any light bulbs or removable parts of glass or plastic Costs incurred for calls to put right an appliance which is improperly installed or calls to appliance outside the United Kingdom Appli...

Page 16: ...an Ridge Road Sheffield S9 1GB NORTH WEST BIRKENHEAD 1 Kelvin Park M11 Dock Road Birkenhead L41 1LT CARLISLE Unit 7 M10 James Street Workshops James Street Carlisle Cumbria CA2 5AH ISLE OF MAN South Quay Ind M64 Estate Douglas Isle of Man IM1 5AT LIVERPOOL Unit 1 M15 Honeys Green Precinct Honeys Green Lane Liverpool L12 9JH MANCHESTER Unit B M09 Central Industrial Estate St Marks Street Bolton BL3...

Page 17: ...eld London EN3 7BB GRAVESEND Unit B4 M57 Imperial Business Estate Gravesend Kent DA11 0DL HARPENDEN Unit 4 M46 Riverside Estate Coldharbour Lane Harpenden AL5 4UN LETCHWORTH 16 17 Woodsite Ind M50 Est Works Road Letchworth Herts SG6 1LA LONDON 2 4 Royal Lane M76 Yiewsley West Drayton Middlesex UB7 8DL MAIDENHEAD Reform Road M60 Maidenhead Berkshire SL6 8BY MOLESEY 10 Island Farm M61 Avenue West Mo...

Page 18: ...nnot at any point reach a temperature of more than 60 C above the ambient temperature Before the oven is connected check that the main fuse and the domestic installation can support the load and that the power supply is properly earthed Themanufacturerdisclaimsanyresponsibilityshould these safety measures not be carried out Connection Min size Cable flex Fuse via Cable flex type 13 A socket 2 5mm2...

Page 19: ... l thematerialsmustwithstandatemperatureincrease of at least 60 C above the ambient temperature l properarrangementsmustbemadeforacontinuous supplyofairtotheoventopreventtheovenoverheating Dimensions of the oven and recess required are given in the relevant diagrams Securing The Oven To The Cabinet 1 Fit the oven into the cabinet recess 2 Opentheovendoor 3 Secure the oven to the kitchen cabinet wi...

Page 20: ...Grafiche MDM Forlì CUSTOMER CARE 55 77 High Street Slough Berkshire SL1 1DZ Tel 08705 950950 Electrolux Household Appliances Limited 2000 ...

Reviews: