background image

Summary of Contents for TGF351SHWB

Page 1: ...ts 5 Setting Surface Controls 6 Setting Warmer Drawer Controls if equipped 7 Before Setting Oven Controls 8 Setting Oven Controls 9 13 Self Cleaning Oven 14 15 General Cleaning 16 19 Changing Cooktop and or Oven Lights 19 Installing Center Grates 20 Customizing Your Oven Performance 21 Avoid Service Checklist 22 23 Warranty 24 GASRANGE This Owner s Guide contains general operating instructions for...

Page 2: ...e Products P O Box 360797 Strongsville OH 44136 This Owner s Guide contains general operating instructions for your range and feature information for several models Your range may not have all the described features The graphics shown are representational The graphics on your range may not look exactly like those shown Note The instructions appearing in this Owner s Guide are not meant to cover ev...

Page 3: ...t in serious injuries and also cause damage to the range Do not allow children to climb or play around the range The weight of a child on an open door may cause the range to tip resulting in serious burns or other injury _IWJV _ 4_II_ I Do not use the oven or warmer drawer for storage Do not store items of interest to children in the cabinets above a range or on the backguard of a range Children c...

Page 4: ... Keep Oven Vent Ducts Unobstructed The oven vent is located below the backguard Touching the surfaces in this area when the oven is operating may cause severe burns Also do not place plastic or heat sensitive items on or near the oven vent These items could melt or ignite Placement of Oven Racks Always place oven racks in desired location while oven is cool If rack must be moved while oven is hot ...

Page 5: ... flame beyond the outer edge of the utensil A higher flame simply wastes heat and energy and increases your risk of being burned by the flame WRONG For most cooking start on the highest control setting and then turn to a lower one to complete the process Use the chart below as a guide for determining proper flame size for various types of cooking The size and type of utensil used and the amount of...

Page 6: ...ch time a control knob is turned to the LITE position To operate the surface burner 1 Place cooking utensil on burner 2 Push the Surface Control knob in and turn counterclockwise out of the OFF position 3 Release the knob and rotate to the LITE position Note All four electronic ignitors will click at the same time However only the burner you are turning on will ignite 3 Visually check that the bur...

Page 7: ...ain quality Do not use plastic wrap to cover food Plastic may melt onto the drawer and be very difficult to clean Use only dishware utensils and cookware recommended for oven use in the warmer drawer lyi_ _ll2_l_ Always use potholders or oven mitts when removing food from the warmer drawer as cookware and plates will be hot To Set the Warmer Drawer Thermostat Control The thermostat control is used...

Page 8: ... oven mitts when using the oven REMOVING REPLACING OVEN RACKS To remove pull the rack forward until it stops Lift up front of rack and slide out To replace fit the rack onto the guides on the oven walls Tilt the front of the rack upward and slide the rack back into place ARRANGING OVEN RACKS WITH 5 RACK POSITIONS To bake on I rack place the rack on position 3 or 4 To bake on 2 racks place the rack...

Page 9: ...AD Push to activate oven after oven functions are set START INDICATOR LIGHT Flashes as a reminder to push the START pad to activate the oven CLOCK PAD Used to set the_ time of day clock BAKE TIME PAD Used to ente_ the length of the baking time FEATURE INDICATOR LIGHTS These light to show which feature is in use TEMPERATURE CONTROL KNOB Operates the Variable Broil Bake or Self Clean Cycle modes whe...

Page 10: ... to increase the time in one minute increments Push and hold _ _ to increase the time in I 0 minute increments The timer can be set for any amount of time from 1 minute to 11 hours and 59 minutes Note if you push_ first the timer will advance to 11 hours and 59 minutes 3 The display shows the timer count down in minutes until one minute remains Then the display will count down in seconds 4 When th...

Page 11: ...ure Control Knob to the desired baking temperature 2 Push _ _ If_ is not pushed the control will beep reminder asa 3 The oven will begin heating to the selected temperature When the temperature reaches the desired baking temperature the control will beep 3 times 4 To cancel the baking function turn Temperature Control Knob to OFF To Change the Oven Temperature after Baking has Started Turn Tempera...

Page 12: ...rs in the display 6 Push _ If f_ is not pushed the control will beep as a reminder For a Delayed Start Time and Automatic Shut Off 1 Be sure that the clock shows the correct time of day 2 Place the food in the oven 3 Turn Temperature Control Knob to the desired baking temperature 4 Push _ 0 00 will flash in the display 5 Push _ _ or_ until the desired amount of baking time appears in the display 6...

Page 13: ...fat could ignite 3 Place the pan on the oven rack Close the oven door when broiling 4 Turn Temperature Control Knob to the desired broil setting The broiling temperature can be set at 2 different levels High Broil HI or Low Broil LO Most foods can be broiled at the HI broil setting Select the LO broil setting to avoid excess browning or drying of foods that should be cooked to the well done stage ...

Page 14: ... around any part of the self cleaning oven DO NOT clean the oven door gasket The woven material of the oven door gasket isessential for a good seal Care should be taken not to rub damage or remove the gasket DO NOT use any cleaning materials on the oven door gasket Doing so could cause damage 2 Remove the broiler pan and insert all utensils and any aluminum foil These items cannot withstand high c...

Page 15: ...for light soils and a 3 hour cycle for average to heavy soils to assure satisfactory results 1 Be sure the oven door is closed 2 Turn Temperature Control Knob to CLEAN 3 Push E f_ 3 00 will appear in the display The oven will automatically program a 3 hour clean cycle 4 If you want a 2 hour clean cycle press _ 2 00 will appear in the display 5 If the door is left open the LOCK indicator light will...

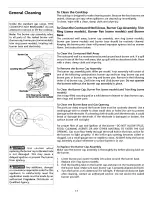
Page 16: ...grates broiler pan and insert in the dishwasher and dry upon removal If soils are not removed follow the cooktop cleaning instructions below Gentle scouring with a soapy scouring pad will remove most spots Rinse with a I I solution of clean water and ammonia If necessary cover difficult spots with an am m onia soaked paper towel for 30 to 40 minutes Rinse with clean water and a dam p cloth then sc...

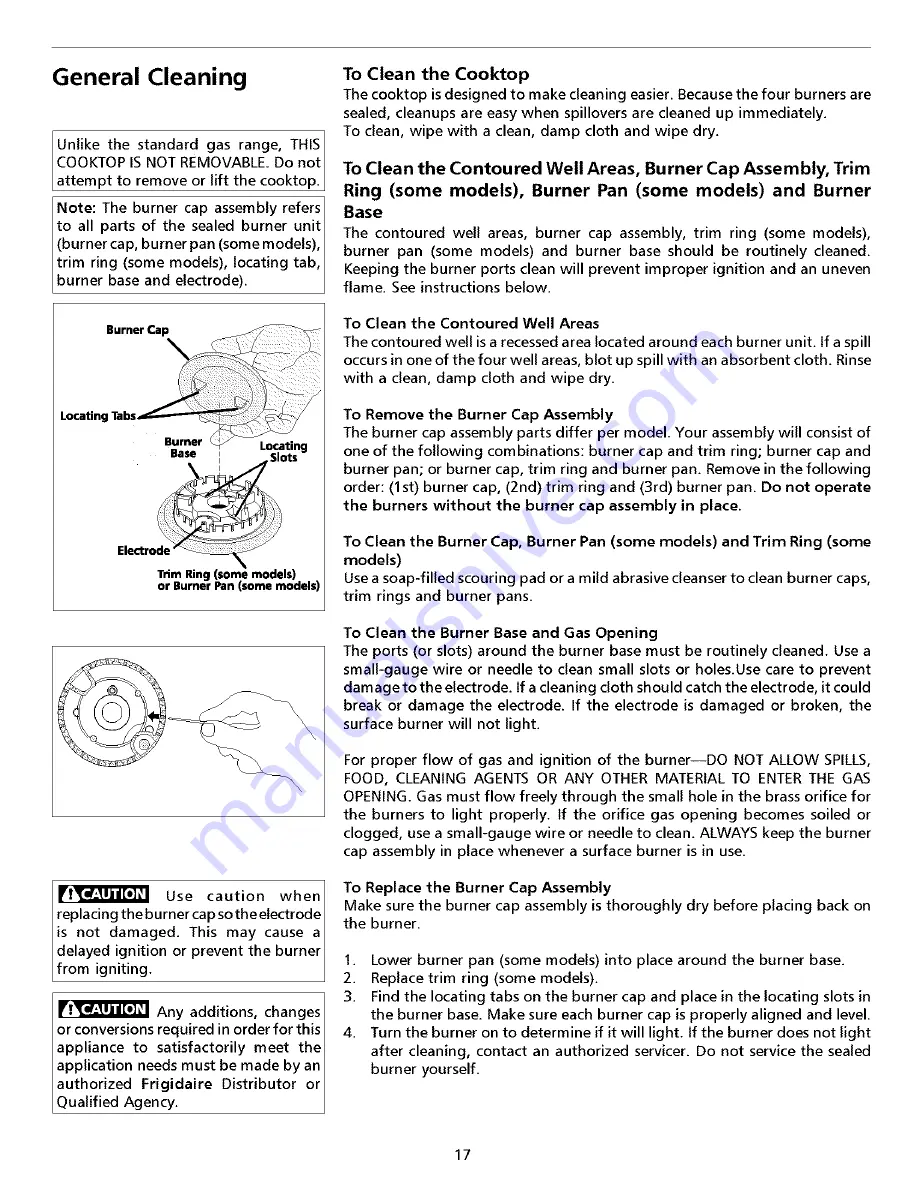
Page 17: ... assembly will consist of one of the following combinations burner cap and trim ring burner cap and burner pan or burner cap trim ring and burner pan Remove in the following order 1st burner cap 2nd trim ring and 3rd burner pan Do not operate the burners without the burner cap assembly in place To Clean the Burner Cap Burner Pan some models and Trim Ring some models Use a soap filled scouring pad ...

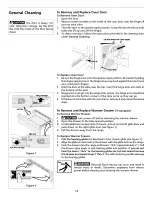
Page 18: ...ed into the bottom corners of the door as far as they can go 4 If the door is not in linewith the oven frame remove it and repeat theabove steps To Remove and Replace Warmer Drawer if equipped To Remove Warmer Drawer 1 Ir_llj_r_ Turn power off before removing the warmer drawer 2 Open the drawer to the fully opened position 3 Locate glide lever on each side of drawer pull up on the left glide lever...

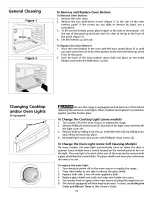
Page 19: ...Change the Cooktop Light some models 1 Turn power off at the main source or unplug the range 2 Remove Phillips Head screws 2 that secure the light cover and then lift the light cover off 3 Remove bulb by rolling back and up Install the new bulb by sliding down and rolling forward into place 4 Re install light cover and secure with Phillips Head screws 2 To Change the Oven Light some Self Cleaning ...

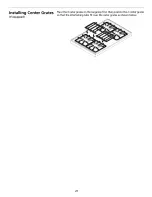
Page 20: ...Installing Center Grates Place the 4 outer grates on the rangetop first then position the 2 center grates so that the interlocking tabs fit over the outer grates as shown below if equipped 20 ...

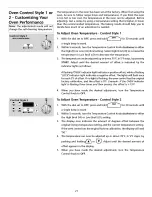
Page 21: ...ted by the indicator lights as follows A flashing OVEN indicator light indicates a positive offset while a flashing LOCK indicator light indicates a negative offset The lights will flash once for each 5 F of offset If no light is flashing the oven control has the original factory calibration and the offset is O F Example If the OVEN indicator light is flashing three times and then pauses the offse...

Page 22: ... ports See Surface Burners in the cleaning chart under General Cleaning for additional cleaning instructions Range power cord is disconnected from outlet Electric Ignition Models only Be sure cord is securely plugged into the outlet Electrical power outage electric ignition models only Burners can be lit manually See Setting Surface Controls in this Owner s Guide Burner ports are clogged With the ...

Page 23: ...th a contact an authorized servicer display F1 or F3 will show Poor baking results Many factors affect baking results Make sure the proper rack position is used Center food in the oven and space pans to allow air to circulate Allow the oven to preheat to the set temperature before placing food in the oven Try adjusting the recipe s recommended temperature or baking time If you feel the oven is too...

Page 24: ...xpenses for making the appliance accessible for servicing such as removal of trim cupboards shelves etc which are not a part of the appliance when it was shipped from the factory 5 Damages to finish after installation 6 Replacement of light bulbs and or fluorescent tubes on models with these features This warranty does not cover the following 1 CONSEQUENTIAL OR _NCIDENTAL DAMAGES SUCH AS PROPERTY ...

Reviews: