background image

Summary of Contents for WRS23MF5ASX

Page 1: ...cal service technician for you Order Genuine Electrolux Parts Accessories Purchase Extended Warranty Protection TABLE OF CONTENTS importantSafety instructions 2 Installation 3 Connecting Water Supply 4 Door Removal instructions 5 IVlechanical TemperatureControls 6 Electronic TemperatureControls 7 Automaticice Water Dispenser 9 N0rmal Operating Sounds Sights 14 Care and Cleaning 15 Major Appliance ...

Page 2: ... a qualified service technician _ WARNING __ i_ _i i_ _ _ii_ iii i_ _ii_ _i_ _i _ii i_ _i_i_i_ i_ __iiii_ I i_ _ _i_i _ _i__i i _i_i _ ii_i_i_i i These Guidelines Must Be Followed To EnsureThat Safety Mechanisms in This Refrigerator Will Operate Properly ELECTRICAL INFORMATION The refrigerator must be plugged into its own dedicated 115 Volt 60 Hz 15 Amp AC only electrical outlet The power cord of ...

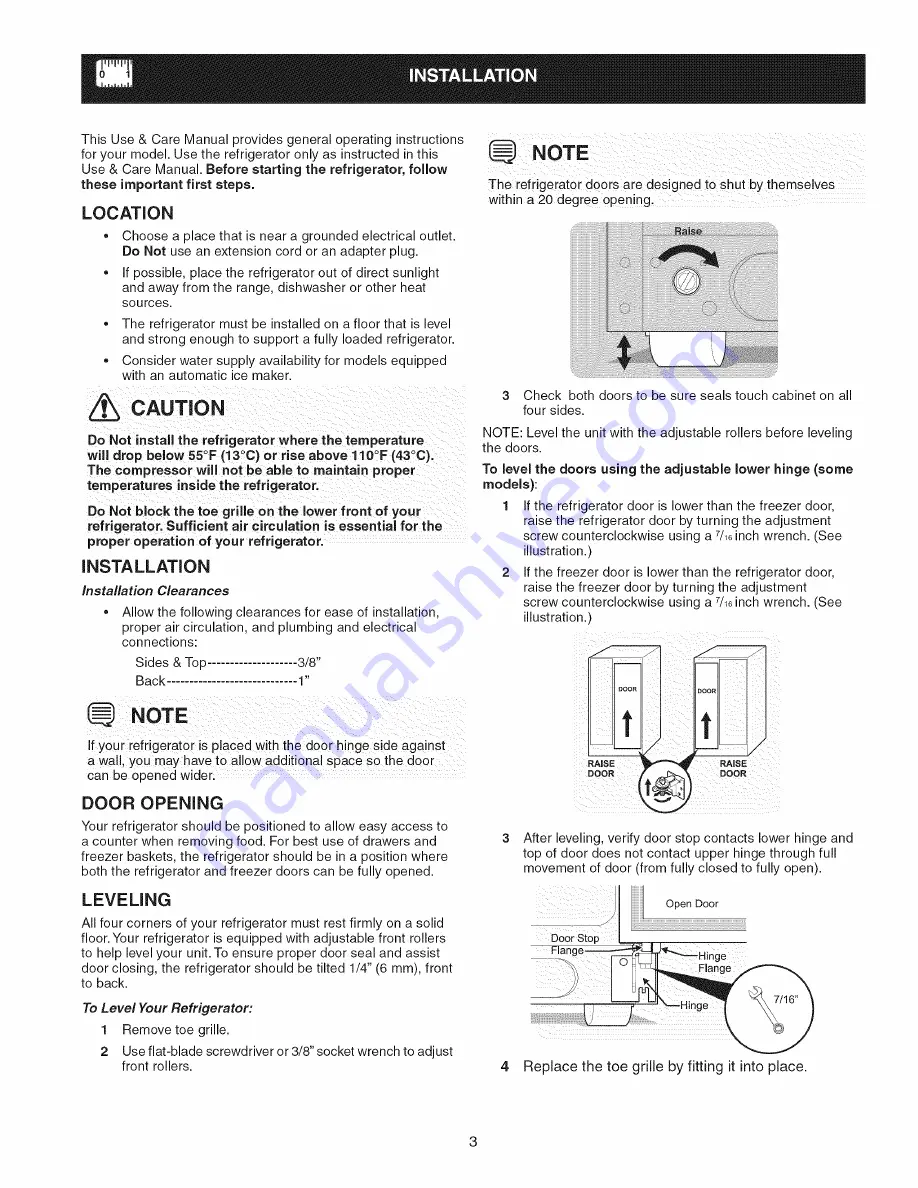
Page 3: ...ioned to allow easy access to a counter when removing food For best use of drawers and freezer baskets the refrigerator should be in a position where both the refrigerator and freezer doors can be fully opened LEVELING All four corners of your refrigerator must rest firmly on a solid floor Your refrigerator is equipped with adjustable front rollers to help level your unit To ensure proper door sea...

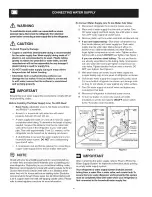
Page 4: ...rate or wear against any other surface 7 Turn ON water supply at shutoff valve and tighten any connections that leak 8 Reconnect refrigerator to electrical power source 9 To turn ice maker on lower wire signal arm side mounted or set the ice maker s ON OFF power switch to the r position rear mounted BasicTools adjustable wrench flat blade screwdriver and Phillips TM screwdriver Access to a househo...

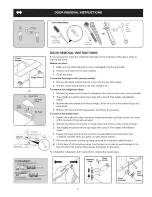
Page 5: ...ve the two screws from the top hinge Lift the door off of the bottom hinge and set it aside 4 Remove the three bottom hinge screws and hinge if necessary To remove the freezer door 1 Detach the multi wire cable connector located above the top hinge Grasp both sides of the connector firmly and pull apart 2 Remove top hinge cover screw on freezer door and remove cover some models 3 Trace lightly aro...

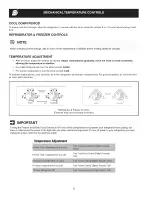
Page 6: ... temperatures a fan circulates air in the refrigerator and freezer compartments For good circulation do not block cold air vents with food items Factory Setting Factory Setting _rJj_ tr _ t_ Freezer co T_o Fresh Food FREEZEI_ F_ E_ I F_OD Refrigerator Freezer Controls Features may vary according to model TurnJ the Freezer nd Fresh rig a Food Controls to 0 turns off the compressor and prevents your...

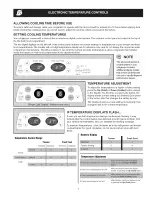
Page 7: ...vice professionals can use to rapidly diagnose performance issues TEMPERATURE ADJUSTMENT To adjust the temperature to a higher or lower setting press the Up Cold or Down Colder button closest to the display The first time you press the button the display shows current setting you entered Each press of the button after that changes the setting by one The display shows your new setting momentarily t...

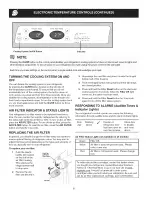
Page 8: ...s time period depending on the types and amounts of food you typically store in your refrigerator To replace your air filter 1 Push the plastic bubble tab located on the side of the air filter housing This releases the hinged bottom half to drop open 2 Remove the old filter and discard it 3 Unpackage the new filter and place it inside the hinged bottom half of the housing 4 Push the hinged bottom ...

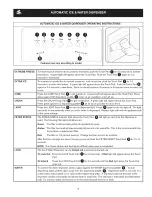
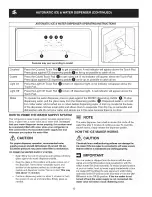
Page 9: ... and or water is dispensed Replace light bulb with an appliance bulb of the same wattage The FILTER STATUS indicator light above the Touch Pad O will light up each time the dispenser is used The following filter light indications are Green The filter is still operating within its specified life cycle Amber The filter has reached approximately 80 percent of its useful life This is the recommended t...

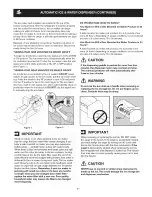
Page 10: ...igerator is first connected to the household water supply line and whenever you replace the water filter CAUTION For proper dispenser operation recommended water supply pressure should fall between 30 psi and 100 psi Excessive pressure may cause water filter to malfunction TO PRIME THE WATER SUPPLY SYSTEM Begin filling the tank by pressing and qolding a drinking glass against the water dispenser p...

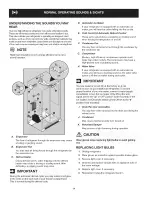
Page 11: ...oduced at a rate of 8 cubes every 75 to 90 minutes CAUTION thed spens ng paddle pushed f0rmore thanour minutes the dispenser motor may overload and stop The overloa d protector will reset automatically afte r three or four minutes WARN NG ii _ I_ iii i i ii i ii iii ii i il i i ii ii ii i ii Don0t use the ice chute as a handle when removing 0r replacing the ice storage bin Do not put fingers up ic...

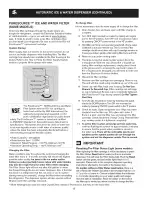
Page 12: ...sition 3 Hold filter cup firmly and unscrew towards left Some water could leak out as you remove cup This is normal Filter cartridge should come down with cup If cartridge remains in housing pull down gently while twisting filter back and forth 4 Rinse out cup under running water 5 The large o ring that seals the filter system fits in the o ring groove inside the cup Should the o ring fall out dur...

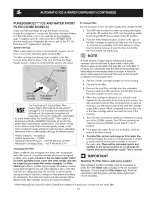
Page 13: ...water supply off to change the filter 1 Turn OFF side mounted ice maker by raising wire signal arm to the UP position Turn OFF rear mounted ice maker by pressing ON OFF power switch to the O position 2 Push the Filter Release Button located to the right of the filter cartridge to release the filter from the housing To minimize the possibility of the filter falling out of the housing during removal...

Page 14: ...n at the factory s0 itca n work as so0n as y0u instal your refrigerat0r To ensure p roper funct 0 n of yOUr ice make r connect a water su pply immediately Or turn the Ice maker off by lifting the wire signal arm to the up 0r OFF position side mounted or the ice maker s On Off power Switch turued off set tO the o p0sition rear mounted i L Drain Pan not removable You may hear water running into the ...

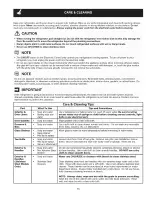
Page 15: ...d result in water leaks when the refrigerator is put back into service Contact a service representative to perform this operation Care Cleaning Tips m I Part What To Use Tips and Precautions Interior Soap and water Use 2 tablespoons of baking soda in 1 quart of warm water Be sure to wring Door Liners Baking soda and excess water out of sponge or cloth before cleaning around controls light water bu...

Page 16: ...d service companies or external causes such as abuse misuse inadequate power supply accidents fires or acts of God DISCLAIMER OF IMPLIED WARRANTIES LIMITATION OF REMEDIES CUSTOMER S SOLE AND EXCLUSIVE REMEDY UNDER THIS LIMITED WARRANTY SHALL BE PRODUCT REPAIR OR REPLACEMENT AS PROVIDED HEREIN CLAIMS BASED ON IMPLIED WARRANTIES INCLUDING WARRANTIES OF MERCHANTABILITY OR FITNESS FOR A PARTICULAR PUR...

Page 17: ...ay be clogged Re place f ter cartridge o Set freezer control to colder seLLing Allow 24 hours temperature to stabilize ICE DISPENSER DiSpenser will not dis storage Container is empty pease ice Freezer temperature is set too ice dispensingarm has beenheid infor more than 4 5 minutes Ice dispenser is jammed Ice has melted and frozen around auger due to infrequent use temperature fluctuations and or ...

Page 18: ... or number codes flashing on the lem digital displays WATER DISPENSER Dispenser will not dis Household water line valve is pense water not open Ice and water filter cartridge is clogged Filter not fully installed Water has an odd taste Water has been in the tank andlor odor period of time o Unit not properly connected to cold water line Water pressure is ex Cut off and cut on pressures tremely low...

Page 19: ...or Bin Door Bin ice Container Pizza Shelf Wire Shelf Small items Door Bin Wire Shelf Door Bin Small Basket Large Basket Door Bin Large Basket Door Bin i 71 GIG_ffG_ffG_lGf 7 Freezer and Refrigerator SpiliSafe _o Controls Sliding Shelf Ice Cream Shelf Ice Maker _ i _ Water Filter Toe Grille Mechanical Controls Dairy Doer Door Bin Wine Rack Door Bin Meat Keeper and Cover SpilISafe _ Fixed Shelf Door...

Reviews: