


2
To reduce the risk of fi re, electric shock, or injury:
•
Do not use outdoors or on wet surfaces.
•
Do not leave vacuum cleaner when plugged in.
Turn off
the switch and unplug the electrical cord when not in use
and before servicing.
•
Do not allow to be used as a toy. Close attention is
necessary when used by or near children.
•
Use only as described in this manual. Use only manufacturer’s
recommended attachments.
•
Do not use with damaged cord or plug. If vacuum cleaner
is not working as it should, has been dropped, damaged,
left outdoors, or dropped into water, return it to a service
center before using.
•
Do not pull or carry by cord, use cord as a handle, close
door on cord, or pull cord around sharp edges or corners.
Do not run vacuum cleaner over cord. Keep cord away from
heated surfaces.
•
Do not use extension cords or outlets with inadequate
current carrying capacity.
•
Turn off all controls before unplugging.
•
Do not unplug by pulling on cord. To unplug, grasp the plug,
not the cord.
•
Do not handle plug or vacuum cleaner with wet hands.
•
Do not put any object into openings. Do not use with any
opening blocked; keep free of dust, lint, hair, and anything
that may reduce airfl ow.
•
This vacuum cleaner creates suction and contains a
revolving brush roll. Keep hair, loose clothing, fi ngers, and
all parts of body away from openings and moving parts.
•
Do not place cleaner on furniture or stairs as the brush roll
may cause damage. Place cleaner on fl oor with the handle
in storage position while using attachments.
•
Do not pick up anything that is burning or smoking, such
as cigarettes, matches, or hot ashes.
•
Do not use without dust bag in place.
•
Belt pulleys can become hot during normal use. To prevent
burns, avoid touching the belt pulley when servicing the
drive belt.
•
Use extra care when cleaning on stairs.
•
Do not use to pick up fl ammable or combustible liquids such
as gasoline, or use in areas where they may be present.
•
Store your cleaner indoors in a cool, dry area.
•
Keep your work area well lighted.
•
Unplug electrical appliances before vacuuming them.
IMPORTANT SAFEGUARDS
When using an electrical appliance, basic precautions should always be followed, including the following:
READ ALL INSTRUCTIONS BEFORE USING THIS VACUUM CLEANER.
WARNING
SAVE THESE INSTRUCTIONS
BEFORE YOU START
CHECK THE VOLTAGE
First check the voltage shown on the data plate (see rear view)
to make sure that the cleaner is of the correct voltage for your
electricity supply. If it is not, do not use the cleaner but refer back
to your dealer.
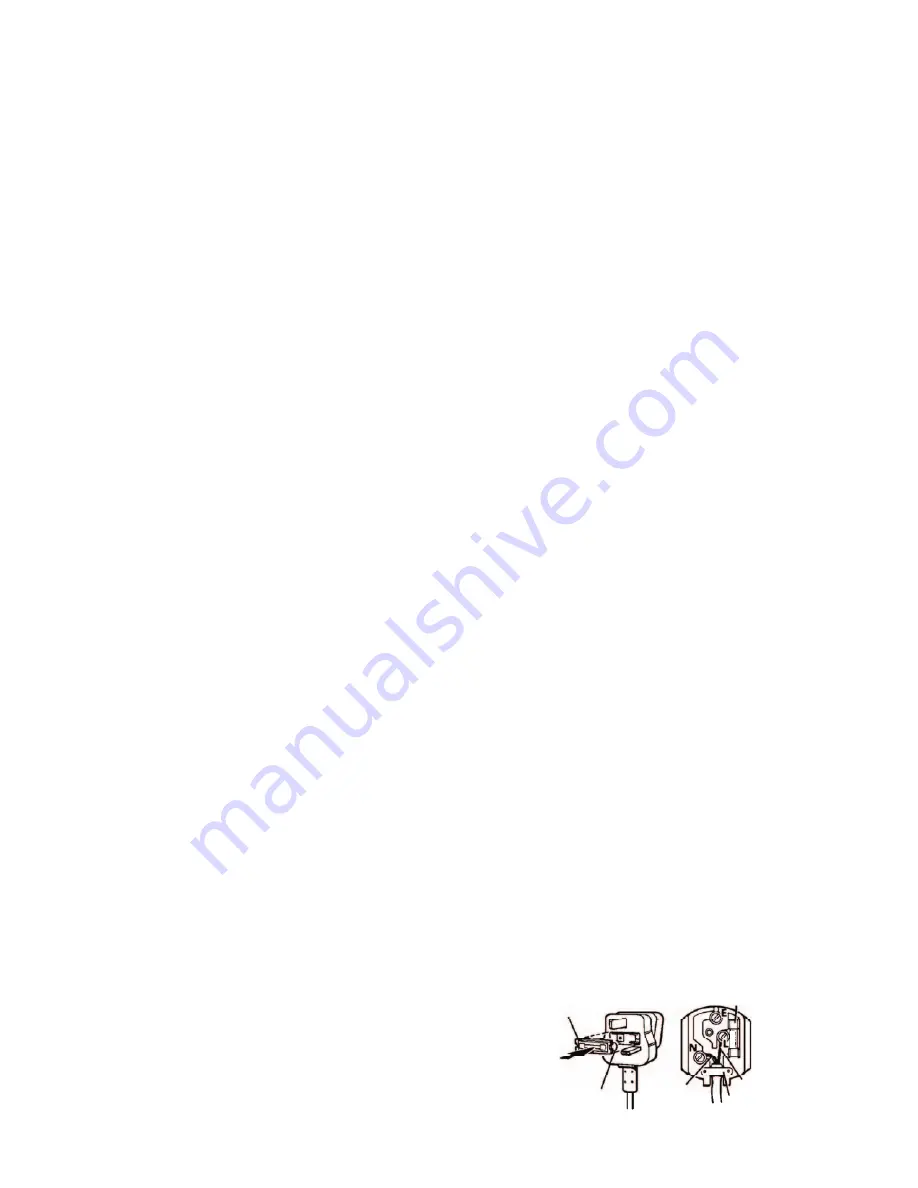
CONNECTING TO YOUR ELECTRICITY SUPPLY
Permanently connected to the cleaner is a mains supply (2-core)
cable fi tted with a non-rewirable plug incorporating a 13A fuse.
In the event of the fuse requiring replacement the fuse cover should
be removed using a small screwdriver. The old fuse
MUST
be replaced
by a 13A ASTA approved BS1362 fuse or a BSI approved fuse. The
cover must be replaced before the plug is used again. In the event
of loss of the fuse cover, replacements can be obtained from your
Electrolux Retailers and must be of the same colour as indicated by
the coloured insert on the base of the plug.
If diffi culty is experienced in obtaining a replacement, contact Electrolux
on 08706 055055.
In no circumstances must the plug be used without a correct
fuse cover fi tted.
If the plug that is fi tted to your appliance is not suitable for your socket
outlet, it must be cut off and the appropriate plug fi tted.
Remove the fuse from the cut off plug.
The cut off plug should then be disposed of to prevent the hazard of
shocks in case it should be plugged into a 13 amp socket in another
part of your home.
The wires in the mains cable of this appliance are coloured in
accordance with the following code:
Blue: Neutral. Brown:
Live.
As the colours of the wires in the mains cable of this appliance may
not correspond with the coloured markings identifying the terminals
in your plug, proceed as follows:
The wire which is coloured blue must be connected to the terminal
which is marked with the letter N or coloured black.
The wire which is coloured brown must be connected to the terminal
which is marked with the letter L or coloured red.
If using a three-pin plug, do not make any connection to the terminal
marked with the letter E or by the earth symbol or coloured green
or green-and-yellow. This cleaner is double insulated and no earth
connection is necessary.
It is in your interest to ensure that the plug is correctly attached
to the mains cable. In case of doubt, have it done by a qualifi ed
electrician, as Electrolux cannot regard the repair of faults on the
plug connection as a service that can be given free of charge under
the terms of the guarantee.
Fuse Cover
Fuse
Cord Clamp
13 Amp Fuse
Blue
Brown


