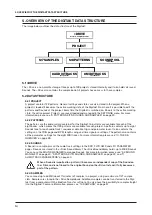
3. PANEL LAYOUT AND CONNECTORS
12
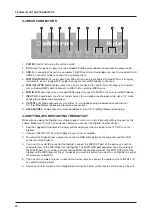
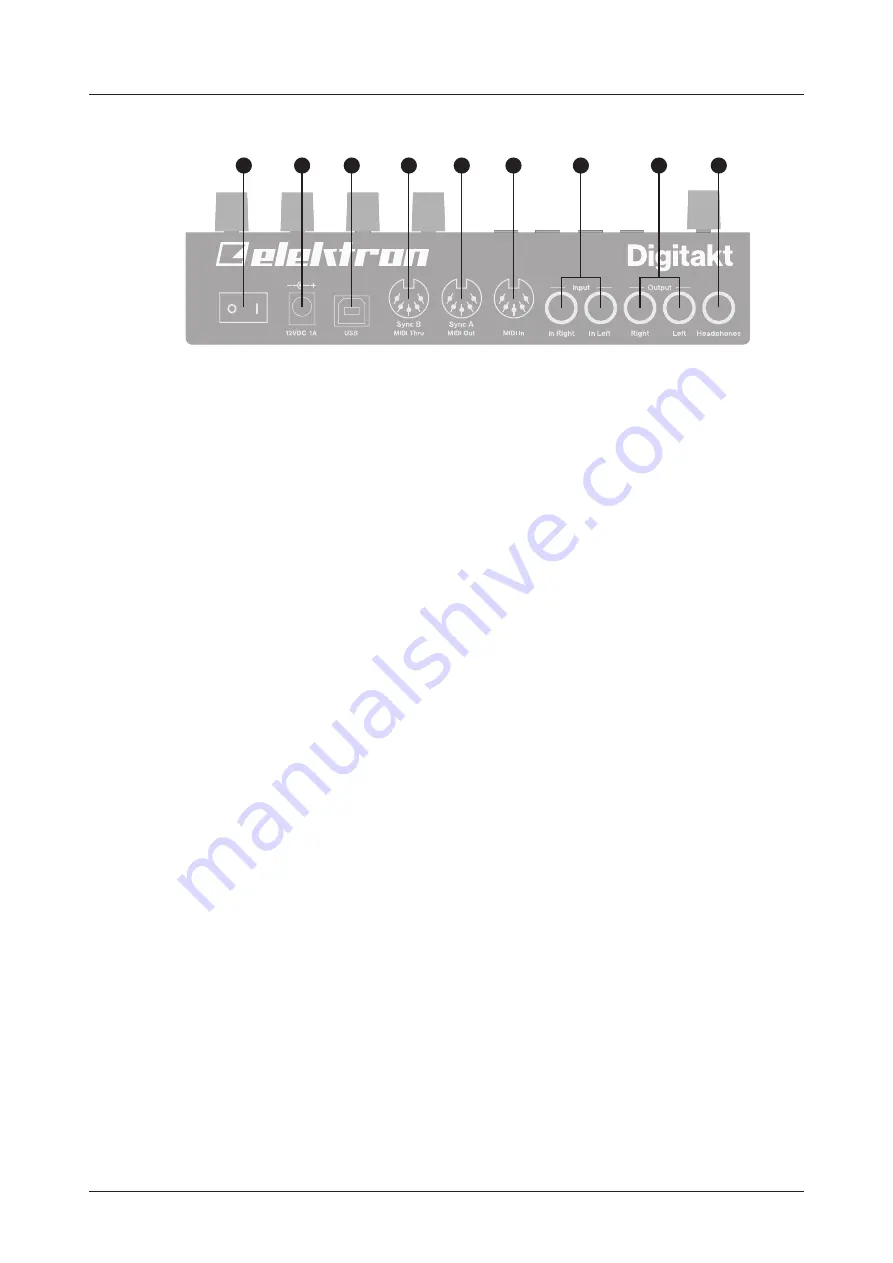
3.2 REAR CONNECTORS
1
2
3
4
5
6
8
7
9
1.
POWER,
Switch for turning the unit on and off.
2.
DC In,
Input for power supply. Use the included PSU-3b power adapter, connected to a power outlet.
3.
USB,
For connecting the unit to a computer. For MIDI-control or Overbridge use. Use the included A to B
USB 2.0 connector cable to connect to a computer host.
4.
MIDI THRU/SYNC B,
Forwards data from MIDI IN. Can also be configured to send DIN sync to legacy
instruments. Use a standard MIDI cable to connect another MIDI device in the chain.
5.
MIDI OUT/SYNC A,
MIDI data output. Can also be configured to send DIN sync to legacy instruments.
Use a standard MIDI cable to connect to MIDI In of an external MIDI device.
6.
MIDI IN,
MIDI data input. Use a standard MIDI cable to connect to MIDI Out of an external MIDI device.
7.
INPUT L/R,
Audio inputs used for external sources for sampling or audio processing. Use a 1/4” mono
phone plug (unbalanced connection).
8.
OUTPUT L/R,
Main audio outputs. Use either 1/4” mono phone plug (unbalanced connection) or
1/4” (Tip/Ring/Sleeve) phone plug (balanced connection).
9.
HEADPHONES,
Audio output for stereo headphones. Use 1/4” (Tip/Ring/Sleeve) phone plug.
3.3 SETTING UP AND STARTING THE DIGITAKT
Make sure you place the Digitakt on a stable support, such as a sturdy table, with sufficient space for the
cables. Make sure to switch off all devices before you connect the Digitakt to other devices.
1. Plug the supplied DC adapter to a power outlet and connect the small plug to the 12 V DC In on the
Digitakt.
2. Connect OUTPUT L/R from the Digitakt to your mixer or amplifier.
3. To control the Digitakt from a computer, connect a USB cable between the computer and the USB
connector of the Digitakt.
4. If you want to use MIDI to control the Digitakt, connect the MIDI OUT port of the device you wish to
send data from to the MIDI IN port of the Digitakt. The MIDI THRU port duplicates the data arriving at
the MIDI IN port, so it can be used for chaining MIDI units together. Connect the MIDI OUT port of the
Digitakt to the MIDI IN port of the of the device you want to control if you want to use Digitakt to control
other devices using MIDI.
5. If you want to sample or process audio from external sources, connect the audio source to INPUT L/R
or via USB (sampling only).
6. Switch on all units. Switch on the Digitakt by pressing the Power switch located at the back of the unit.
Summary of Contents for Digitakt
Page 1: ...Digitakt User Manual...
Page 84: ...4116ENG O...


