6
automatically exits this function, at any time, and returns to
the previous state.
Press and hold the
B+C
keys (Simultaneously) to enter the
setup menu:
Briefly press button
C
to select the filter to be set up:
Grease filter:
Green
Charcoal filter:
Red
Briefly press button
B
to activate (the 2nd LED flashing) or
deactivate (2nd LED off).
Note:
the LEDs light up for a limited number of seconds after
which they turn off to indicate that the indicator light has been
activated (or deactivated).
User Servicing and Maintenance Instructions
Cleaning
Clean using
ONLY
a cloth dampened with neutral liquid detergent.
DO NOT CLEAN WITH TOOLS OR INSTRUMENTS
. Do not use
abrasive products.
DO NOT USE ALCOHOL!
Panel
Fig. 3-17
The panel for perimeter suction should always be left closed and
should only be opened in case of maintenance interventions (eg
cleaning or replacing filters).
Grease filter
Fig. 3-17
Traps cooking grease particles.
This must be cleaned once a month (or when the filter saturation
indication system
–
if envisaged on the model in possession
–
indicates this necessity) using non aggressive detergents, either
by hand or in the dishwasher, which must be set to a low
temperature and a short cycle.
When washed in a dishwasher, the grease filter may discolor
slightly, but this does not affect its filtering capacity.
To remove the grease filter, pull the spring release handle.
Replacing lamps
2x14 W LED
The hood is equipped with a lighting system based on LED
technology.
The LEDs guarantee an optimum lighting, a duration up to 10
times longer than the traditional lamps and allow to save 90%
electrical energy.
For replacement, contact the technical service.
Summary of Contents for EHL640SS
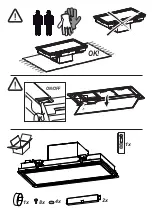
Page 20: ...1x 2x 4x 8x 1x OK ON OFF ...
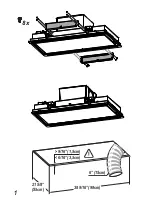
Page 21: ...1 9 16 1 5cm 6 16 3 5cm 38 9 16 98cm 6 15cm 21 5 8 55cm 8x ...
Page 22: ...3 2 1 2 3 x3 ...
Page 23: ...90 180 4 ...
Page 24: ...5 90 180 ...
Page 25: ...6 1 2 3 4 6 7 8 5 90 180 ...
Page 26: ...7 90 180 ...
Page 27: ...8 1 2 3 4 6 7 8 5 x 8 90 180 ...
Page 28: ...9 90 180 ...
Page 29: ...10 1 2 ...
Page 30: ...11 1 2 ...
Page 31: ...12 90 180 ...
Page 35: ...18 17 16 1 2 3 x3 ...
Page 36: ...19 Clack Ok Clack Starting Collar ...
Page 37: ...20 Ok A B C D A B C D A B C D A B C D A B C D A B C D A A B C D C B D 0 197 E5 ...
Page 38: ......
Page 39: ......
Page 40: ...LIB0156855 Ed 12 19 ...


