1
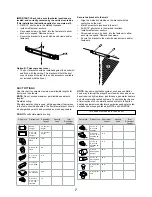
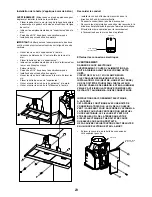
Metal grease filter maintenance
The metal filter traps grease released by foods on the cook
-
top. The filter must always be installed when the hood is
operating / used.
To remove:
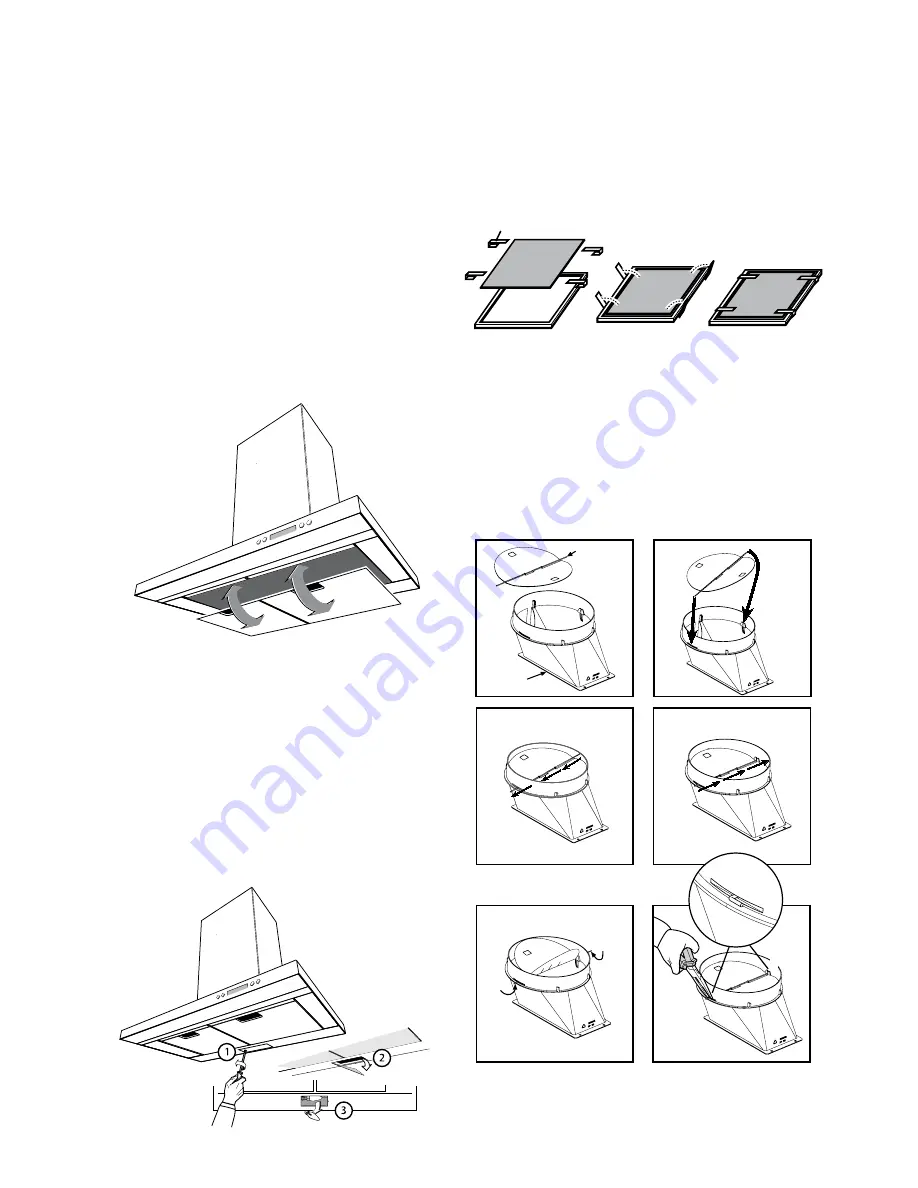
Push the filter lock / pivot in direction to the center of the
filter.
Once the pivot is pushed pull down the filter slowly.
To replace:
Insert the filter tabs into the slots
Push the filter lock / pivot in direction to the center of the
filter.
Once the pivot is pushed, raise the filter slowly until the
top and release the pivot.
To clean:
Swish the filter in hot soapy water and rinse in clean
water or wash it in the dish washer.
Do not use abrasive cleaners.
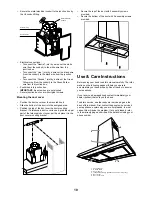
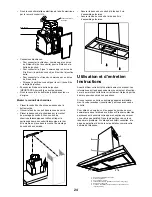
Hood maintenance
Clean with a damp, soapy cloth and dry with a clean cloth.
A glass cleaner may also be used.
ATTENTION: Do not wet the control panel.
Do not use a steel wool pad; it will scratch the surface.
To clean the stainless steel surface, use warm sudsy
water, stainless steel cleaner or polish. Always wipe
the surface in the direction of the grain. Follow the cleaner
instructions for cleaning the stainless steel surface.
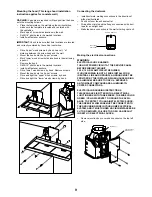
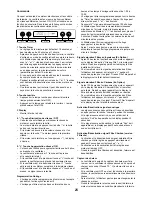
Lamp bulb maintenance
Use a Phillips # 2 screw driver to remove the lamp cover.
Remove it carefully from its housing.
Remove the damaged lamp bulb (turn counter clockwise)
and replace it with a new bulb. E12 Philips Lamp 120V,
40W.
•
•
•
•
•
•
•
•
•
•
•
•
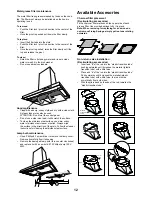
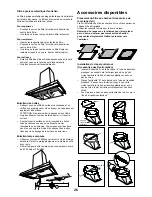
Available Accesories
Charcoal filter placement
(Recirculating accessories)
Fit the charcoal filter mattress on the upper side of each
grease filter. Use provided springs to fix it in place.
Note: When removing for replacing for a new one do
not remove Fixing Springs, simply pull out one rotating
outwards.
Non-return valve installation
(Recirculating accessories)
Insert end “a” of the rod into the “plastic transition tube”,
pushing outwards until it crosses the material (plastic
transition tube) with a little force.
Place end “b” of the rod into the “plastic transition tube”.
Push outwards until it crosses the material (plastic
transition tube) with a little force, the rod must be
symetrically from both sides.
With the pliers bend both ends of the rod, towards the
“plastic transition tube”.
•
•
•
Rod
Plastic
Transition
Tube
a
End “a”
End “b”
a
b
a
b
a
b


