9
9.
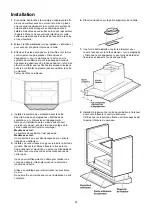
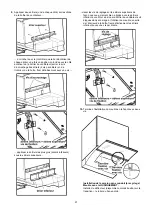
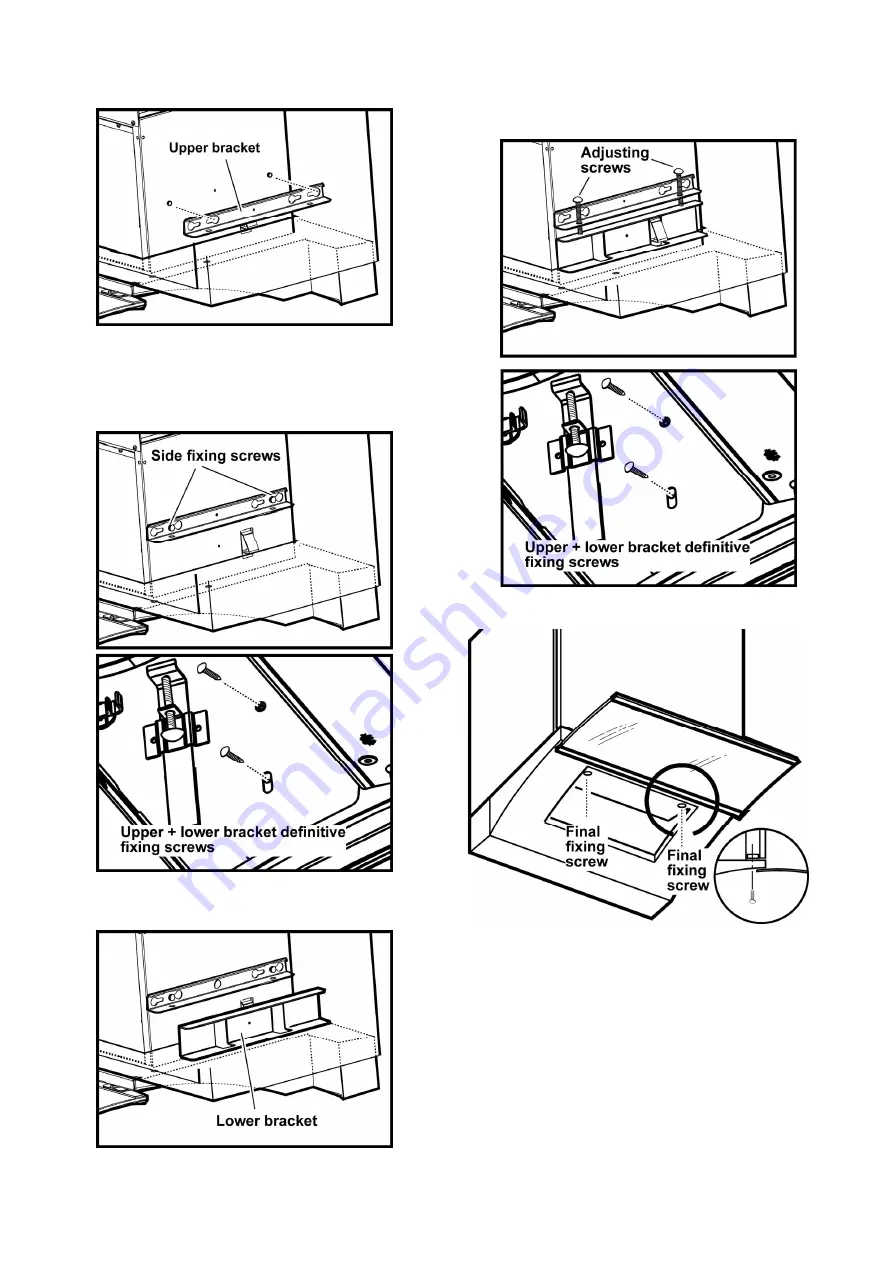
Apply two brackets (one per side) to the blower unit
housing.........
....... lock in place (check that each bracket , once in
position, is flush to the front side of the blower unit
housing) tighten the side fixing screws (two per brackets)
and, from the inside of the hood, fix with one screw each
then .......
.......apply the two bigger brackets (lower brackets) under
the first two and....
..... tighten securely the two screws on upper brackets,
check that blower housing is now well blocked, then,
from the inside of the hood, fix definitively the lower
brackets with one screw each.
10.
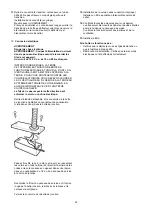
Refinish the installation to cabinet with two fixing screws.
For
Ductless (recirculating) installations
Cabinet without ceiling ONLY:
Install the deflector (available as an extra kit) on the
transition - snap into place.
11.
Connect ducting to transition. Seal with duct tape.
Do not use duct smaller than the transition.
For
Ductless - recirculating - installations
:
Cabinet with ceiling ONLY:
provide and install a section of duct long enough to
connect hood transition to deflector once this has been
installed onto the cabinet ceiling (the deflector is
available as an extra kit).
Summary of Contents for Glide EGL436SS
Page 6: ...6 Dimensions and Clearances ...
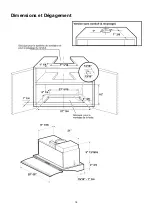
Page 18: ...18 Dimensions et Dégagement ...
Page 30: ...30 Dimensiones y Espacios libres ...
Page 38: ......
Page 39: ......
Page 40: ......


