background image

10

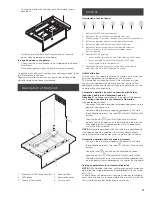
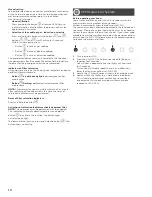
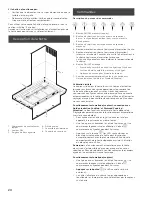
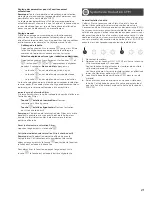
Manual setting

To be performed when you notice unsatisfactory functioning 
of the Automatic operation, and it has to be done when nor-
mal environmental conditions persist in the kitchen.
Manual setting includes:

đƫ

Hood calibration


Press and hold the button 

, all button LEDs flash to  


indicate initiation of calibration; the process will last for 


approximately 5 minutes.

đƫ

Selection of the cooktop (gas , induction, or electric 


Press and hold simultaneously the buttons 

 and 

:  

 buttons  , 

 and 

 start flashing for 5 seconds. 


Within this timeframe, press:

đƫ

Button 

 in case of gas cooktop

đƫ

Button 

 in case of electric cooktop

đƫ

Button 

 in case of induction cooktop

The preselected button remains lit to indicate the selection 
was performed, after 10 seconds the button flashes briefly to 
indicate that the performed selection was recorded.

Indicators of Filter Saturation

At regular time intervals, the hood signals indicate the need to 
perform filter maintenance.

đƫ

Button 

 on with steady light:


perform grease filter 

 maintenance.

đƫ

Button 

 flashing:

 perform activated charcoal filter 

 maintenance.

NOTE: 

Filter saturation signal is visible within the first minute 

after switching off the hood; within this time, the reset of 
saturation indicators must be performed.

Reset of filter saturation indicators:

Press and hold the button 

.

Activation of saturation indicator activated charcoal filter
NOTE: 

This operation must be performed with the hood off.

This indicator is normally deactivated; press and hold the

button 

 to activate the function: the button lights

up with steady light.

To deactivate the function, press and hold the button 

: the 

button lights up flashing.

CFM Reduction System

Before operating your hood: 

Some States and Provinces of the US & Canada restrict the
maximum exhausting airflow of range hoods. 
Airflow is measured as cubic feet per minute (CFM). 
These maximum levels allowed are detailed in the local code of 
your area.  Please check local codes to find out if you need to 
restrict the maximum airflow of your hood.  If your local code 
mandates a maximum airflow level below the maximum airflow 
of this hood (i.e. 600 CFM), please execute the procedure below 
to reduce the maximum airflow.

1

5

Turn the motor OFF.   

Press the ON/OFF (1) and Intensive speed (5) buttons 
together for 3 seconds.  


You will hear a beep and all control lights will illuminate 
for 3 seconds.  


This action will Disable speeds 3 and 4 and effectively 
lower the Maximum airflow to >300 CFM.

Locate the CFM certification sticker in the hardware pack.   

Peel and Affix this sticker to a visible area in the blower.  
This sticker provides official certification to your local  
inspector that this hoods maximum airflow has been  
reduced to >300 CFM.

Summary of Contents for Stoney EST630SS

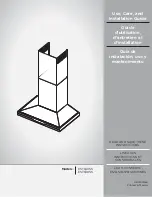
Page 1: ...utilisation d entretien et d installation Guía de instalación uso y mantenimiento READ AND SAVE THESE INSTRUCTIONS LISEZ CES INSTRUCTIONS ET CONSERVEZ LES LEA Y CONSERVE ESTAS INSTRUCCIONES LIB0132564 Printed in Mexico Models EST630SS EST636SS ...

Page 2: ...y 12 APPROVED FOR RESIDENTIAL APPLIANCES FOR RESIDENTIAL USE ONLY READ AND SAVE THESE INSTRUCTIONS PLEASE READ ENTIRE INSTRUCTIONS BEFORE PROCEEDING INSTALLATION MUST COMPLY WITH ALL LOCAL CODES IMPORTANT Save these Instructions for the Local Electrical Inspector s use INSTALLER Please leave these Instructions with this unit for the owner OWNER Please retain these instructions for future reference...

Page 3: ...control device IWARNING TO REDUCE THE RISK OF A RANGE TOP GREASE FIRE a Never leave surface units unattended at high settings Boilovers cause smoking and greasy spillovers that may ignite Heat oils slowly on low or medium settings b Always turn hood ON when cooking at high heat or when flambeing food I e Crepes Suzette Cherries Jubilee Peppercorn Beef Flambe c Clean ventilating fans frequently Grea...

Page 4: ...box Copies of the standards listed may be obtained from National Fire Protection Association Batterymarch Park Quincy Massachusetts 02269 CSA International 8501 East Pleasant Valley Road Cleveland Ohio 44131 5575 BEFORE INSTALLING THE HOOD 1 For the most efficient air flow exhaust use a straight run or as few elbows as possible CAUTION Vent unit to outside of building only 2 At least two people are...

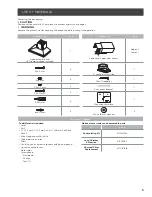
Page 5: ...x45 mm 6 6 round air transition 1 4x8 mm 4 Torx 10 adapter 1 3 5x9 5 mm 2 Duct cover bracket 1 5 4x75 mm 4 Mounting template 1 10x60 mm 4 8x40 mm 2 Ø 6 4x18 mm washers 2 Parts not Supplied Tools Materials required đƫ 2 ƫ đƫ đƫā1 4 3 2 cm 1 6 3 2 mm and 1 16 4 8 mm drill bits đƫ đƫ ƫ 0 ƫ ƫ10 05ƫ đƫ ƫ 1 ƫ ƫ 1 đƫ đƫ 1 ƫ 1 ƫ ƫ3 0 ƫ 1 ƫ 1 đƫ 3ƫ ƫ 5 ƫ 3 đƫ 0 ƫ đƫ 3 2 č Flat blade Phillips Torx 10 Option...

Page 6: ...ke I CAUTION For gas cooktop range installations mount the hood so the bottom is at list 27 68 58 cm above the cooking surface For electric induction cooktop range installations mount the hood so the bottom is at least 24 61 cm above the cooking surface There is no maximum mounting height however we recommend mounting the hood no greater than 27 above the cooking surface For every inch 2 54 cm abo...

Page 7: ...odes and ordinances There must be enough conduit and wires from the fused disconnect or circuit breaker box to make the connection in the hood s electrical terminal box NOTE Do not reconnect power until installation is complete 4 Use caulk to seal all openings Install range hood 1 Using 2 or more people hang range hood on 2 mounting screws through the mounting slots on back of hood B A D C A Mount...

Page 8: ...o terminal box A B C D E F A Home power supply cable B UL listed or CSA approved strain relief C Black wires D UL listed wire connectors E White wires F Green or bare and yellow green ground wires 5 Use UL listed wire connectors and connect black wires C together 6 Use UL listed wire connectors and connect white wires E together I WARNING ELECTRICAL SHOCK HAZARD I WARNING ELECTRICALLY GROUND BLOWE...

Page 9: ...fter this process you can set your hood to automatically connect with an Elica s cooktop or make the Manual settings to calibrate the sensor to work without connectivity Automatic operation sensor connection with Golden Induction Cooktop and Diamond Cooktop Attention The proper operation of the hood will depend on the Setting of parameters for Automatic Operation see dedicated section đƫ To connec...

Page 10: ...ed Reset of filter saturation indicators Press and hold the button Activation of saturation indicator activated charcoal filter NOTE This operation must be performed with the hood off This indicator is normally deactivated press and hold the button to activate the function the button lights up with steady light To deactivate the function press and hold the button the button lights up flashing CFM Red...

Page 11: ...to a low temperature and a short cycle When washed in a dishwasher the grease filter may discolour slightly but this does not affect its filtering capacity To remove the grease filter pull the spring release handle A A Spring release handle Replacing a LED lamp The LED lights are replaceable by a service technician only See Who to contact section in the warranty for service contact information Cha...

Page 12: ...of finish đ Wear to finish due to operator abuse improper maintenance use of corrosive or abrasive cleaning products pads and oven cleaner products WHO IS COVERED This warranty is extended to the original purchaser for products purchased for ordinary residential use in North America Including the United States Guam Puerto Rico US Virgin Islands Canada This warranty is non transferable and applies on...

Page 13: ...CES INSTRUCTIONS ET CONSERVEZ LES VEUILLEZ LIRE CES INSTRUCTIONS AU COMPLET AVANT DE COMMENCER L INSTALLATION DE L APPAREIL DOIT RESPECTER TOUS LES CODES EN VIGUEUR IMPORTANT Conservez ces instructions afin de pouvoir les remettre à l inspecteur électricien de votre région INSTALLATEUR Veuillez laisser ces instructions avec l appareil pour le propriétaire PROPRIÉTAIRE Veuillez conserver ces instruc...

Page 14: ...SSEMENT POUR RÉDUIRE LES RISQUES D INCENDIE DE GRAISSE SUR LES CUISINIÈRES a Ne laissez jamais la cuisinière sans surveillance lorsqu elle est réglée à une haute température Les débordements par bouillonnement causent de la fumée et des débordements de gras qui peuvent s enflammer Faites chauffer l huile lentement à une température basse ou moyenne b Faites toujours fonctionner la hotte lorsque vou...

Page 15: ...tilation la plus efficace possible installez la conduite en ligne droite ou avec le moins de coudes possibles ATTENTION La sortie de la conduite de ventilation doit donner sur l extérieur 2 Deux personnes sont nécessaires pour effectuer l installation 3 La quincaillerie fournie permet de fixer la hotte à la plupart des murs et des plafonds consultez un installateur qualifié pour vous assurer que la ...

Page 16: ...mm 2 Bride de support du cache conduit 1 5 4x75 mm 4 Gabarit de montage 1 10x60 mm 4 8x40 mm 2 Ø Rondelle 6 4x18 mm 2 Pièces non Fournies Outils nécessaires Niveau Perceuse avec forets de 1 3 2 cm 1 8 3 2 mm y 1 16 4 8 mm Crayon Pince à dénuder ou couteau utilitaire Mètre ruban ou règle Pince Pistolet à calfeutrage et composé de calfeutrage résistant aux intempéries Brides de conduit Scie sauteuse...

Page 17: ...sson Pour l installation des cuisinieres électriques induction Installer cette hotte de sorte que le rebord inférieur est pas moins de 24 61 cm sur la surface de cuisson Il est recommandé d installer cette hotte plus de 27 au dessus de la surface de cuisson Par pouce 2 54 cm supérieure à 27 diminuera l efficacité de la capture de la fumée et de l humidité et la performance de ventilation S IL VOUS...

Page 18: ...tte REMARQUE Ne pas mettre le système sous tension avant d avoir complètement terminé l installation 4 Utiliser un calfeutrant pour assurer l étanchéité au niveau de chaque ouverture Installation de la Hotte 1 À deux personnes au moins suspendre la hotte aux 2 crochets de montage à travers les encoches de montage à l arrière de la hotte B A D C A Vis de montage B Encoches de montage C Rondelles D ...

Page 19: ...omologation UL 6 Connecter ensemble les conducteurs blancs E à l aide de connecteurs de fils homologation UL I AVERTISSEMENT RISQUE DE CHOC ÉLECTRIQUE I AVERTISSEMENT DÉCONNECTER LA SOURCE DE COURANT ÉLECTRIQUE AVANT L ENTRETIEN REPLACER PIÈCES ET PANNEAUX AVANT DE FAIRE LA REMISE EN MARCHE LE NON RESPECT DE CES INSTRUCTIONS PEUT CAUSER UN DÉCÈS OU UN CHOC ÉLECTRIQUE 7 À l aide des connecteurs de fi...

Page 20: ... capteur situé dans la hotte fournit un temps d activation lorsque vous branchez votre appareil pour la première fois Cette activation prendra 5 minutes Après ce processus vous pouvez configurer votre hotte pour qu elle se connecte automatiquement à la table de cuisson d Elica ou effectuer les réglages manuels pour calibrer le capteur pour qu il fonction ne sans connectivité Fonctionnement automati...

Page 21: ...retien du filtre à charbon actif Remarque L indication de la saturation des filtres est visible pendant la première minute après l arrêt de la hotte dans ce délai la réinitialisation des indicateurs de saturation doit être effectuée Reset indicateurs de saturation filtres Appuyez longuement sur la touche Activation indicateur de saturation filtre à charbon actif Remarque cette opération doit être effe...

Page 22: ... peut en provoquer la décoloration Toutefois les caractéristiques de filtrage ne seront en aucun cas modifiées Pour démonter le filtre anti graisse tirer la poignée de décrochement à ressort A A Poignée à ressort Remplacement de la lampe à DEL Les lumières DEL sont remplaçables par un technicien de service seulement Voir les informations de contact de service Qui contacter Filtres à charbon Si le sys...

Page 23: ...mpoules filtres métalliques ou au charbon et toute autre pièce consommable đƫ Usure normale đƫ Usure due à une mauvaise utilisation du propriétaire un entretien incorrect une utilisation de substances nettoyantes QUI EST COUVERT Cette garantie s étend à l acheteur original de produits achetés pour un usage domestique habituel en Amérique du Nord Y compris Etats Unis Guam Porto Rico les Iles virgin ...

Page 24: ...STALACIÓN DEBE CUMPLIR TODA LA NORMATIVA LOCAL IMPORTANTE Guarde estas instrucciones para su uso por parte del inspector de electricidad local INSTALADOR Entregue al propietario estas instrucciones junto con la unidad PROPIETARIO Conserve estas instrucciones para futuras consultas Advertencia de seguridad Antes de realizar el cableado de este aparato desactive el circuito de energía eléctrica en e...

Page 25: ...stado sólido para el control de la velocidad I ADVERTENCIA PARA REDUCIR EL RIESGO DE INCENDIO OCASIONADO POR GRASA a No deje nunca ninguna unidad externa desatendida y con valores de fuego altos La cocción puede causar humo o reboses de grasa que pueden prender fuego Caliente el aceite a fuego lento o medio b Encienda siempre la campana cuando cocine a una temperatura alta o cuando realice flameado...

Page 26: ...n una pared o techo no dañe el cableado ni otros servicios públicos đƫ Los ventiladores con conductos siempre deben dar salida al aire hacia el exterior NOTA Solo para versión Aspirante đƫ Para usarse solamente en ventilación común No lo utilice para ventilar materiales y vapores peligrosos o explosivos đƫ Sólo use conductos metálicos RECOMENDACIONES GENERALES đƫ Nunca deje las unidades de superfic...

Page 27: ...ndares enumerados en National Fire Protection Association Batterymarch Park Quincy Massachusetts 02269 CSA International 8501 East Pleasant Valley Road Cleveland Ohio 44131 5575 ANTES DE INSTALAR LA CAMPANA 1 Para obtener una circulación del flujo de aire más eficaz utilice un tubo de tramo recto o el menor número posible de tubos acodados PRECAUCIÓN el conducto de ventilación solamente debe tener s...

Page 28: ...x45 mm 6 Transición redonda de 6 1 4x8 mm 4 Adaptador Torx 10 1 3 5x9 5 mm 2 Soporte de la cubierta del ducto 1 5 4x75 mm 4 Plantilla de montaje 1 10x60 mm 4 8x40 mm 2 Rondana de Ø 6 4x18 mm 2 Piezas no suministradas Herramientas Materiales necesarios đƫ 2 đƫ ƫ ƫ ƫ ƫāŝĘƫĨăċĂƫ ĩČ 1 8 3 2 mm y 1 16 4 8 mm đƫ 8 6 đƫ ƫ ƫ 1 ƫ ƫ1 ƫ đƫ 0 ƫ ƫ ƫ ƫ đƫ 6 đƫ 0 ƫ ƫ 0 ƫ5ƫ ƫ ƫ 0 ƫ ƫ 1 ƫ de agua đƫ 6 ƫ ƫ 1 0 ƫ ƫ2...

Page 29: ...a de la cocina Cuanto más cerca esté la campana de la cocina más eficaz resultará la captura de olores grasa y humos I PRECAUCIÓN Se encuentre a 27 68 58 cm sobre la superficie de cocción Para la instalación de estufas eléctricas inducción instale esta campana de tal manera que la cornisa Inferior se encuentra a no menos de 24 61 cm Sobre la superficie de cocción No hay una altura máxima de instalaci...

Page 30: ...ical Code Código Nacional Eléctrico o CSA Asociación de Normalización Canadiense y los códigos y ordenanzas locales Debe haber suficiente conducto de y alambres de la caja de desconexión con fusible o cortacircuitos para hacer la conexión en la caja eléctrica de terminales de la campana NOTA No restablezca la electricidad hasta que se complete la instalación 4 Use masilla de calafateo para sellar t...

Page 31: ...ento Conexión eléctrica Características eléctricas nominales Modelos EST630SS EST636SS Voltaje 120 V Corriente 3 7 A Frecuencia 60 Hz Potencia Máx de lámparas 2 x 2 5 W Consumo de energía Modo de espera 0 73 W h Modo de operación 467 7W h I ADVERTENCIA PELIGRO DE CHOQUE ELÉCTRICO I ADVERTENCIA DESCONECTE EL SUMINISTRO DE ENERGÍA ANTES DE DARLE MANTENIMIENTO VUELVA A COLOCAR TODOS LOS COMPONENTES Y...

Page 32: ...ucto puede invertirse para ocultar las ranuras đƫ Coloque la cubierta del conducto por encima de la campana montada đƫ Deslice la parte inferior del conducto en el área de la campana đƫ Coloque la parte superior del ducto sobre el soporte Si se usa una cubierta telescópica del conducto tome la parte superior de la cubierta telescópica y posiciónela en el soporte đƫ Sujete la parte superior del con...

Page 33: ...inado el preceso de calibración Presione el botón el LED central se iluminará en blanco đƫ La campana se encenderá a la velocidad más apropiada según humos y vapores de cocción que sean detectados por el sensor de la campana Ajustes de los parámetros del funcionamiento automático NOTA Toda operación de calibración selección configuración y lógica conexión descrita a continuación debe ser realizada...

Page 34: ...ALCOHOL I ATENCIÓN De no observarse las instrucciones dadas para limpiar el aparato y sustituir el filtro puede producirse un incendio El fabricante recomienda leerlas y respetarlas atentamente El fabricante no se hace responsable por los daños al motor o los incendios provocados en el aparato debido a interven ciones de mantenimiento incorrectas o al incumplimiento de las normas de seguridad prop...

Page 35: ...arte consumible đƫ Desgaste normal đƫ Desgaste terminal debido a abusos del usuario mantenimiento inadecuado uso de productos toallas de limpieza corrosivos o abrasivos y por uso de limpiadores para hornos QUIÉN ESTÁ CUBIERTO Esta garantía se extiende al comprador original de productos adquiridos para uso residencial en Norte América incluyendo Estados Unidos Guam Puerto Rico Islas Vírgenes de EU ...

Page 36: ...uctos adquiridos para uso residencial en Latinoamérica Para cualquier defecto estético se tiene una garantía limitada por treinta 30 días de la fecha de compra del usuario final Esta garantía no es transferible y aplica solamente al comprador original y no se extiende a propietarios subsecuentes del producto Esta garantía se expresa en lugar de otras garantías expresadas o implicadas incluyendo per...

Reviews: