


Procedure:
1.
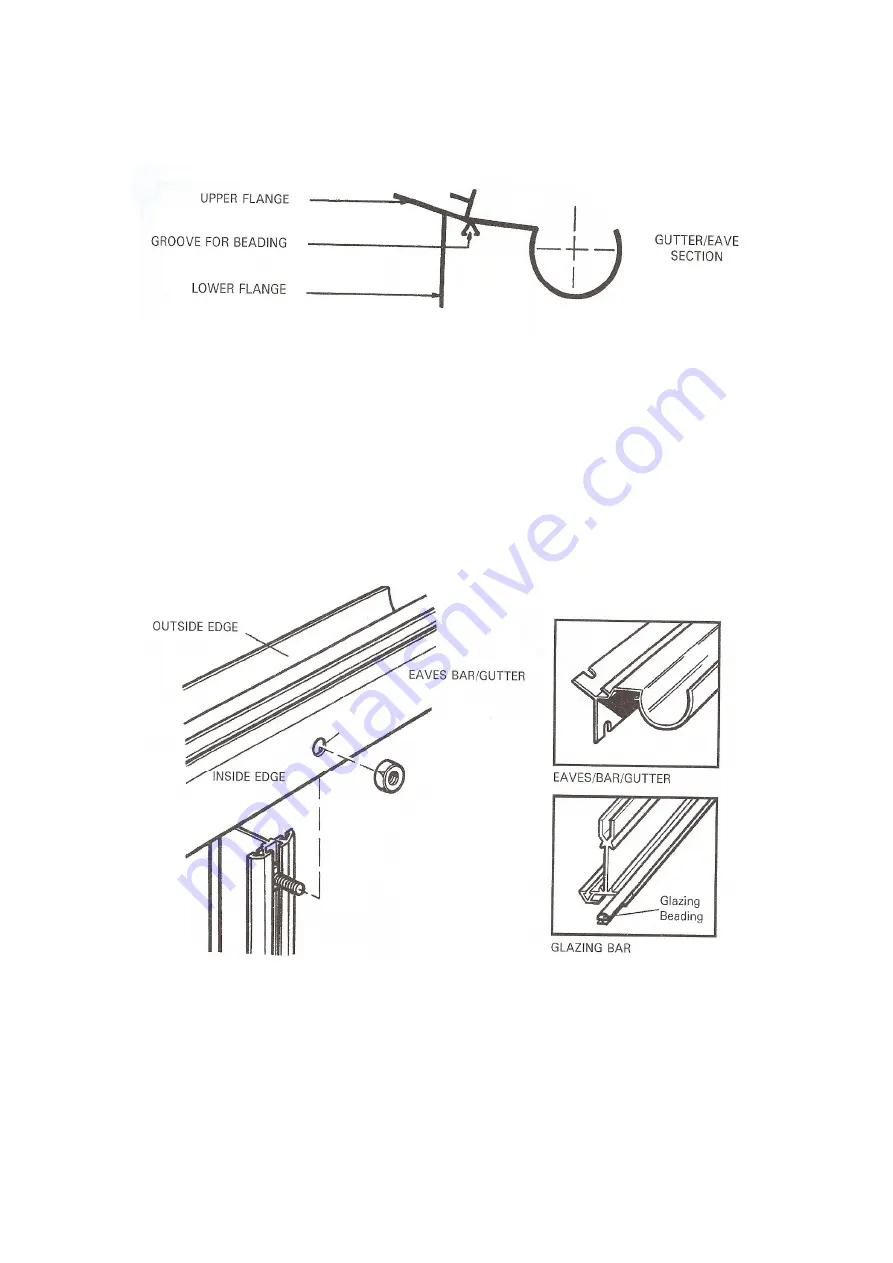
Insert the glazing head in to the gutter/eave bar and glazing bars as shown below (in the
manner previously outlined)
2.
Lay out the component parts on the floor with the bolt slots uppermost. The gutter and cill
are facing the ground.
3.
Insert 3 bolts into each glazing bar (1 – top, 1 – middle, 1 – bottom). If you are fitting a front
door (either single or double), insert an extra bolt into the top of each glazing bar. These will
be used later in the installation of the door.
4.
Attach the gutter/eave bar to the top of each glazing bar utilising the top bolt in each glazing
bar as illustrated below.
5
.
The cill will bolt to the bottom of the glazing bars in a similar manner. Before securing the
nut on to the bottom bolt of the outer glazing bars, place the diagonal brace angles over the bolt.
The bracing angles must be arranged so that the inside of the angles are facing each other.
6. Attach the horizontal angle brace utilising the previously inserted bolts and position the bar
around the middle of each glazing bar. Ensure that the horizontal angle brace is parallel to the gut-
ter/eave bar and cill.
7.
Ensure all points are tight and frame is square before tightening nuts.
Summary of Contents for KENSINGTON 10 x 6
Page 1: ......
Page 2: ......
Page 3: ......
Page 17: ...DOOR FRAME...
Page 36: ...6 WIDE LT TOUGHENED GLASS PLAN Glass pane for standard door on gable end Louvre on rear end...
Page 39: ...OPTIONAL EXTRAS RAIN WATER KIT FOR GUTTERING...
Page 40: ...ELITE 1407...


