


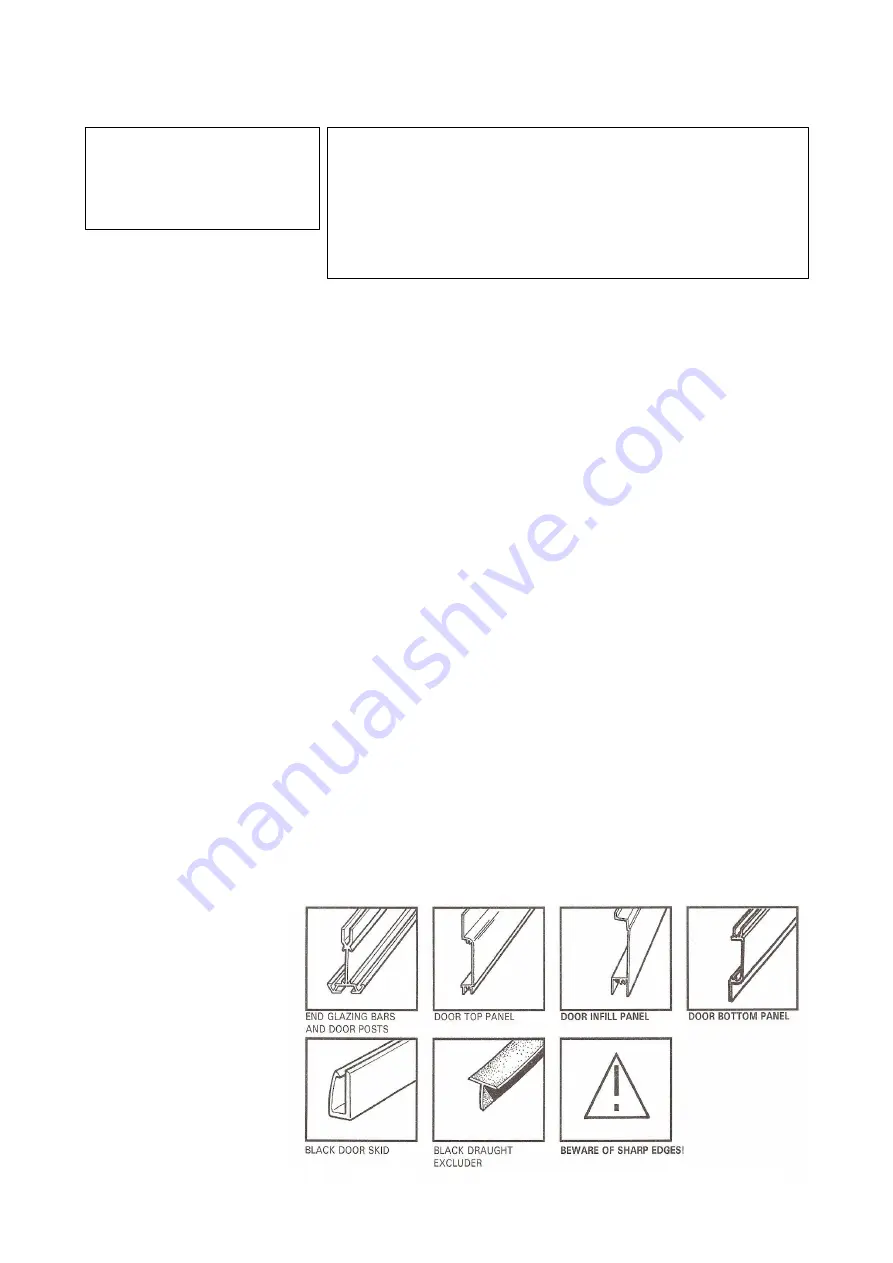
DOOR FRAME ASSEMBLY
1.Place the two side door glazing bars on a level surface two feet apart with the bolt slots facing
downwards
. The top of each side piece has two screw holes in it, the bottom has three. Insert the
glazing beading into the inside of both bars. (
Key point
).
2. Place the top, bottom and two infill panels in position as shown by the position of the screw
holes in the side pieces of the panels. The top panel has the greenhouse name on it. The bottom
panel has the edge for the door skid to fit on. The lower infill panel locks on to the bottom panel.
3. Fix the door together by screwing through the door side pieces into the screw eyes in the door
with the No.8 half-inch self–tapping screws. DO NOT fix the top left hand side screw yet. The
screws will go in more easily and without danger of trying to go crooked if you can put a small
amount of grease on the panel before assembling the doors. Alternatively, you could insert the
screws into the screw eyes of the door
panels before assembling the doors, this would have the effect of pre-self tapping the panels prior to
assembly making assembly easier.
4. Fix the top left hand side with the one-and-a-half inch screw provided (if the door is on the right
hand gable, it is the top right hand that has the 1 ½”). Put the screw through the door catch so that
the serrated part is facing outwards and upwards. Next slip two spring washers on to the screw, and
then fix the screw through the side of the door and into the top panel (
Key point
).
5. Make sure all the angles are square and tighten all screws.
6. Fix each door wheel into position by pushing the bolt provided through the centre of the wheel
and then through the hole in the top door panel from underneath (i.e. from the inside of the door).
Put the washer over the bolt and secure with the nut provided, tightening until there is no movement
on the bolt. The nuts are lock-nuts and are harder to put on than normal nuts in general assembly.
The wheel will revolve freely because it has ball bearings in it. (
Key point
).
7. Slip the nylon door skid on the bottom panel.
8. Turn the door over and insert the black rubber draught excluders in the groove (bolt slot) in each
side piece of the door. Push up to the top of the door and trim off surplus at the bottom. To prevent
the draught excluder from slipping down, insert a nut and bolt at the bottom of the door post and
tighten.
9. Do not fit the door at this
stage, see later page for this
detail.
From the main bag of fittings you require
2 door wheels
1 Nylon door skid (this may have been fitted prior to delivery)
2 lengths of black brush draught excluder
Door catch, self tapping screws and spring washers.
Components consist of:
2 door glazing bars
3 infill panels
2 top and bottom door panels
Summary of Contents for KENSINGTON 10 x 6
Page 1: ......
Page 2: ......
Page 3: ......
Page 17: ...DOOR FRAME...
Page 36: ...6 WIDE LT TOUGHENED GLASS PLAN Glass pane for standard door on gable end Louvre on rear end...
Page 39: ...OPTIONAL EXTRAS RAIN WATER KIT FOR GUTTERING...
Page 40: ...ELITE 1407...


