06112020
-00182
4
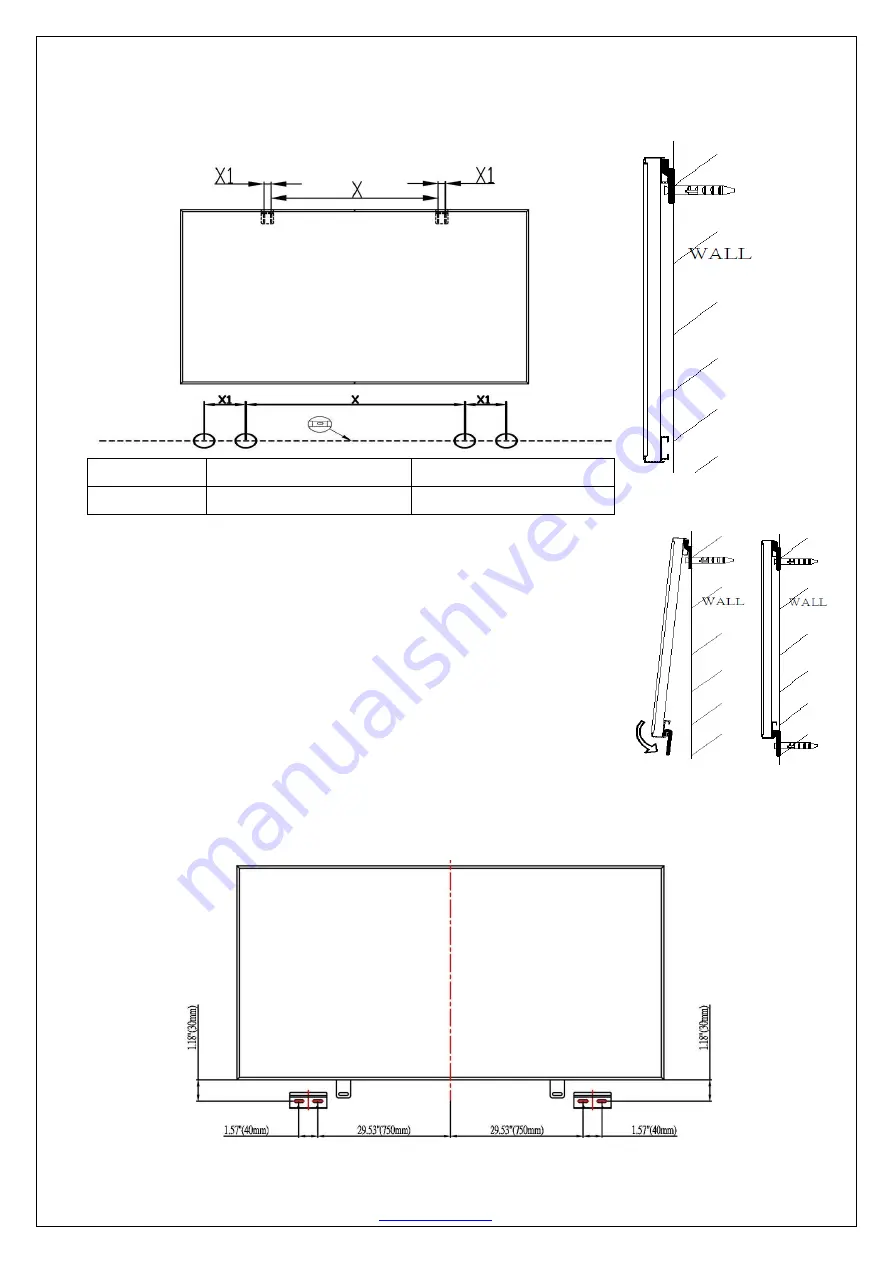
Step1
: Mark the location the WhiteBoardScreen will be installed and drill your holes for all the
Top Hanging
Brackets
(c). Once the holes have been drilled, insert and screw the
wall screws
(a) as shown below. It is strongly
recommended to install the WhiteBoardScreen on wood studs for added stability. If the location does not have
wood studs, then use the included
hollow wall anchors
(b).
Step 2:
Hang the WhiteBoardScreen on the
Top Hanging Brackets
, making sure
the top lip inserts into the rail on back of the frame.
Step 3:
Next, attach the
Bottom Hanging Brackets
(d) to the bottom frame, again
making sure the lip of the bracket inserts in the rail. Then, drill holes according to
the holes on the bottom brackets to insert and screw the wall screws to secure the
bottom hanging brackets to the wall.
Pen Tray Installation
Step 4:
Line up the
Tray Hanging Brackets
(j) with the bottom screw holes of the
bottom hanging brackets
(b).
Then, mark and drill the holes and install brackets to the wall.
Minimum clearance requirement for pen tray installation diagram
Model
X1 = Bracket hole distance X = Wall bracket distance
WB4x8-CLR2
30mm (1.18”)
1200mm (47.24”)


