background image

CHAPTER 1. AP-4000

1.3. AUTOPILOT

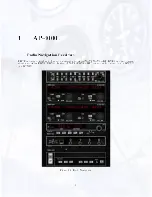
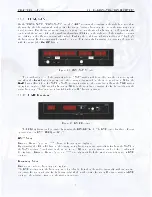
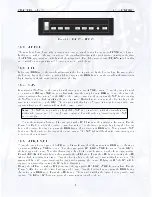
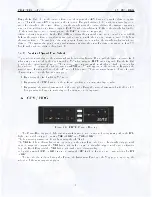
Figure 1.10: KAP 150 / KFC 150

1.3.2 AP ENG

The most basic form of autopilot operation is to engage only the autopilot engage (AP ENG) mode button.

In this mode, with no other modes selected, the aircraft will maintain the pitch attitude existing at the time

of AP ENG engagement and will y with the wings level. Use of the vertical trim (UP/DN) switch in this

mode will aect an approximate 0.9 degree per second pitch change.

1.3.3 HDG

In heading (HDG) mode the aircraft will maintain the heading selected by the heading bug. Be sure to place

the heading bug in the desired position before engaging the HDG button, as the aircraft will immediately

begin turning in the shortest direction toward the bug.

1.3.4 NAV

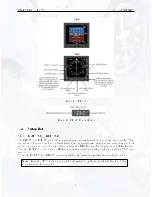
In navigation (NAV) mode the autopilot will intercept and track VOR courses. To use the autopilot with

a conventional CDI-type VOR indicator rst make sure the autopilot is in HDG mode and then tune the

desired navigation frequency. Set the OBS to the desired course and then depress the NAV button causing

the NAV indicator to ash signifying the mode is armed. Within ve seconds move the heading bug to the

same value as selected on the OBS. The autopilot will then y a 45 degree intercept heading until course

capture whereupon the system will track the desired course.

Note: The NAV indicator will not ash if the NAV mode is selected while the aircraft is level

within

±

4

degrees and 2-3 dots of course deviation, but will rather go immediately into NAV

mode directly.

To use the navigation feature of the autopilot with a HSI, rst tune the navigation frequency. Use the

Course Set Knob to select the desired course line value. Set the intercept angle by placing the heading

bug on the desired heading and press the HDG button, if not already in HDG mode. Now press the NAV

button and y the selected heading until course capture. The NAV light will ash until course interception

to indicate that it is armed.

1.3.5 APR/GS/BC

To use the autopilot in approach (APR) mode st make sure that the system is in HDG mode if using a

conventional CDI-type VOR indicator. Tune the appropriate ILS, LOC or VOR frequency. Set the OBS to

the nal approach course. Note that if intending to y a back course be sure to use the front course setting.

Press the BC (Back Course) button after pressing the APR button. Press the APR button causing the APR

light to ash indicating it is armed. Turn the heading bug to the inbound course within ve seconds. The

system will y a

45

degree intercept heading until capturing the course. If ying an ILS the GS will be

captured automatically causing the GS light to illuminate.

If using the APR mode with an HSI please tune the appropriate ILS, LOC or VOR frequency rst. Use the

Course Set Knob to set the desired nal approach course. Turn the heading bug and press the HDG button

if not already in HDG mode. Press the APR button. The autopilot will y the desired heading until course

capture. The BC and GS features operate the same way as described above.

7

Summary of Contents for AP-4000

Page 1: ...O p e r a t o r s M a n u a l A P 4 0 0 0 a v i o n i c m o d u l e s R e l e a s e O c t o b e r 2 0 1 9 www flye lite ch ...

Page 2: ...LITE ELectronic IFR Training Environment is a software that allows you to use your personal computer to replicate the instrument panel avionics and ight aerodynamics of speci c aircraft to practice all proce dures and simulate elements of ight under instrument meteorological conditions This Operator s Manual is to give an insight of the options and training possibility that ELITE XTS o ers If you ...

Page 3: ...nel 4 1 1 5 Transponder 5 1 2 EFS 40 EADI EHSI 5 1 3 Autopilot 6 1 3 1 KAP 150 KFC 150 6 1 3 2 AP ENG 7 1 3 3 HDG 7 1 3 4 NAV 7 1 3 5 APR GS BC 7 1 3 6 ALT 8 1 3 7 CWS 8 1 3 8 FD 8 1 4 Altitude Vertical Speed Selector 8 1 4 1 Altitude Pre Select 8 1 4 2 Vertical Speed Pre Select 9 1 5 CRS HDG 9 2 Conclusion 10 2 1 Troubleshooting 10 2 2 Notes 11 ...

Page 4: ...eceivers ELITE is equipped with up to four radio navigation receivers NAV1 NAV2 ADF DME and two commu nication receivers COM1 COM2 Instead of NAV1 COM1 a GPS device can be ordered e g a GNS530 or a GTN750 Figure 1 1 Radio Navigation 2 ...

Page 5: ...n the NAV1 or NAV2 receiver is activated the actual radial from the VOR station is displayed in place of the standby frequency While in the radial mode turning the knobs directly sets the active frequency There is no radial available when an ILS frequency is tuned 1 1 2 DME Receiver Figure 1 3 DME Receiver The LED brightness can be adjusted by turning the DIM BRT knob The DME device has three di e...

Page 6: ...frequency of 371 5 kHz may be received with the ADF set to either 371 or 372 Note When a receiver is tuned to a frequency the closest NAVaid with this frequency is received When two facilities in the same area have identical frequencies ELITE will show a dialog box to select the desired one 1 1 4 Marker Receiver and Audio Panel Figure 1 5 ELITE Marker Receiver The Marker Receiver can be switched t...

Page 7: ...ll aircraft currently available To select and add the EFS 40 EHSI by itself or the EHSI EADI combination to any aircraft simply go to the Con guration Page and select the corresponding option as desired under the Instrument Con guration column The complete EFS 40 Pilot s Guide is on the Main ELITE USB Memory stick and is also available at www bendixking com Refer to the Pilot s Guide for speci c o...

Page 8: ... automatic trim as well as automatic response to all selected autopilot modes The only di erence being the KFC 150 also has a ight director FD function Since the KAP 150 does not have a FD function it uses a standard attitude reference without V bar com mands To use the KAP 150 and KFC 150 autopilots refer to the instructions within the next few sections Note Press the TEST button and wait for the...

Page 9: ... within 4 degrees and 2 3 dots of course deviation but will rather go immediately into NAV mode directly To use the navigation feature of the autopilot with a HSI rst tune the navigation frequency Use the Course Set Knob to select the desired course line value Set the intercept angle by placing the heading bug on the desired heading and press the HDG button if not already in HDG mode Now press the...

Page 10: ... ight director FD function that the KAP 150 does not ELITE aircraft modules using this autopilot have a V bar that appears on the attitude indicator anytime the FD or AP ENG features are selected If the FD function only is selected the V bar will command the user to make control inputs to satisfy the system requirements by manoeuvring the orange delta wing into the V bar 1 4 Altitude Vertical Spee...

Page 11: ...ct the desired vertical speed The indicated up down arrows show whether a climb or descent has been selected To engage the selected rate press ENG and VS will appear on the indicator Engaging the vertical speed function will cancel the ALT mode if being used There are several ways to change the rate of vertical speed once the function is engaged 1 By rotating the knob while in V S mode 2 By pressi...

Page 12: ...ur USB Card Download File If there are any open questions regarding the installation or the setup of the software please refer to the installation manual The most common issues that occur during the setup are also included in this documents The most frequent questions and issues are discussed in these documents Please feel free to contact the ELITE Support Team if the topic is not discussed in eit...

Page 13: ...CHAPTER 2 CONCLUSION 2 2 NOTES 2 2 Notes Please feel free to add any notes here 11 ...

Page 14: ......

Reviews: