background image

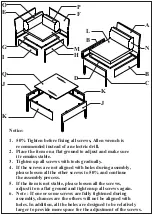
Notice:

1.   50% Tighten before fixing all screws, Allen wrench is 
      recommended instead of an electric drill.
2.   Place the item on a flat ground to adjust and make sure 
      it remains stable.
3.   Tighten up all screws with tools gradually.
4.   If the screws are not aligned with holes during assembly, 
      please loosen all the other screws to 50% and continue 
      the assembly process.
5.   If the item is not stable, please loosen all the screws,
      adjust it on a flat ground and tighten up all screws again.
6.   Note : If one or some screws are fully tightened during
      assembly, chances are the others will not be aligned with 
      holes. In addition, all the holes are designed to be relatively
      larger to provide more space for the adjustment of the screws.  

O
E

G

I

Q

J

K

J

K

P
F

B

N

B

C

D

A

L

M

H

Summary of Contents for CHB-0554PCSGRY

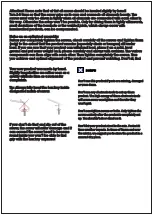
Page 1: ...NOTE 50 TIGHTEN BEFORE FIXING ALL BOLTS ASSEMBLY INSTRUCTION Item NO CHB 0554PCSGRY CHB 0554PCSBLK Cohiba 4 Seater Sofa Set Black Item name Cohiba 4 Seater Sofa Set Grey...

Page 2: ...n align with each other Then tighten completely the screws Thus you achieve and optimal alignment of the product and prevent wobbling Don t sit find Your new product was made by hand Slightly irregula...

Page 3: ...sembly please loosen all the other screws to 50 and continue the assembly process 5 If the item is not stable please loosen all the screws adjust it on a flat ground and tighten up all screws again 6...

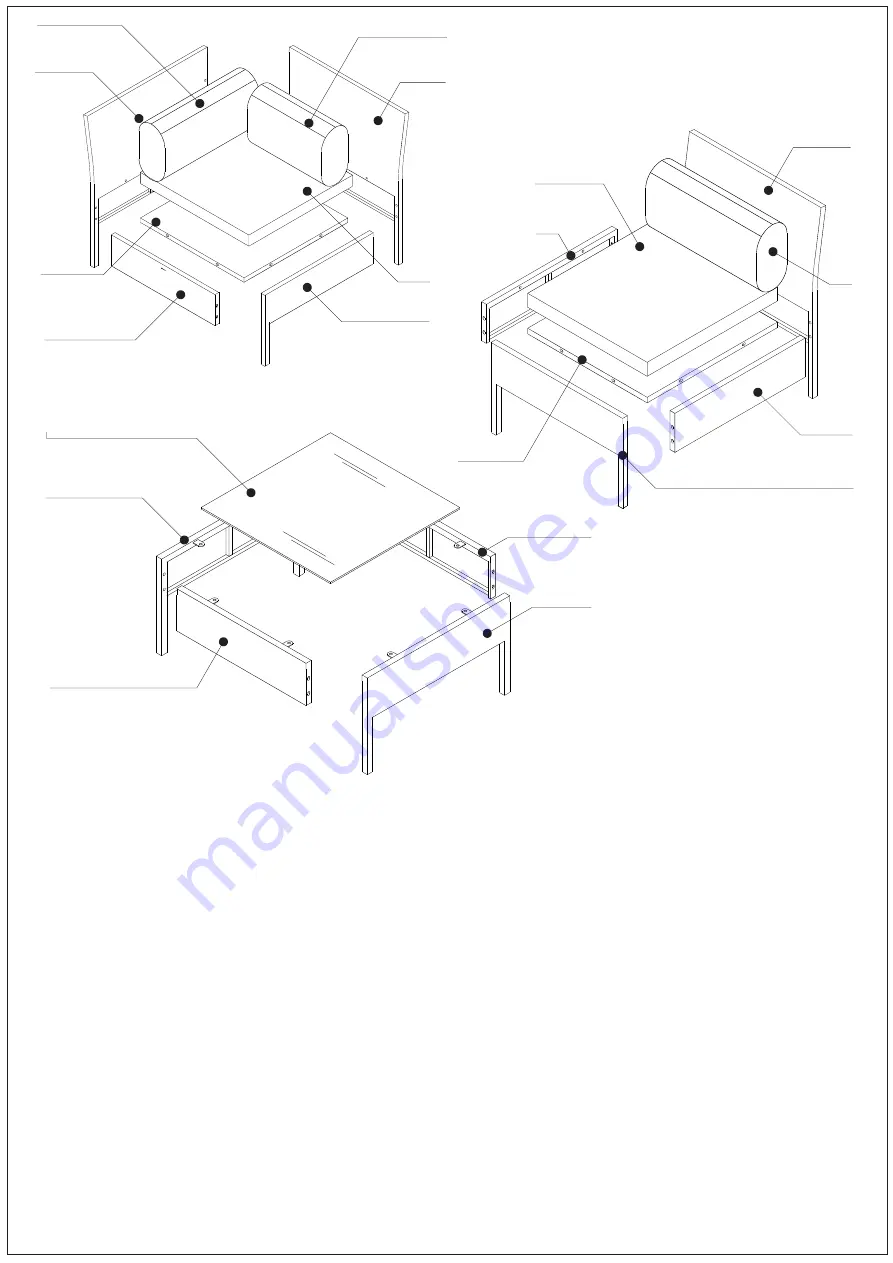
Page 4: ...t Frame 2 pcs Seat Frame 2 pcs Corner Big Frame 3 pcs Corner Small Frame 3 pcs Corner Seat Frame 3 pc Corner Front Frame 3 pcs Corner Side Frame 3 pcs Table Leg Frame 2 pcs Table Side Frame 2 pcs Seat...

Page 5: ...P Q 1 Part List Hardware 2 3 Corner Small Back Pillow 3 pcs Table Glass 1 pc Bolt M6x40mm 46 pcs Bolt M6x30mm 42 pcs Allen key 1 pc...

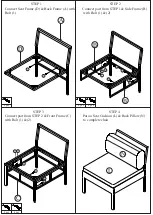
Page 6: ...Connect part from STEP 1 Side Frame B with Bolt 1 2 STEP 3 STEP 4 Put on Seat Cushion L Back Pillow N to complete chair Connect part from STEP 2 Front Frame C with Bolt 1 2 1 1 1 1 1 1 2 2 2 2 1 1 2...

Page 7: ...r Big Frame E with Bolt 1 STEP 7 STEP 8 Put on Corner Seat Cushion M Corner Big Back Pillow O Corner Small Back Pillow P to complete corner chair Connect part from STEP 6 Corner Side Frame I Corner Fr...

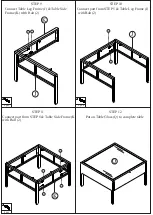
Page 8: ...Frame K with Bolt 2 STEP 10 Connect part from STEP 5 Table Leg Frame J with Bolt 2 STEP 11 STEP 12 Put on Table Glass Q to complete table Connect part from STEP 6 Table Side Frame K with Bolt 2 2 2 2...

Reviews: