but can be seen in the “Machine Status”
menu in the “AL” folder.
The maximum and minimum temperature
alarm is regulated according to the ther-
mostat control probe (probe1) and/or dis-
play probe (probe 3). The temperature
limits are defined by the “HAL” (maximum
alarm), “LAL” (minimum alarm) and PbA
(alarm configuration on probe 1,3 or both)
parameters.
MAXIMUM AND MINIMUM TEMPERA-
TURE ALARM
If an alarm condition occurs and alarm
exclusion times are not in progress (see
alarm exclusion parameters), the alarm
icon lights up permanently and the relay
that is configured as an alarm is activated.
This type of alarm does not affect the reg-
ulating in progress.
Alarms are considered as absolute
(default) values or as values related to the
Set point (the distance from the Set point
itself) and based on the Att parameter.
If the alarms are relative (Att=1), the para-
meter HA1 is set to positive values and
LA1 to negative values.
This alarm condition can be viewed in the
folder “AL” with labels “AH1-AL1”.
ALARM WITH THRESHOLD (PROBE 3)
By setting the PbA=3 parameter an alarm
is associated to probe 3. It refers to a spe-
cific threshold (defined by the SA3 para-
meter). An over-temperature or an under-
temperature alarm is generated and the
icon is turned on. This alarm condition can
be viewed in the “AL” folder with the
labels “AH3-AL3”.
The alarm is handled as a temperature
alarm referring to probe 3: for delays and
backswings, refer to standard alarms
DEFROST ALARM
If the end of defrosting is due to a time-
out (rather then because an end of
defrosting temperature is detected by the
defrosting probe), an alarm is generated
and the icon lights up.
This condition can be viewed in the “AL”
folder with the label “Ad2”.
Automatic back swinging occurs when the
next defrost starts. By pressing any button
during the alarm condition, the signal light
disappears. In order to cancel the alarm
properly, you must wait until the next
defrost.
EXTERNAL ALARM
The device can also control an external
alarm, i.e. from a digital input. If the digital
input is enabled, the alarm control is acti-
vated by programming and remains
enabled until the next time the digital
input is deactivated. When an alarm is set
off, the alarm icon lights up permanently,
a buzzer (if present) and the relay config-
ured as alarm are activated and the com-
pressor, defrost and fan controllers are
deactivated according to the value of the
rLO
parameter):
This alarm condition can be displayed in
the “AL” folder using the “EA” label. The
relay can be silenced; even if the alarm
icon starts blinking, the controllers remain
locked until the next time the digital input
is deactivated.
OPEN DOOR ALARM
If a door is open, the Open Door alarm is
signalled in response to a delay defined by
the tdO parameter. The alarm is signalled
by the flashing alarm icon. This alarm con-
dition can be viewed in the “AL” folder
with the label “Opd”.
NOTE: Do not set parameter tAo to
zero when the door is closed since if
the door is continually opened and
closed, any alarms would never be sig-
nalled.
LINK ALARM
In the event of a master/slave/echo com-
munication failure, the No Link alarm is
signalled. This alarm condition can be
viewed on the master and slaves, if pre-
sent, in the “AL” folder with the “E7” label.
Error status is also signalled by any con-
nected echo devices with signal “- - -”
appearing on the display.
NOTE:
•The E7 error is signalled after approx. 20
seconds in “no link” condition to avoid any
link disturbance causing communication
errors.
•The E7 error is also signalled for address-
ing conflicts when:
a) the number of Slaves set on the MAS-
TER is different from the actual number of
Slaves on the network
b) 2 or more Slaves have the same
address.
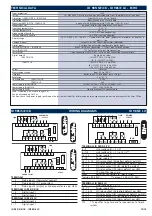
ELECTRICAL
CONNECTIONS
Warning! Always switch off machine
before working on electrical connections.
The instrument has screw terminals for
connecting electrical cables with a maxi-
mum diameter of 2.5 mm
2
(only one con-
ductor per terminal for power connec-
tions): for terminal capacity, see the label
on the instrument.
The relay contacts are voltage free. Do not
exceed the maximum current allowed. For
higher loads, use a suitable contactor.
Make sure that the power voltage com-
plies with the device voltage.
Probes have no connection polarity and
can be extended using an ordinary bipolar
cable (note that if probes are extended
this affects the electromagnetic compati-
bility (EMC) of the instrument: special care
must be used when wiring).
Probe cables, power supply cables and the
TTL serial cable should be kept separate
from power cables.
MECHANICAL ASSEMBLY
The unit has been designed for panel-
mounting. Drill a 29x71 mm hole, insert
the keyboard and fix it in place with the
special brackets provided. The remote dis-
play has also been designed for panel-
mounting on a cut-out measuring 45.9 x
26.4 mm. It is pressure-mounted using
special brackets.
Do not install the instruments in excessive-
ly humid and/or dirty locations. They are
suitable for use in locations with normal
pollution levels.
Always make sure that the area next to the
instrument cooling slits is adequately ven-
tilated.
ID 985/S/E/CK - ID985/E LX
5/14
Value
Description
0
no resources are disabled
1
disables compressor and defrosting
2
disables compressor, defrosting and fans
DISPLAY
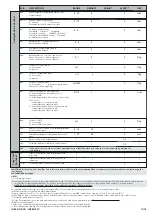
AH1
AL1
AH3
AL3
Ad2
EA
Opd
PA
E7
Press any button to silence the alarm. The LED will
start to blink. If simultaneous, they will be showed
on the display alternately every 2 seconds
*No-link alarms and addressing conflicts alter-
nate with the temperature or probe error val-
ues normally displayed on the Master or Slave.
ALARM
High temperature alarm (referring to
room probe or probe 1)
Low temperature alarm (referring to
room probe or probe 1)
High temperature alarm (referring to
probe 3)
Low temperature alarm (referring to
probe 3)
Defrosting timed out
External alarm
Door Open Alarm
Pressure Switch Alarm
Master-Slave Communication failure
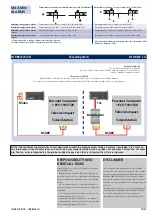
CONDITIONS OF USE
PERMITTED USE
For safety reasons the instrument must be installed and
used in accordance with the instructions supplied.
Users must not be able to access parts with dangerous
voltage levels under normal operating conditions.
The device must be suitably protected from water and
dust according to the specific application and only be
accessible using special tools (except for the front key-
pad)
The device can be fitted to equipment for household
use and/or similar use in the refrigeration sector and
has been tested with regard to safety in accordance
with the European harmonized reference standards.
It is classified as follows:
• as an automatic electronic control device to be inde-
pendently mounted as regards its construction;
• as a 1 B type operated control device as regards its
automatic operating features;
• as a Class A device as regards the category and struc-
ture of the software.
UNPERMITTED USE
The use of the unit for applications other than those
described is forbidden.
It should be noted that the relay contacts supplied
with the device are functional and therefore exposed
to potential faults. Any protection devices required to
comply with product requirements or dictated by com-
mon sense due to obvious safety reasons should be
installed externally.


