background image

1. Unpacking Your Fan.

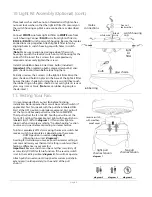
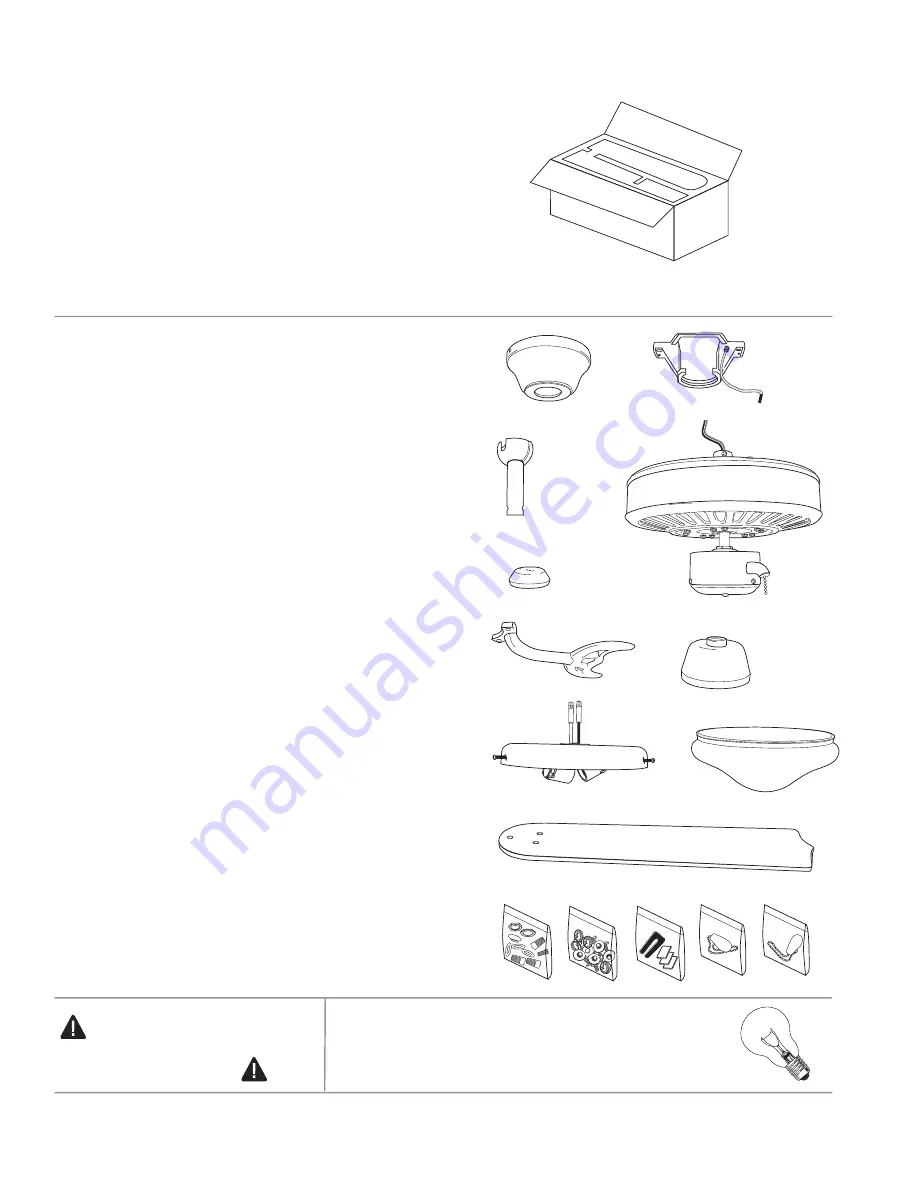
2. Parts Inventory.

Carefully open the packaging. Remove items 
from Styrofoam inserts. Remove motor housing 
and place on carpet or Styrofoam to avoid 
damage to finish. Do not discard fan carton or 
Styrofoam inserts should this fan need to be 
returned for repairs.
Check against parts inventory that all parts have 
been included.

a.

 canopy. 1 piece

b.

 hanging bracket. 1 piece

c.

 4in. downrod and hanging ball. 1 piece

d.

 motor housing. 1 piece

e.

 weatherproof hanging ball cover. 1 piece

f.

 blade arm. 5 pieces

g.

 weatherproof yoke cover. 1 piece

h.

 light kit fitter. 1 piece

i.

 glass shade. 1 piece

j.

 blade. 5 pieces

k.

 hardware packs

page 2

a

b

c

f

j

k

d

g

e

h

i


IMPORTANT REMINDER

: You must 

use the parts provided with this fan for
proper installation and safety.

bulbs required:

2 x 60 watt max. candelabra base bulbs

 (included)

Summary of Contents for E-WOD52ABZ5C

Page 1: ...Testing Your Fan pg 8 Troubleshooting pg 9 Warranty pg 9 Parts Replacement pg 9 net weight of fan 18 08 lb 8 2 kg PRINTED IN CHINA For Models E WOD52ABZ5C E WOD52CS5C READ THESE INSTRUCTIONS AND SAVE...

Page 2: ...wire connectors to use WARNING If using this fan in a WET or DAMP location this fan must be connected to a supply circuit that is protected by a Ground Fault Circuit Interrupter GFCI to reduce the ri...

Page 3: ...hat all parts have been included a canopy 1 piece b hanging bracket 1 piece c 4in downrod and hanging ball 1 piece d motor housing 1 piece e weatherproof hanging ball cover 1 piece f blade arm 5 piece...

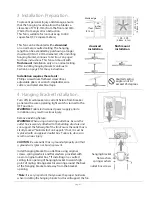
Page 4: ...1m blade edge 7 feet 2 13m 76cm 30 inches spring washers flat washers outlet box screws hanging bracket Note It is very important that you use the proper hardware when installing the hanging bracket...

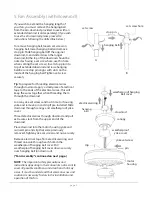
Page 5: ...longer downrod B the top of the downrod should be noted as having a set screw hole use this hole when setting the set screw Insert stop pin into top of extended downrod and raise hanging ball Be sure...

Page 6: ...washers will be located in one of the hardware packs into the remaining holes Securely tighten these screws To prepare the fan for wiring hang fan onto hanging bracket by sliding the canopy over the...

Page 7: ...wire connector provided Connect all GROUND GREEN wires together from fan to BARE GREEN wire from ceiling with wire connector provided If you intend to control the fan light with a separate light swit...

Page 8: ...Tighten blade arm screws twice a year page 7 blade arm screws lock washers blade attachment screws and washers motor housing blade arm blade If you wish to use fan WITHOUT the light kit please proceed...

Page 9: ......

Page 10: ...Note Leave rubber ring on glass shade intact switch housing cap light kit fitter bulb glass shade hex nut lock washer fan pull chain extension black wire white wire molex connections rubber ring It i...

Page 11: ...time or exposure to salt air is specifically exempted under this warranty Neither Litex Industries nor the manufacturer will assume any liability resulting from improper installation or use of this pr...

Reviews: