background image

Warranty.

Parts Replacement.

For parts and information, please refer to
"Parts Inventory" on page 2.
Ellington Customer Support:

1-800-527-1292

www.ellingtonfans.com

Troubleshooting.

Problem: 

Fan fails to operate.

Solutions:

1. Check wall switch to fan.
2. Verify that reverse switch is set completely in 
either direction.
3. Check to be sure fan is wired properly.
4. Verify that male plug and female plugs are 
connected properly in switch housing.

Problem: 

Fan wobbles.

Solutions:

1. Use the balancing kit in one of the hardware 
packs. 

If no blade balancing kit is provided, please 

call Customer Support, 1-800-527-1292, to request 
one.

2. Check to be sure set screw(s) on motor 
housing yoke is (are) tightened securely.
3. Check to be sure set screw on hanging ball is 
tightened securely.

page 9

CRAFTMADE/ELLINGTON: LIFETIME WARRANTY:
CRAFTMADE/ELLINGTON warrants this fan to the original 
household purchaser for indoor use under the following 
provisions:
1-YEAR WARRANTY: CRAFTMADE/ELLINGTON will replace 
or repair any fan which has faulty performance due to a 
defect in material or workmanship. Contact 
Craftmade/Ellington Customer Service at 

1-800-486-4892 

to arrange for return of fan. Return fan, shipping prepaid, to 
Craftmade/Ellington.  We will repair or ship you a 
replacement fan, and we will pay the return shipping cost.
5-YEAR WARRANTY: CRAFTMADE/ELLINGTON will repair or 
replace, at  no charge to the original purchaser, any fan 
motor that fails to operate satisfactorily when failure results 
from normal use.
RETURN FAN MOTOR ONLY, shipping prepaid, to Litex 
Industries. We will repair or ship purchaser a replacement 
motor and Litex will pay the return shipping cost.
6-YEAR to LIFETIME LIMITED WARRANTY: 
CRAFTMADE/ELLINGTON will repair the fan, at no charge 
for labor only to the original purchaser, if the fan motor fails 
to operate satisfactorily when failure results from normal 
use. Parts used in the repair will be billed to the purchaser 
at prevailing prices at time of repair.
    The purchaser shall be responsible for all costs incurred 
in the removal, reinstallation and shipping of the product 
for repairs.
    This warranty does not apply when damage from 
mechanical, physical, electrical or water abuse results in 
causing the malfunction. Deterioration of finishes or other 
parts due to time or exposure to salt air is specifically 
exempted under this warranty.
    Neither Craftmade/Elington nor the manufacturer will 
assume any liability resulting from improper installation or 
use of this product. In no case shall the company be liable 
for any consequential damages for breach of this, or any 
other warranty expressed or implied whatsoever. This 
limitation as to consequential damages shall not apply in 
states where prohibited.

Summary of Contents for MXW36ABZ5

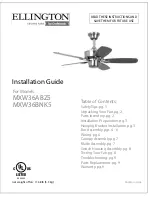
Page 1: ...Contents Safety Tips pg 1 Unpacking Your Fan pg 2 Parts Inventory pg 2 Installation Preparation pg 3 Hanging Bracket Installation pg 3 Fan Assembly pgs 4 6 Wiring pg 6 Canopy Assembly pg 7 Blade Assem...

Page 2: ...2 gauge or there is more than one house wire to connect to the corresponding fan lead wires consult an electrician for the proper size wire connectors to use 5 Electrical diagrams are for reference on...

Page 3: ...attached to motor 1 piece j hardware packs 1 Unpacking Your Fan Carefully open the packaging Remove items from Styrofoam inserts Remove motor housing and place on carpet or Styrofoam to avoid damage...

Page 4: ...pproved outlet box Failure to do so can result in serious injury CAUTION Be sure outlet box is grounded properly and that a ground wire GREEN or bare is present Partially loosen screws in slotted hole...

Page 5: ...ires through downrod apply a small piece of electrical tape to the ends of the electrical wires this will keep the wires together when threading them through the downrod Loosen yoke set screws and nut...

Page 6: ...ood screw Test safety cable by pulling on loose end with pliers If the safety cable slips the nut and the screw on the vice must be set tighter Find a secure attachment point wood ceiling joist highly...

Page 7: ...be cut to the desired length and then stripped When downrod is secured in place on the hanging bracket electrical wiring can be made as follows Connect BLACK wire from fan to BLACK wire from ceiling w...

Page 8: ...cure blade arms Align blade arm holes with motor screw holes and attach blade arm with lock washers and blade arm screws Note Use slot located on fitter plate for easy access to motor screw holes with...

Page 9: ...low you to raise your thermostat setting in summer and lower your thermostat setting in winter without feeling a difference in your comfort Important Reverse switch must be set either completely UP or...

Page 10: ...nt fan and we will pay the return shipping cost 5 YEAR WARRANTY CRAFTMADE ELLINGTON will repair or replace at no charge to the original purchaser any fan motor that fails to operate satisfactorily whe...

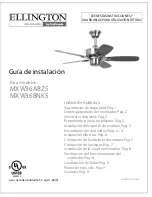
Page 11: ...P g 3 Instalaci n del soporte de montaje P g 3 Ensamblaje del ventilador P gs 4 6 Instalaci n el ctrica P g 6 Colocaci n de la cubierta decorativa P g 7 Colocaci n de las aspas P g 7 Instalaci n de la...

Page 12: ...el cable de la casa es superior al 12 o hay m s de un cable de la casa para conectar a los cables principales del ventilador al cual correpsonda cada uno Consultar con un electricista para informarse...

Page 13: ...or 1 unidad j paquetes de art culos de ferreter a 1 Desempaquetado del ventilador Abrir el empaque cuidadosamente Sacar los art culos del embalaje Sacar el motor y ponerlo en una alfombra o en el emba...

Page 14: ...e reemplazar con una caja de salida aprobada El no hacer el cambio si es necesario puede resultar en lesiones graves PRECAUCION Asegurarse de que la caja de salida est conectada a tierra correctamente...

Page 15: ...es para pasarlos por el tubo poner un pedacito de cinta aisladora en la punta de los cables esto mantendr los cables juntos al pasarlos por el tubo Aflojar los tornillos de fijaci n del cuello y la tu...

Page 16: ...a y el tornillo del seguro del cable nuevamente Encontrar un punto de acoplamiento seguro se recomienda la viga de madera en el techo y asegurar el cable de seguridad Ser necesario de utilizar tornill...

Page 17: ...e provisto Puesto que este ventilador no incluye juego de luz es necesario colocar un conector para cable en la punta del cable AZUL como se indica con la flecha en el diagrama Nota Si elige comprar j...

Page 18: ...s aspas con los agujeros para los tornillos del motor y fijar el brazo para el aspa con arandelas de seguridad y tornillos para el brazo para el aspa Nota Utilizar la abertura en la placa de conexi n...

Page 19: ...diagrama 3 Un ventilador de techo le permitir subir el termostato en verano y bajarlo en invierno sin notar una diferencia en su comodidad Importante Hay que mover el interruptor de reversa o complet...

Page 20: ...E ELLINGTON al 1 800 486 4892 para acordar el reenv o del ventilador Devolver el ventilador con los gastos de env o prepagados a Craftmade Ellington Nosotros repararemos o reemplazaremos el ventilador...

Reviews: