Replacement of drain duct
© Elma Schmidbauer GmbH
SM_Elmasonic_S_02.2018_EN
61
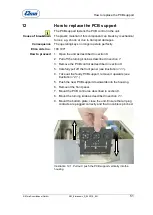
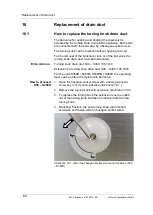
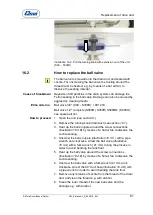
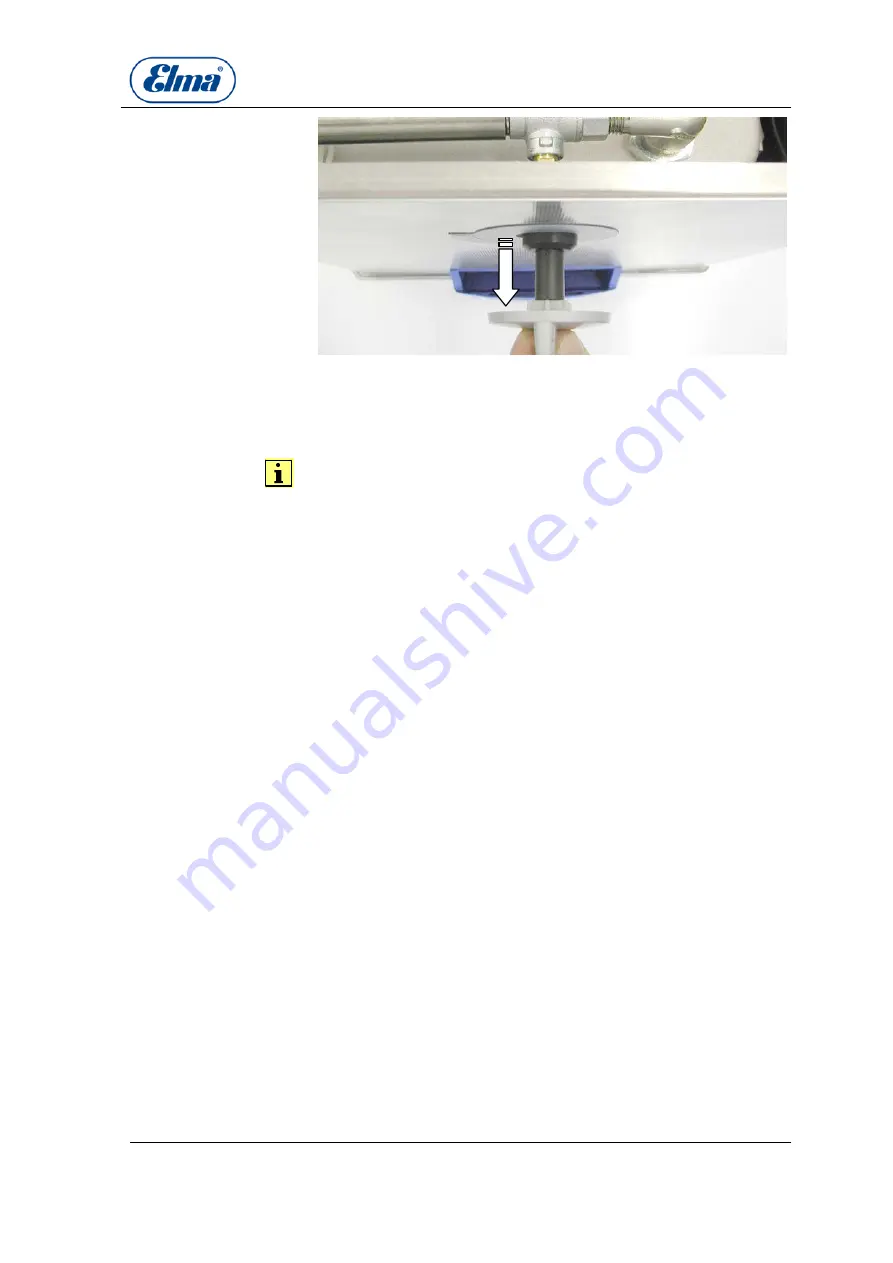
Illustration 16.2. Pull the turning knob with extension out of the unit
(S30 – S300H)
16.2
How to replace the ball valve
The ball valve is screwed onto the drain duct and sealed with
Loctite. For unscrewing the ball valve the ducting around the
thread must be heated, e.g. by means of a hot air fan, to
dissolve the sealing material.
Deposits of dirt particles in the drain system can damage the
Teflon sealing in the ball valve. Damage can also be caused by
aggressive cleaning media.
Ball valve 3/8" (S30 – S300H): 100 1219
Ball valve 1/2" complete (S350R | S450H| S500HM | S900H):
see spare part list
1. Open the unit (
see section 6.
).
2. Remove the turning knob drain duct (
see section 16.1.
).
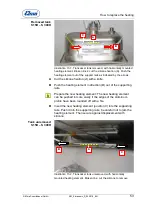
3. Heat up the barrel nipple around the screw connections
(
illustration 16.3.B
) by means of a hot air fan to dissolve the
Loctite sealing
.
4. Unscrew the barrel nipple (
illustration 16.3.C
) with a pipe
wrench anti-clockwise. Arrest the ball valve (
illustration
16.3.A
) with a fork wrench ( 21 mm) during the process in
order to avoid bending the tank floor.
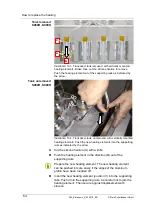
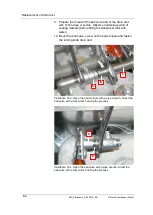
5. Heat up the ball valve around the screw connections
(
illustration 16.4.E
) by means of a hot air fan to dissolve the
Loctite sealing.
6. Unscrew the ball valve with a fork wrench (21 mm) anti-
clockwise. Arrest the 90° duct bow (
illustration 16.4.D
) with
a pipe wrench in order to avoid bending the tank floor.
7. Remove any remains of Loctite from the thread of the drain
duct and clean the thread e.g. with alcohol.
8. Clean the inner thread of the new ball valve and the
ductings e.g. with alcohol.
Cause of breakdown
Elma order no.
How to proceed

