Faulty operating and switch elements
30
SM/Transsonic_LC/1104/D
© Elma GmbH & Co KG
8.4
How to replace the control thermostat T420H-T1060H
The control thermostat is a single-pole switch element. The
correct functioning of the control thermostat can easily be
checked: turn the knob. Around the ambience temperature of
the capillary probe (bath / tank temperature) there must be a
clicking sound in the component (break-over point).
The thermostat operates perfectly only if the cleaning liquid is
evenly heated. Without a thorough mixing of the liquid, e.g. by
operating the ultrasound, there will be zones of different
temperatures in the bath. The difference of temperature
between the surface and the bottom of the tank can be up to
40°C.
The user may get the impression that the thermostat is faulty,
as the temperature of the liquid on the surface exceeds the set
temperature by far.
Due to an insufficient mixing of the liquid and the heat
accumulation around the heating element, heat bubbles will be
produced inside the tank. The noise caused by this process
increases the impression that the liquid is already boiling.
A breakdown of the control thermostat is very rare. In case of a
breakdown of the PTC heating, the short circuit current can
damage the component. The same happens in case of a
mechanical damage to the probe cable. In this case the break-
over point of the component does not work anymore and there
will be no clicking sound when you turn the knob.
(for all mains voltages) 200 000 5127
To replace the component open the bottom plate and carefully
pull off the foil around the thermostat. Proceed as follows:
Cause of breakdown
Elma Order No.
1. Open the unit as described in
section 7
.
How to proceed
2.
Pull off the turning knob as described in
section 8.1
.
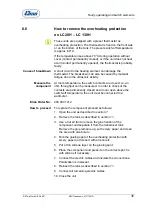
3. Loosen the plug contacts of the electric cables at the control
thermostat (
Illustration 8.7.1.
).
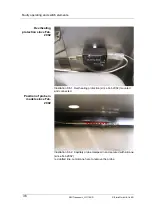
4. Carefully cut the silicone around the capillary probe with a
knife (
Illustration 8.7.2.
).
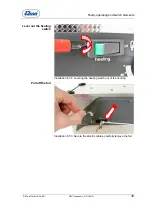
5. Carefully pull off the foil around the fastening screws
(
Illustration 8.7.3.
).
6. Loosen the two fastening screws (
Illustration 8.7.3.A
) at the
front plate and remove the control thermostat.
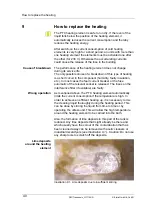
7. Pull out the temperature probe which is fixed to the metal
clamp on the tank outside. If required, cut the silicon
(
Illustration 8.7.2
.).
Summary of Contents for LC130H
Page 2: ......


