11
◆
CAMERA OPERATIONS
Function
Description
①
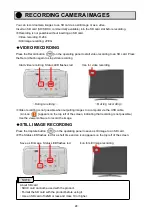
Power
Power ON
The product enters the standby status in 5
– 10 seconds after the DC
power cord is connected to the product.
(
Status LED
:
Red
)
To turn on the product, press the Power button. The Status LED turns
blue or green and the product starts to output images from HDMI Out
port or RGB Out port.
Power OFF
To turn off the product, press the Power button again. The Status LED
turns red and the product returns to the standby status.
※
The Power button is disabled when the power is supplied through
the USB cable only.
②
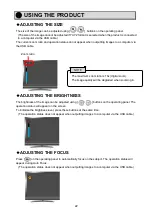
ZOOM-IN
To enlarge the image.
③
ZOOM-OUT
To shrink the image.
④
One-push AF
To focus automatically.
⑤
Brightness
+
To brighten the image.
⑥
Brightness-
To darken the image.
⑤
+
⑥
Initialization of
the brightness
To initialize the brightness level by pressing
⑤
and
⑥
together.
⑦
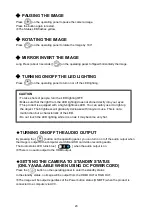
Lighting/MENU
To turn on or off the LED lighting.
Long-press this button to display the OSD menu.
⑧
Image rotation/
Mirror inversion
To rotate the image.
(
0°/180°
)
※
The image will be flipped
horizontally when this button is long pressed (about 3 seconds).
⑨
Freeze
To pause or restart the image.
⑩
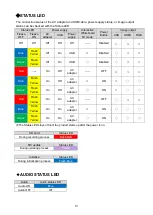
Status LED
To indicate the status of the product.
For details, refer to “
◆
Status LED
”(
⇒
P.13).
⑦
⑧
⑨
⑬
①
⑭
②
④
③
⑩
⑥
⑤
⑪
⑫


