20
◆
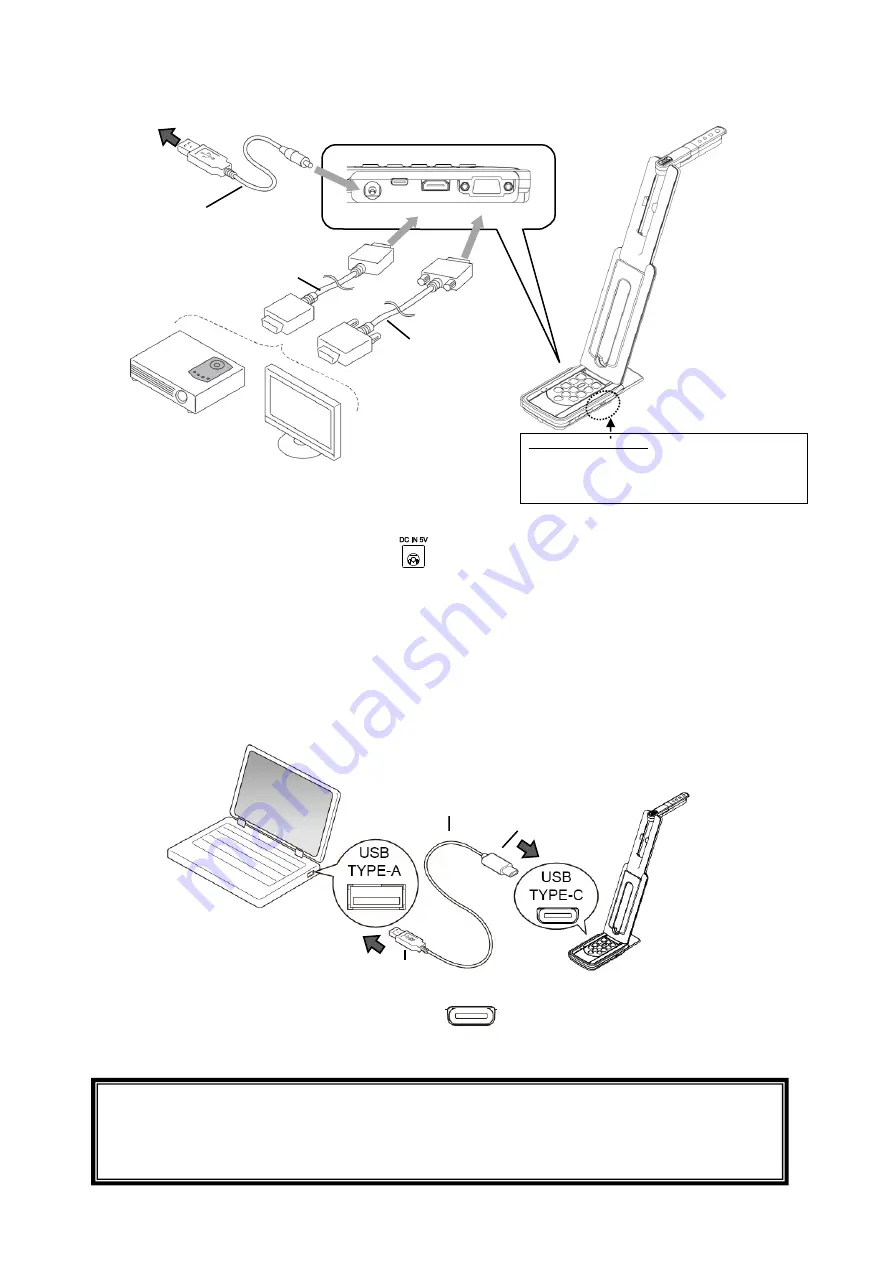
CONNECTING TO A PROJECTOR OR MONITOR
1. Connect the product to a projector or monitor with the HDMI cable or RGB cable.
2. Connect the supplied DC power cord to [
]. Connect the USB plug to the supplied AC adapter.
Then connect it to a wall outlet.
3. The product enters the standby status. (Status LED: Red)
4. Press the Power button to turn on the product. The image output will begin.
◆
CONNECTING TO A COMPUTER
The product is compliant to UVC (video class) standard. You can transfer the image via USB by
connecting the product to a computer using the USB cable (bus power).
1. Connect the Type C plug of the USB cable to [
] in the side of the product.
2. Connect the Type A plug of the USB cable to the USB port of your running computer.
3. Set the resolution as described in P.15 using the UVC app.
Flicker correction
Select the same value as the power
supply frequency of the location where
the product is used. (50Hz/60Hz)
TYPE C plug
TYPE A plug
2
USB cable
1
3
To the USB port
To the AC adapter
USB
DC power cord
HDMI cable
1
2
RGB cable
DC IN 5V HDMI OUT RGB OUT
CAUTION
・
The frame rate may be decreased depending on the computer used.
・
The performance may be unstable depending on the power supply of the computer. In
that case, use the AC adapter to supply the power to the product.


