- 19 -
2
4
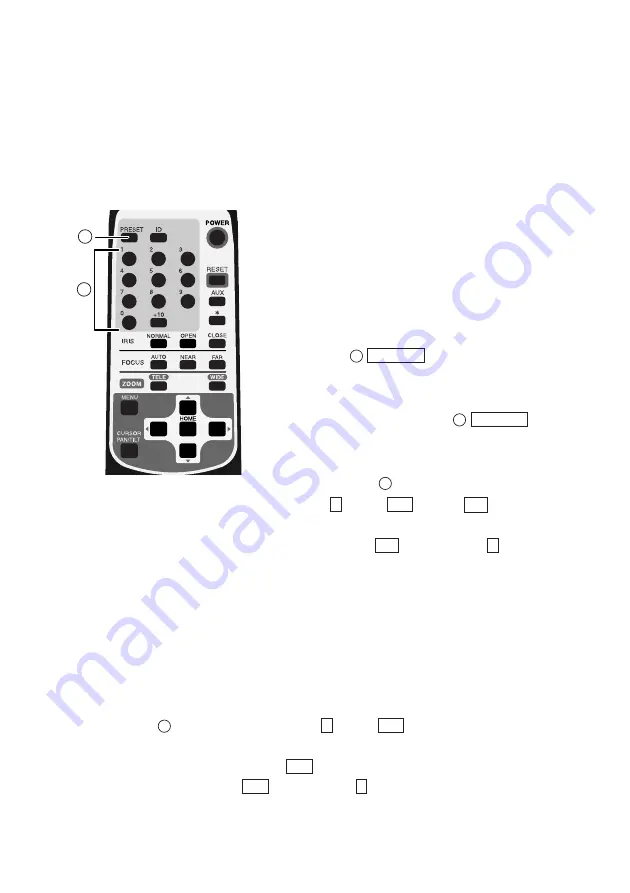
[5] Preset operation
(1) Registration in the Preset Contents
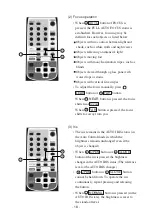
• Set the Camera head direction, the zoom
position, the focus status and the brightness
level. (To register the [CAMERA2] settings
together, set [MAIN CONTROL] –
[CAMERA2 PRESET] to [ON] in the OSD
menu.)
• When
PRESET
button is pressed (once),
the LED (light emitting diode) on the main
unit blinks in green (at intervals of 0.2 sec).
To cancel this step, press
PRESET
button
again.
• Then, input the preset No. within 0 through 16
by pressing
corresponding one or two of
the
0
t
10
buttons. (+
10
button is
used to input numeric of 10 or larger. For
“10,” press +
10
button and then
0
button.)
• Upon pressing, the LED on the main unit goes
out and the registration of the preset contents
is completed. (The preset contents already
registered, if any, are overwritten.)
• The home position can be registered freely to
any position by using the preset No. “0.”
4
2
2
(2) Execution of the Preset
• When
intended one or two of the
0
t
10
buttons is pressed, the
Camera head direction, the zoom position, the focus status and the brightness
level are set as per registered. (+
10
button is used to input numeric of 10 or
larger. For “10,” press +
10
button and then
0
button.)
4
The Camera head direction, the zoom position, the focus status and the brightness level can
be registered. In addition to these items, when [MAIN CONTROL] – [CAMERA2
PRESET] is set to [ON] in the OSD menu, the [CAMERA2] settings can also be registered
together (Refer to P. 24). Up to 17 setting can be registered (Nos. 0 – 16). Even if the main
unit power is turned OFF, the registered contents are preserved.


