158
addition, good designs not only have visual
appeal, but also run well on the embroidery
machine.
Embroidery
•
Determine the fabric that the design will
be sewn on. Fabrics such as crossgrain
and corduroy need special consideration
when punching. Caps also need special
consideration.
•
Determine how the design will run. Know
the sewing path and what is sewn on top
of what. Start with the background.
•
Choose your thread colors and sequence.
•
Try to place Run stitches between regions
so that the Run is covered by stitches that
come later.
•
If a punching tool is enabled, you can
press the Spacebar on your keyboard to
toggle between the Run
tool and the
enabled punching tool. The user can
digitize a run segment and press the
Spacebar again to toggle back to the
previously used punching tool.
Other items to consider
•
Are there special customer
specifications?
•
Does an outline need to be drawn around
the Fill?
•
Does the width of the columns need to be
wider?
•
Is the lettering minimum size or larger?
A successful digitizer
•
Allows for a "learning curve". You may
need to continue having difficult designs
digitized by an outside source—this is
normal.
•
Spends time practicing.
•
Has realistic expectations.
•
Views designs as basic shapes.
Manual and Run
Stitches
Creating Bean stitches
Use the Run
tool to create Bean stitches.
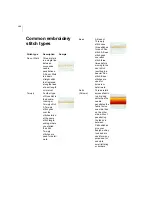
A Bean stitch is also known as a Three Ply
stitch and is a running stitch where the
machine sews over each stitch three times
before it moves to the next stitch. The result
is a heavy running stitch.
To change the properties of your
segment, click the Segment Settings
tool on the ribbon or double-click the
segment. You see the Segment Settings
property pages. Click the appropriate
property page and make the setting
changes.
Summary of Contents for XPRESSIVE 2
Page 1: ...Xpressive II User sGuide...
Page 10: ...8 Glossary 195 Index 221...
Page 22: ...20...
Page 48: ...46...
Page 62: ...60...
Page 148: ...146...
Page 184: ...182...
Page 190: ...188...
Page 196: ...194...
Page 230: ...228...


