ELNA XPRESSIVE II
6
3
U
ser’s Guide
Important
•
Xpressive only displays text and
characters found within font files. If you
enter text containing letters or characters
not found in the selected font file, only the
text found in the font file will be displayed
in the design workspace.
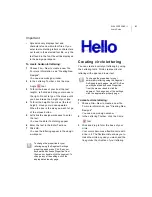
To create horizontal lettering:
1
Choose File—New to create a new file.
For more information, see "Creating New
Designs".
You see a new design window.
2
In the Lettering Toolbar, click the Line
Angle
tool.
3
To form the base of your box (the text
length), left-click and drag your mouse to
the right. Do not let go of the mouse until
you have drawn the height of your box.
4
To form the height of your box (the text
height), move your mouse upwards.
When the box is the size you want, let go
of the mouse button.
5
Left-click the design workspace to enter
the text.
You see the Enter Text dialog appear.
6
Enter the text in the Enter Text box.
7
Click OK.
You see the lettering appear in the design
workspace.
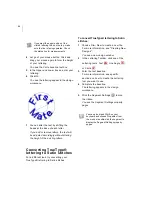
Creating circle lettering
You can create a variety of lettering by using
the Lettering tools. Circle creates circular
lettering with upper and lower text.
To create circle lettering:
1
Choose File—New to create a new file.
For more information, see "Creating New
Designs".
You see a new design window.
2
In the Lettering Toolbar, click the Circle
tool.
3
Click and drag to form the base of your
circle.
Your cursor becomes a flexible circle with
a line in it. The flexible circle allows you to
make the circle any size you want, and the
line guides the direction of your lettering.
To change the properties for your
lettering using the Segment Settings
property pages, press Ctrl+E on your
keyboard and choose Properties from
the menu or double-click the segment. To
change any of the settings, click the
appropriate property page.
To change the properties for your
embroidery lettering using the Segment
Settings property pages, press Ctrl+E on
your keyboard and choose Properties
from the menu or double-click the
segment. To change any of the settings,
click the appropriate property page.
Summary of Contents for XPRESSIVE 2
Page 1: ...Xpressive II User sGuide...
Page 10: ...8 Glossary 195 Index 221...
Page 22: ...20...
Page 48: ...46...
Page 62: ...60...
Page 148: ...146...
Page 184: ...182...
Page 190: ...188...
Page 196: ...194...
Page 230: ...228...

