44
44
Chapter 4 - Component Installation
Chapter 4 - Component Installation
External PC-Bus Controller
External PC-Bus Controller
Using an external PC-Bus controller may be the simplest overall integration
Using an external PC-Bus controller may be the simplest overall integration
process.
process.
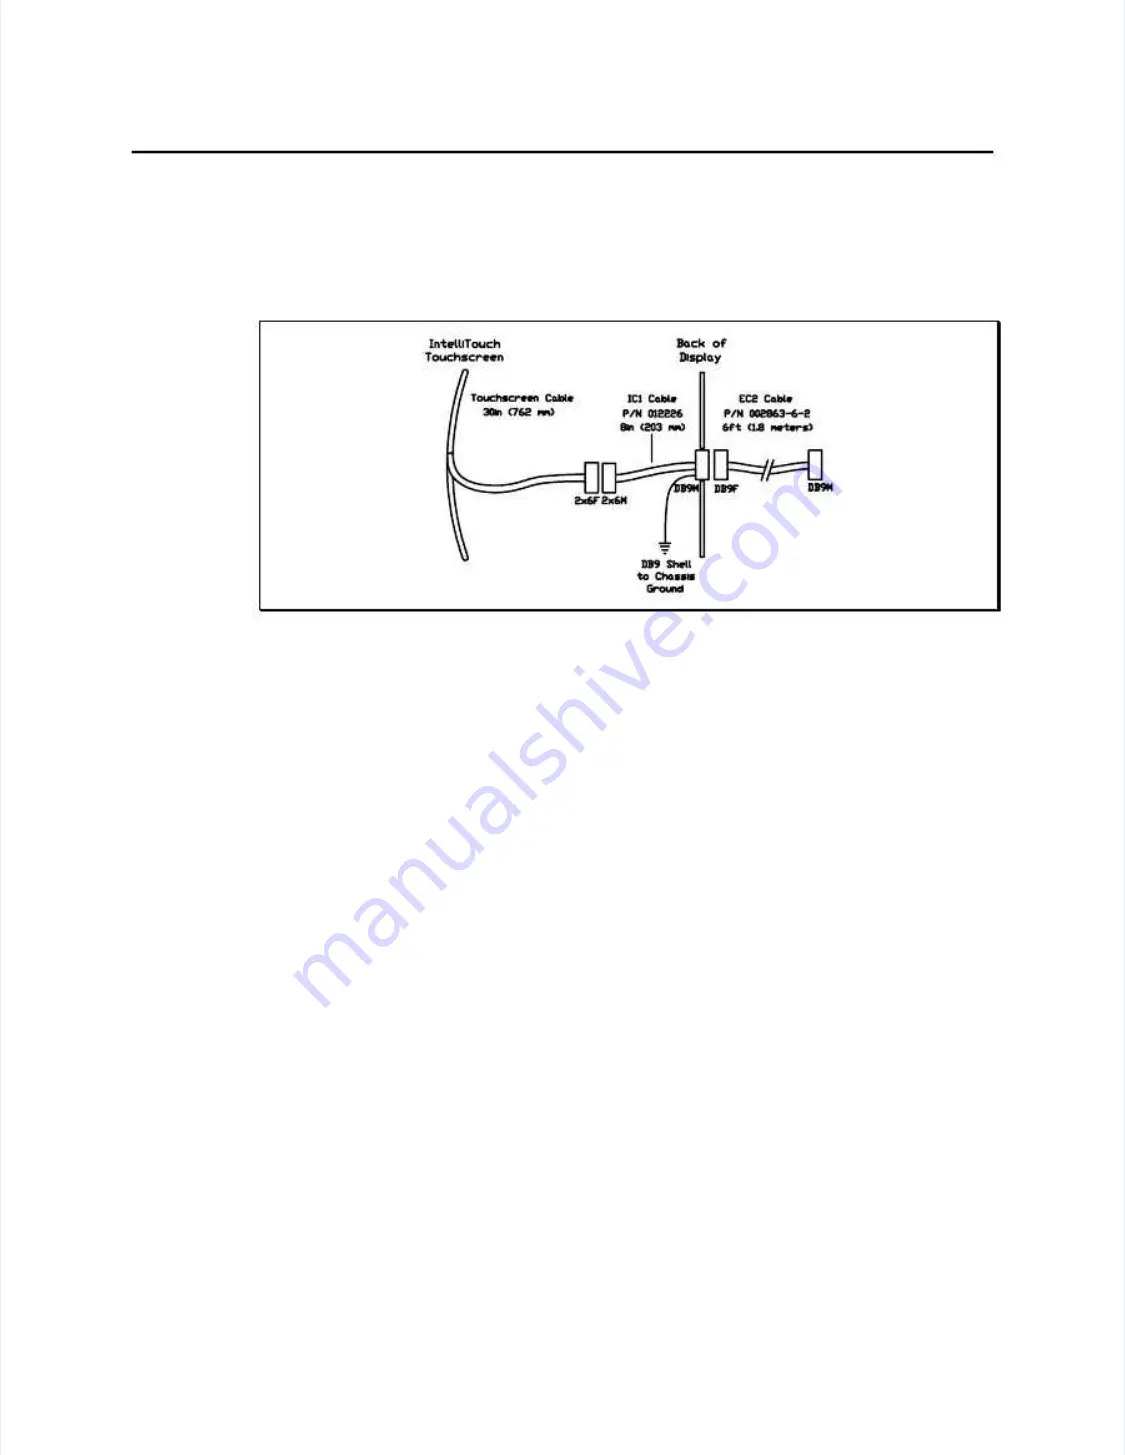
Figure 4-4. Touchscreen Cabling System for External PC-Bus Controllers
Figure 4-4. Touchscreen Cabling System for External PC-Bus Controllers
An 8-inch (203 mm) internal interface cable (IC1, P/N 012226) that connects the
An 8-inch (203 mm) internal interface cable (IC1, P/N 012226) that connects the
touchscreen to the display case is included in the touchscreen kits
touchscreen to the display case is included in the touchscreen kits
(P/N 0028XXA-XXX-K2). The termination of the IC1 cable is a DB9M
(P/N 0028XXA-XXX-K2). The termination of the IC1 cable is a DB9M
connector. An external 6-foot (1.8 meter) cable (EC2, P/N 002863-6-2) included
connector. An external 6-foot (1.8 meter) cable (EC2, P/N 002863-6-2) included
in the controller kits extends the connection to the controller. (See Figure 4-4.)
in the controller kits extends the connection to the controller. (See Figure 4-4.)
Mechanically, there may be several options for mounting the connector on the
Mechanically, there may be several options for mounting the connector on the
display case:
display case:
••
Mounting the IC1 cable to a chassis member that is exposed to the display
Mounting the IC1 cable to a chassis member that is exposed to the display
exterior. This requires a DB9 hole punch to mount the connector neatly, but
exterior. This requires a DB9 hole punch to mount the connector neatly, but
makes reassembly of the back of the case very easy, and is usually the best
makes reassembly of the back of the case very easy, and is usually the best
functional and cosmetic solution.
functional and cosmetic solution.
••
Mounting the IC1 cable to a concealed chassis member, with a hole in the
Mounting the IC1 cable to a concealed chassis member, with a hole in the
exterior of the case (usually plastic) to provide access to the connector. This
exterior of the case (usually plastic) to provide access to the connector. This
technique also requires a metal punch to mount the DB9 connector, but the
technique also requires a metal punch to mount the DB9 connector, but the
plastic case hole can often be routed, nibbled, or punched with simple tools,
plastic case hole can often be routed, nibbled, or punched with simple tools,
and usually provides a neat appearance. This is also an excellent functional
and usually provides a neat appearance. This is also an excellent functional
solution as the back case is again very simple to reassemble.
solution as the back case is again very simple to reassemble.
Summary of Contents for IntelliTouch Ultra
Page 1: ...IntelliTouch IntelliTouch Ultra Ultra Product Manual Product Manual Revision 3 2 Revision 3 2...
Page 5: ...iv iv...
Page 11: ...x x...
Page 17: ...6 6 Chapter 1 Introduction Chapter 1 Introduction...
Page 35: ...24 24 Chapter 3 Touch Monitor Installation Chapter 3 Touch Monitor Installation...
Page 61: ...50 50 Chapter 4 Component Installation Chapter 4 Component Installation...


