background image


A7


Internet


Tablet


User


Manual


Page


5


Chapter 2 – Getting Started


2.1   The SIM Card Slot 
2.2   Charging the Battery 
2.3   Checking the Battery Status 
2.4   Connecting USB Devices 
2.5   Inserting a Micro SD card 
2.6   Connecting Earphones 
2.7   Using the Mouse 
2.8   Inputting Information 
2.9   The Power Switch 


2.1 The SIM Card Slot 


The A7 Tablet comes with a SIM Card Slot for future functionality, but the 
unit does not currently support any SIM functions.  


2.2 Charging the Battery


The battery that comes with your Tablet is partially charged. It is 
recommended that you use your Tablet until the battery is completely 
discharged before charging the battery the first time. Batteries perform 
best after being fully charged. 


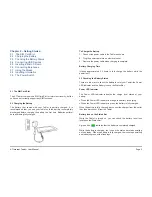
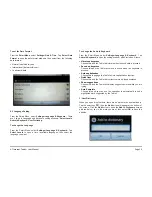
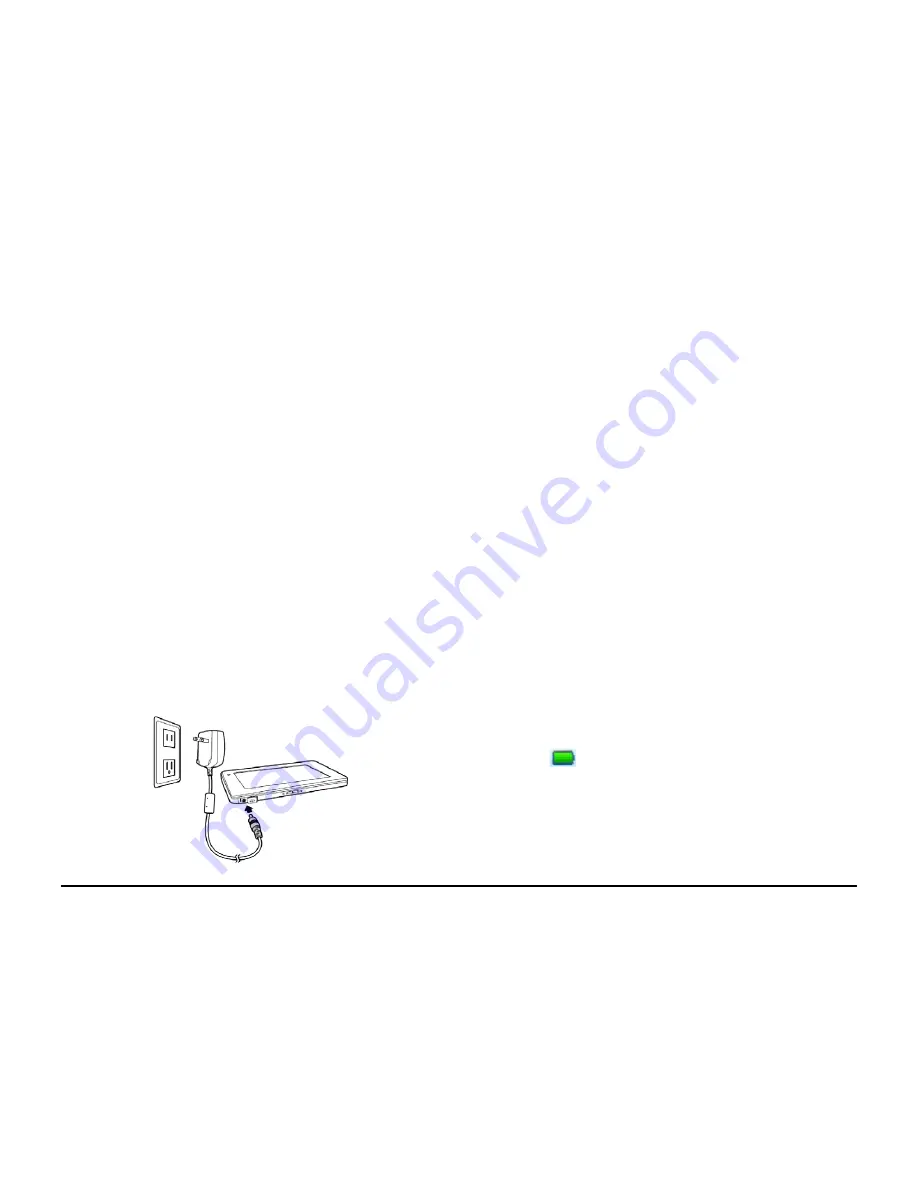
To Charge the Battery


1. 

Connect the power cable to the Tablet as shown.


2. 

Plug the power cable into an electrical outlet.


3.  Remove the power cable when charging is complete. 


Battery Charging Time


It takes approximately 3.5 hours to fully charge the battery while the 
power is off. 


2.3 Checking the Battery Status


There are two ways to check the battery level of your Tablet: the Power 
LED Indicator and the Battery Icon on the Status Bar.


Power LED Indicator


The Power LED Indicator indicates the charge level status of your 
battery:


  When the Power LED indicator is orange, the battery is charging.  

  When the Power LED indicator is green, the battery is fully charged.  

When the battery is fully charged, disconnect the charger from the outlet 
first, then disconnect it from the Tablet. 

 
Battery Icon on the Status Bar


While the Tablet is turned on, you can check the battery level icon 
located on the Status Bar.


A green icon          indicates that the battery is completely charged.


While the battery is charging, the icon on the status bar starts scrolling 
on the display. When the battery is fully charged, the icon stops scrolling 
and indicates green with a flash logo. 


Summary of Contents for A7 Internet Tablet

Page 1: ...INTERNET TABLET User Manual version 1 1 www elocitynow com ...

Page 2: ...ed Use only the AC adapter that is approved for use with this Tablet Use of another type of adapter may risk fire or explosion Before you connect the Tablet to a power source ensure that the voltage rating of the AC adapter matches that of the available power source 220 V 50 Hz in China 115 V 60 Hz in most of North and South America and some Far Eastern countries such as South Korea and Taiwan 100...

Page 3: ... NOTICE The Directive 2002 96 EC on Waste Electrical and Electronic Equipment WEEE which entered into force on 13th February 2003 is to ensure that WEEE are recycled using best available treatment recovery and recycling techniques in order to protect human health and natural resources Recycling disposal Do not dispose of your product which has the WEEE logo shown as right on it or on its box in th...

Page 4: ... between the equipment and receiver Connect the equipment into an outlet on a circuit different from that to which the receiver is connected Consult the dealer or an experienced radio TV technician for help This Tablet complies with Part 15 of the FCC Rules Operation is subject to the following two conditions 1 This Tablet may not cause harmful interference and 2 This Tablet must accept any interf...

Page 5: ... and built in webcam Email exchange that allows you to keep in touch with personal and business contacts Media Player for music and movies Built in camera to take digital pictures and record video clips Powerful tools and office programs for your business needs USB connections for connecting external devices LEFT RIGHT Speaker Outputs audio Power Button Press to turn on off power USB Port Use to c...

Page 6: ... 3 Remove the power cable when charging is complete Battery Charging Time It takes approximately 3 5 hours to fully charge the battery while the power is off 2 3 Checking the Battery Status There are two ways to check the battery level of your Tablet the Power LED Indicator and the Battery Icon on the Status Bar Power LED Indicator The Power LED Indicator indicates the charge level status of your ...

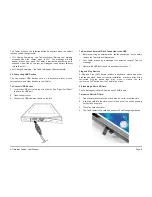
Page 7: ...SB cable as shown on the left To Remove an External Drive Connected to the USB 1 Before removing an external drive tap the connection icon to safely remove the Tablet to avoid data loss 2 Your Tablet will pop up a message to confirm the removal Tap the message 3 Remove the USB device and close the port cover door Plug and Play Devices A Plug and Play PnP device includes a keyboard mouse and other ...

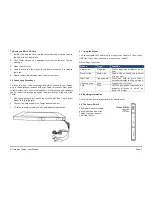
Page 8: ...f the Tablet See Top Bottom Panel to locate the jack 2 Connect the earphones to the Tablet as shown below 3 To listen to audio outputs open an entertainment application 2 7 Using the Mouse You can navigate the Tablet with your finger see Chapter 2 Connecting USB Devices on how to connect a mouse to your Tablet Mouse Finger Functions Mouse Finger Function Single click Single tap Click or single tap...

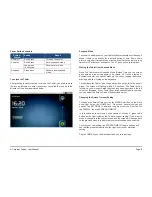
Page 9: ...nit by tapping the screen moving a mouse or typing on the keyboard To reactivate the Tablet give the power button on the left side a short press The screen will light up within 2 3 seconds The Tablet will be locked so you will need to slide the green lock up as described in the left column of this page If your Tablet goes into Suspend Mode too quickly you can adjust the Screen Timeout as described...

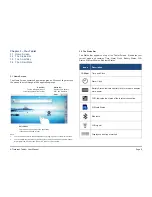
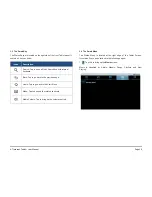
Page 10: ...then move the icon to Recycle Bin 3 2 The Status Bar The Status Bar appears on top of the Tablet Screen It indicates your current mode and contains Time Alarm Clock Battery Status WiFi Status SIM card Status Bluetooth Status Icons Description 12 00pm Time and Clock Alarm Clock Battery Status Indicates battery level more bars denotes more power WiFi Indicates the status of the internet connection S...

Page 11: ...eyboard Back Tap to go back to the previous page Home Tap to go back to the Start Menu Menu Tap to bring up the related shortcuts Media Volume Tap to bring up the volume controls 3 4 The Smart Menu The Status Menu is located at the right edge of the Tablet Screen It contains 5 keys as described in the following pages 1 Tap this to bring up the Music screen Music is classified by Artists Albums Son...

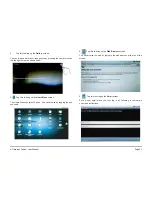
Page 12: ...wn below 3 Tap this to bring up the Home Menu screen The Home Menu contains 18 icons You can browse by tapping the icon you need 4 Tap this to bring up the Web Browser screen You can browse the web by typing in the web address at the top of the screen 5 Tap this to bring up the Email screen Set up your email when you first log in by following a few simple on screen instructions ...

Page 13: ...t to save changes and exit or click Cancel to exit the application if you don t want to change the setting To set the Time Zone From the Smart Menu select Settings Date Time Select and open the Select Time Zone setting window Select time zone and click Set to save changes To set the Time Format From the Smart Menu select Settings Date Time Tap the Use 24 Hour Format menu to change the time format ...

Page 14: ...d Keyboard to open the setting window which includes 6 items Vibrate on keypress Choose this and the Tablet will vibrate when the keyboard is pressed Sound on keypress Choose this and the Tablet will make a sound when the keyboard is pressed Auto capitalization Choose this to engage the Tablet s Auto capitalization function Quick fixes Choose this and the Tablet will correct commonly typed mistake...

Page 15: ...ords as you type by setting the Visible passwords Credential Storage Your Tablet allows applications to access secure certificates and other credentials by setting Use Secure Credentials You can install encrypted certificates from an SD card and set or change the credential storage password You can clear credential storage of all contents and reset its password by selecting Clear Storage 4 5 Appli...

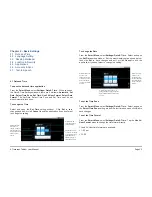
Page 16: ...can English British English French German Italian and Spanish Always use my settings Select this and the Tablet will make your settings the new default settings overriding any application settings Chapter 5 Making a Connection 5 1 Connecting to the Internet via WiFi 5 2 Bluetooth 5 3 Flight Mode 5 1 Connecting to the Internet via WiFi The Wireless networks application makes the Internet connection...

Page 17: ... the password and select Done 4 After a WiFi connection is made the Wireless signal will appear on the Status Bar 5 2 Bluetooth Bluetooth is a short range wireless communications technology With Bluetooth capabilities devices can exchange information within a distance of about 10 meters Use Bluetooth to Transfer files Share Internet access with the other computer Connect to Internet through a mobi...

Page 18: ...he Web 6 1 Accessing Websites You use the internet for so many things checking email finding driving directions getting news and instant messaging among others Now you can bring the internet with you almost anywhere you go Use your Tablet to make internet connections and the web browser opens the entire online world for you To access the internet your Tablet must be setup properly see Chapter 5 Ma...

Page 19: ...ap Add to open the Add bookmark window 3 Key in Name and Location 4 Click OK to finish Adding or Click Cancel to exit the Adding window To edit a bookmarked web page 1 Tap to open the bookmark window 2 Press the bookmark you want to edit holding it for about 2 seconds until a popup windows opens ...

Page 20: ...pped with Instant Messenger E mail for communication Before you start online communication your Tablet must have an active internet connection see Chapter 5 Connecting to the Interenet via WiFi for detailed instructions on how to connect to the internet 7 1 Instant Messenger Instant messenger allows you to send and receive instant messages online To open Messenger From Mail menu select Messaging 1...

Page 21: ...pear You can enter Email by Internet also Using Email After setting up your email accounts you can start sending and receiving emails There are some folders in the left of your email windows You could add or delete some favorite folders by press and move the folders Some Folders Inbox Received mails are sent to this folder Sent Sent messages are saved in this folder Drafts Composed mails that are ...

Page 22: ...The Sound Recorder allows you to record your voice To record your sound 1 From the Main Menu select Sound Recorder 2 Tap to start recording a voice clip 3 Tap to stop recording The Sound recorder interface Write email Tap to open the Writing Send Save Discard Tap to discard the email Recipient type or add from your contact list Subject Content ...

Page 23: ...and video clips To activate the Camera From the Main Menu select Camera To Take a Picture When you open the Camera application the camera is set to photo capture by default 1 Focus your camera on the image you want to capture 2 Tap and hear a click as the picture is captured 3 Tap the photo There are four icons Delete Share Set As Done You can view video clips in the Gallery and browse the photo b...

Page 24: ...ok 8 Once you start reading a book it will show up on the home shelf in the Current Reads list 9 When viewing your collection of books just start typing characters using the keyboard to filter the list 10 While reading a book you can navigate forward and backward using either filing or tap gestures this can be reconfigured in the settings 11 When you stop reading the application will remember whic...

Page 25: ...Reading List Download Books Before you down load books online be sure your network connection is available Choose your book and go it s that easy Chapter 9 Tools 9 1 OI File Manager 9 2 Calculator 9 3 Alarm Clock 9 4 SD Card Manager Tablet Storage 9 1 OI File Manager The OI File Manager lets you browse and manage the contents of your Tablet 9 2 Calculator You can do basic calculations using the Ca...

Page 26: ... interface There are 5 clock face choices to choose from The Alarm Clock display faces 9 4 SD Card Manager Tablet Storage Check and manage micro SD card contents through the SD card Tablet storage To access SD Card Tablet storage From the Main Menu select Setting SD Card Tablet storage Note Format will delete all data in the Tablet and cannot be restored ...

Page 27: ...ion Check system information such as storage status Model number Kernel version through the system info application 10 2 Volume Display Setting By pressing the volume buttons See Chapter 1 Top Bottom Panel for the location of the Volume buttons Tap and slide the sliders to adjust the Volume You can set system sound and display in Sound display settings windows Sound settings includes Silent mode M...

Page 28: ...ng time Turn off Wi Fi when not using it or where it is not available to save power 10 4 S3 System You can set your Tablet sleep to save power when it isn t working by entering S3 system To enter S3 system Tap the power button on the left panel The Tablet will enter S3 system with power LED flickering To Exit S3 system Tap the power button on the left panel The Tablet will exit S3 system and enter...

Reviews: