background image


29 

Installation and Commissioning 


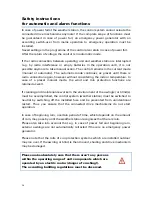
Attention, mains voltage! The legal national regulations must  

be complied with. 

 
Installation, inspection, commissioning and troubleshooting of the control system 
must only be carried out by a competent electrician. Disconnect all lines to be 
assembled, and take safety precautions against accidental switch-on. 
 
The control system is exclusively intended for appropriate use. With each 
inappropriate change or non-observance of the instructions for use, any warranty 
or guarantee claim will be void. 
After unpacking the control, check immediately for any mechanical damages. In 
case of transport damage, this must immediately notified to the supplier. 
 

If damaged, the control system must not be put into  

operation.  

 
If it must be assumed that safe operation of the control or of the connected drives 
is no longer guaranteed, the conservatory control must be put out of operation 
and be secured against accidental operation. 
 
The control must only be operated as stationary system, i.e. only in a fitted state 
and after completion of all installation and start-up works, and only in the 
environment intended for this purpose. 
 
Elsner Elektronik does not assume any liability for changes in standards after 
publication of this instruction manual. 

Summary of Contents for Solexa 230V

Page 1: ...Installation and Adjustment Item numbers 10110 10130 10131 Solexa 230V Shading Control EN ...

Page 2: ...13 E Outdoor temperature block 14 F Wind alarm 15 Table for wind speeds 16 G Rain alarm 16 H Storage of automatic settings 17 Basic settings 18 1 Radio connection to the weather station 20 Delete all radio connections of the weather station 21 2 Rotational direction of the motor 21 3 Operating direction 22 4 Operating command in case of wind or rain alarm 23 5 Sending of meteorological and automat...

Page 3: ... 39 Operating unit 39 Insert batteries operating unit 39 Error messages 40 Query service data 42 Factory settings 42 Abbreviations 42 Technical data 42 Operating unit 42 Weather station 43 Connection diagram for weather station 44 View of rear side and drill hole plan for the weather station 45 View of rear side and drill hole plan for the operating unit 46 Connection samples for several drive mec...

Page 4: ...be arried out by a competent electrician Proceed as follows when commissioning the Solexa control system 1 Installation and connection see chapter Installation and commissioning 2 Basic setting see chapter Basic settings 3 Setting of the automatic see chapter Setting of automatic Options for connection and control A drive mechanism for awnings or blinds may be connected to the Solexa control syste...

Page 5: ...ith extension and retraction delay Extension to a programmed position for blinds with slats with additional setting of the slat angle Blocking of shading until a selectable indoor temperature is reached heat gain only in automatic mode Retraction of shading below a selectable outdoor temperature frost protection only in automatic mode Retraction of shading when a selectable wind speed is reached w...

Page 6: ...of the control system displays the current outdoor temperature upper line and the indoor temperature lower line as well as the function mode automatic or manual the battery load and the current alarm messages for rain or wind The meteorological data are updated once per minute and in case of a keystroke Outdoor temperature Indoor temperature Battery symbol indicates the charge status of the batter...

Page 7: ...rotection function may be set up or turned off in the automatic settings e g for internal awnings Display of lightness and wind speed Press the key during temperature display once for a short moment and current lightness in kilolux kLux and wind speed in meters per second m sec are displayed The values are updated every 4 seconds Note During the first approx 90 seconds after the return of voltage ...

Page 8: ...hes between automatic mode display and manual mode display After the manual operation with the keys or the control system is in manual mode The automatic functions then are deactivated there is no control in terms of lightness or temperature With key the control is reset to automatic display After switching from manual to automatic mode the drive remains in the position set manually If the conditi...

Page 9: ... drive mechanisms in system XS During this display use the keys and in order to centrally operate all drive mechanisms Settings default setting automatic With the SET key and by pressing shortly you access the display of lightness and wind speed By pressing long you access the setting menu of the automatic and the basic setting For this purpose please read chapters Setting of automatic or Basic se...

Page 10: ...xtension delay C Retraction delay D Indoor temperature block E Outdoor temperature block F Wind alarm G Rain alarm H Storage This is how you access the automatic settings In meteorological data display press the key for at least 3 seconds in order to access the automatic setting You are in the automatic settings as soon as the symbols and are shown left in the display You can see the first paramet...

Page 11: ...matic settings at any time by pressing the key The accomplished changes of the values are not saved in this case If you do not press any key in the automatic settings for 5 minutes the display automatically changes to temperature display Accomplished settings are not saved either ...

Page 12: ...for lightness is 40 kLux Adjust the value with higher and lower or select off in order to switch off the function You reach the setting by pressing once more when the display shows 1 kLux If you select there is no control in terms of lightness Therefore the following automatic parameters chapter B to E are skipped In this case the shading may be operated manually and is protected from wind and rai...

Page 13: ...ontinuously higher than the value which you have set topic A of the automatic settings for the shading to extend Thus the shading quickly reacts to the sun Adjust the value with higher and lower Then press in order to access the setting of the next parameter C Retraction delay After the setting of the extension delay now enter the delay time for the retraction of the shading The presetting for the...

Page 14: ...if the value is exceeded the shading extends in case of sun The indoor temperature is only applied for the automatic mode of the control system The manual operation of the shading is still possible The delay hysteresis of the indoor temperature block is 3 C That means the shading is blocked only after the indoor temperature has dropped below the set value more than 3 C The presetting for the indoo...

Page 15: ...delay hysteresis of the outdoor temperature block is 2 C That means the shading is released only after the outdoor temperature has extended the set value more than 2 C If your shading also operates at low temperatures or if it is installed indoor please deactivate the outdoor temperature block display Outdoor as well as indoor temperature blocks only apply for the automatic mode Manual operation i...

Page 16: ... 5 minutes the stop time starts from the beginning The following table see next chapter serves as indication in order to set the wind value Depending on the position of the winter garden and the assembly position of the weather station different wind values may be optimal for the protection of the shading Observe the behaviour of the awning or blind in case of wind and correct the wind value accor...

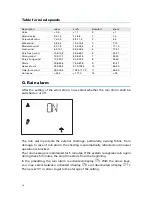
Page 17: ... 28 5 32 6 102 3 117 3 11 56 63 Hurricane 32 6 117 3 12 63 G Rain alarm After the setting of the wind alarm now select whether the rain alarm shall be switched on or off The rain alarm protects the exterior shadings particularly awning fabric from damage In case of rain alarm the shading is automatically retracted and manual operation is blocked The rain message is maintained for 5 minutes If the ...

Page 18: ...f the entry of automatic settings the symbol save asks whether the accomplished setting shall be saved Press the key in order to save your entered data and to access the meteorological data display With you quit the automatic settings without saving ...

Page 19: ...rological and automatic data 6 Shading position 7 Save This is how you access the basic settings In meteorological data display press the key for at least 3 seconds in order to access the automatic setting You are in the automatic settings as soon as the symbols and are indicated left in the display Then press again for at least 3 seconds in order to access the basic settings You are in the basic ...

Page 20: ...ave the basic settings at any time by pressing the key The accomplished changes are not saved in this case If you do not press any key in the basic settings for 5 minutes the display automatically changes to temperature display Accomplished settings are not saved either ...

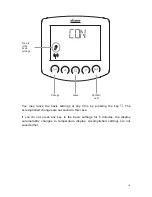
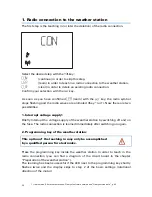
Page 21: ...interrupt the voltage supply of the weather station by switching off and on the fuse The radio connection is learned immediately after switching on again 2 Programming key of the weather station This option of the teaching in may only be accomplished by a qualified person for electronics Press the programming key inside the weather station in order to teach in the radio connection you can find a d...

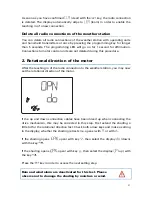
Page 22: ...n of the motor After the teaching in of the radio connection to the weather station you may now set the rotational direction of the motor If the up and down connection cables have been mixed up when connecting the drive mechanism this may be corrected in this step First extend the shading a little bit for the rotational direction test Check both arrow keys and make a setting in the display whether...

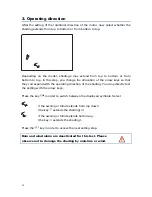
Page 23: ...s so that they correspond with the operating direction of the shading You may directly test the setting with the arrow keys Press the key in order to switch between the displayed symbols Select if the awning or blind extends from top down the key extends the shading or if the awning or blind extends bottom up the key extends the shading Press the key in order to access the next setting step Rain a...

Page 24: ...sage exists The permanent operating command is necessary if Solexa is used as control centre for wired motor drive units e g IMSG 230 which control several drive mechanisms or when combined with a Lixa patio roof control Press the key in order to switch between the displays Off and On Select if in case of alarm the operating command shall stop after 4 minutes setting for conventional awning or bli...

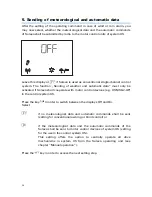
Page 25: ... Solexa shall cooperate with motor control devices e g XS MSG2 AP in the control system XS Press the key in order to switch between the displays Off and On Select if no meteorological data and automatic commands shall be sent setting for conventional awning or blind control or if the meteorological data and the automatic commands of the Solexa shall be sent to motor control devices of system XS se...

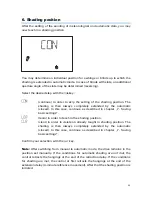
Page 26: ...as described in chapter 7 Saving basic settings learn in order to teach in the shading position clear in order to delete an already taught in shading position The shading is then always completely extended by the automatic closed In this case continue as described in chapter 7 Saving basic settings Confirm your selection with the key Note After switching from manual to automatic mode the drive rem...

Page 27: ... the awning or blind so that there is no shading Press the key in order to access the next setting step 6 2 Setting of the desired position The command close appears Now extend the shading as far as the automatic must extend it later in case of sunshine Press the key in order to access the next setting step ...

Page 28: ...sition 7 Saving of basic settings At the end of basic settings the symbol save asks whether the accomplished setting shall be saved Press the key in order to save your entered data and to access the meteorological data display With you quit the basic settings without saving After the basic setting the values for the automatic functions may be set In case of first commissioning please check the fun...

Page 29: ...a preset manual mode the wind and rain protection functions are retained as well If cleaning and maintenance works in the environment of the awing s or blind s must be accomplished the control system weather station must be switched to neutral by switching off the installed fuse and be prevented from unintentional restart Thus you ensure that the connected drive mechanisms do not start operation I...

Page 30: ...ter unpacking the control check immediately for any mechanical damages In case of transport damage this must immediately notified to the supplier If damaged the control system must not be put into operation If it must be assumed that safe operation of the control or of the connected drives is no longer guaranteed the conservatory control must be put out of operation and be secured against accident...

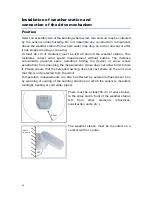
Page 31: ...e concurrently prevents spray raindrops hitting the device or snow snow penetration from impairing the measurement It also does not allow birds to bite it Please ensure that the extended awning does not cast shade on the unit and that this is not protected from the wind Temperature measurements can also be affected by external influences such as by warming or cooling of the building structure on w...

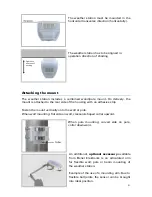
Page 32: ...e housing with an adhesive strip Fasten the mount vertically onto the wall or pole When wall mounting flat side on wall crescent shaped collar upward When pole mounting curved side on pole collar downward An additional optional accessory available from Elsner Elektronik is an articulated arm for flexible wall pole or beam mounting of the weather station Example of the use of a mounting arm Due to ...

Page 33: ...ample for the application of the hinge arm mounting Pole mounting with mounting brackets Preparation of the weather station The cover of the weather station with rain sensor is engaged at the lower rim to the right and to the left see fig Remove the cover from the weather station Be careful not to break away the cable connection between the circuit board in the bottom part and the rain sensor in t...

Page 34: ... operation this LED indicates the receipt of a valid data package by a short flashing 8 Programming key for the teaching in of the radio connection to the operating unit Connection of voltage supply and drive mechanism The drive mechanism of the awning or blind is connected to the weather station Several drive mechanisms may be connected in parallel In case of the parallel connection of motors ple...

Page 35: ...on the weather station board To teach the wireless connection to the control unit please see Chapter Commissioning and 1st Wireless Connection to the Weather Station in the basic settings Close the housing by putting the cover over the bottom part The cover must engage at the right and at the left with a clearly noticeable click Check whether cover and bottom are correctly engaged The figure illus...

Page 36: ... operating unit For the same reason the operating unit should not be installed above the heater Please make also sure that there is no direct air supply coming from windows or doors which would distort measured values The operating unit may be installed and operated in dry interior rooms only Relative air humidity may not exceed 80 Avoid condensation Notes on radio installations When planning faci...

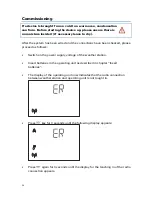
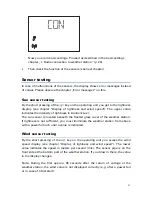
Page 37: ...ked please proceed as follows Switch on the power supply voltage of the weather station Insert batteries in the operating unit as described in chapter Insert batteries The display of the operating unit now indicates that the radio connection between weather station and operating unit is not taught in Press key for 3 seconds until the following display appears Press again for 3 seconds until the di...

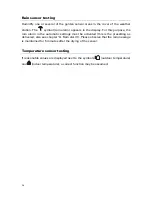
Page 38: ...lux kLux The sun sensor is located beneath the frosted glass cover of the weather station If lightness is not sufficient you must illuminate the weather station from above with a powerful torch until a value is indicated Wind sensor testing By the short pressing of the key on the operating unit you access the wind speed display see chapter Display of lightness and wind speed The lower value indica...

Page 39: ... rain alarm in the automatic settings must be activated this is the presetting as delivered also see chapter G Rain alarm Please observe that the rain message is maintained for 5 minutes after the drying of the sensor Temperature sensor testing If reasonable values are displayed next to the symbols outdoor temperature and indoor temperature a correct function may be assumed ...

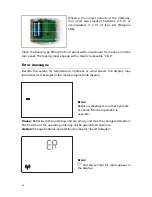
Page 40: ...ill be stored for approx 10 years Batteries are not necessary for this purpose For safety reasons the weather station should be disconnected from the mains current e g deactivate remove fuse if you want to accomplish maintenance and cleaning works Operating unit Clean the display with a wet cloth if necessary Insert batteries operating unit The battery compartment is inside the housing Open the op...

Page 41: ...r messages Despite the values for temperature lightness or wind speed the display may indicate error messages in the meteorological data display Error Battery is displayed no other symbols or values Manual operation is possible Cause Batteries in the operating unit are empty and must be changed Attention The function of the operating unit may not be guaranteed anymore Action Change batteries as de...

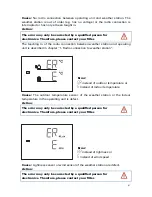
Page 42: ...described in chapter 1 Radio connection to weather station Error instead of outdoor temperature or instead of indoor temperature Cause The outdoor temperature sensor of the weather station or the indoor temperature in the operating unit is defect Action The error may only be corrected by a qualified person for electronics Therefore please contact your fitter Error instead of lightness or instead o...

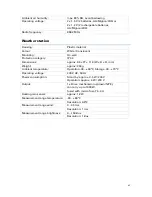
Page 43: ...vered Shading beginning with a sun intensity of 40 kLux Delay time in case of sunshine until shadings extend 1 min retract 12 min Blocking until indoor temperature 18 C Blocking until outdoor temperature 5 C Wind alarm beginning with 4 m sec Rain alarm activated Abbreviations kLux Kilolux 1000 Lux unit of light intensity m s Metres per second unit of wind strength Technical data The product confor...

Page 44: ...ons approx 96 77 118 W H D mm Weight approx 260 g Ambient temperature Operation 30 60 C Storage 30 70 C Operating voltage 230 V AC 50 Hz Power consumption Stand by approx 3 5 W 230 V Operation approx 4 W 230 V Output 1 x Drive mechanism up down N PE can carry up to 1000 W fused with mircro fuse T 6 3 A Heating rain sensor approx 1 2 W Measurement range temperature 40 80 C Resolution 0 6 C Measurem...

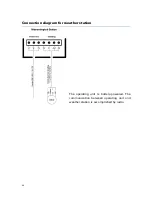
Page 45: ...44 Connection diagram for weather station The operating unit is battery powered The communication between operating unit and weather station is accomplished by radio ...

Page 46: ...45 View of rear side and drill hole plan for the weather station All values are in mm deviations due to technical reasons are possible ...

Page 47: ...46 View of rear side and drill hole plan for the operating unit All values are in mm deviations due to technical reasons are possible ...

Page 48: ...as group Drive output control weather station or motor control device Drive output control weather station or motor control device Drive output control weather station or motor control device Drive output control weather station or motor control device ...

Page 49: ...weather station IMSG 230 PE N L1 Netz Feeder 230 V AC Zentral Motor PE N M 230 VAC Taster L1 out Drive Output PE N Automatic Control IMSG 230 PE N L1 Netz Feeder 230 V AC Zentral Motor PE N M 230 VAC Taster L1 out IMSG 230 PE N L1 Netz Feeder 230 V AC Zentral Motor PE N M 230 VAC Taster L1 out Control cable central command other IMSG 230 ...

Page 50: ...0 PE N L1 Netz Feeder 230 V AC Zentral Motor PE N Taster L1 out IMSG 230 PE N L1 Netz Feeder 230 V AC Zentral Motor PE N Taster L1 out IMSG 230 PE N L1 Netz Feeder 230 V AC Zentral Motor PE N M 230 VAC Taster L1 out IMSG 230 PE N L1 Netz Feeder 230 V AC Zentral Motor PE N M 230 VAC Taster L1 out IMSG 230 PE N L1 Netz Feeder 230 V AC Zentral Motor PE N M 230 VAC Taster L1 out IMSG 230 PE N L1 Netz ...

Page 51: ...ta of the automatic Shading if lightness exceeds kLux Delay time of extension min Delay time of retraction min Shading if indoor temperature exceeds C Outdoor temperature block below C Wind alarm from m sec Rain alarm Yes No ...

Page 52: ...k GmbH Control and AutomationTechnology Sohlengrund 16 75395 Ostelsheim Phone 49 0 7033 30945 0 info elsner elektronik de Germany Fax 49 0 7033 30945 20 www elsner elektronik de Technical support 49 0 70 33 30 945 250 ...

Reviews: