Chapter 5
Installation
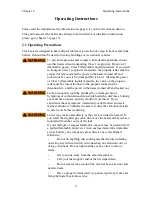
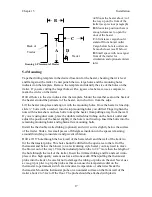
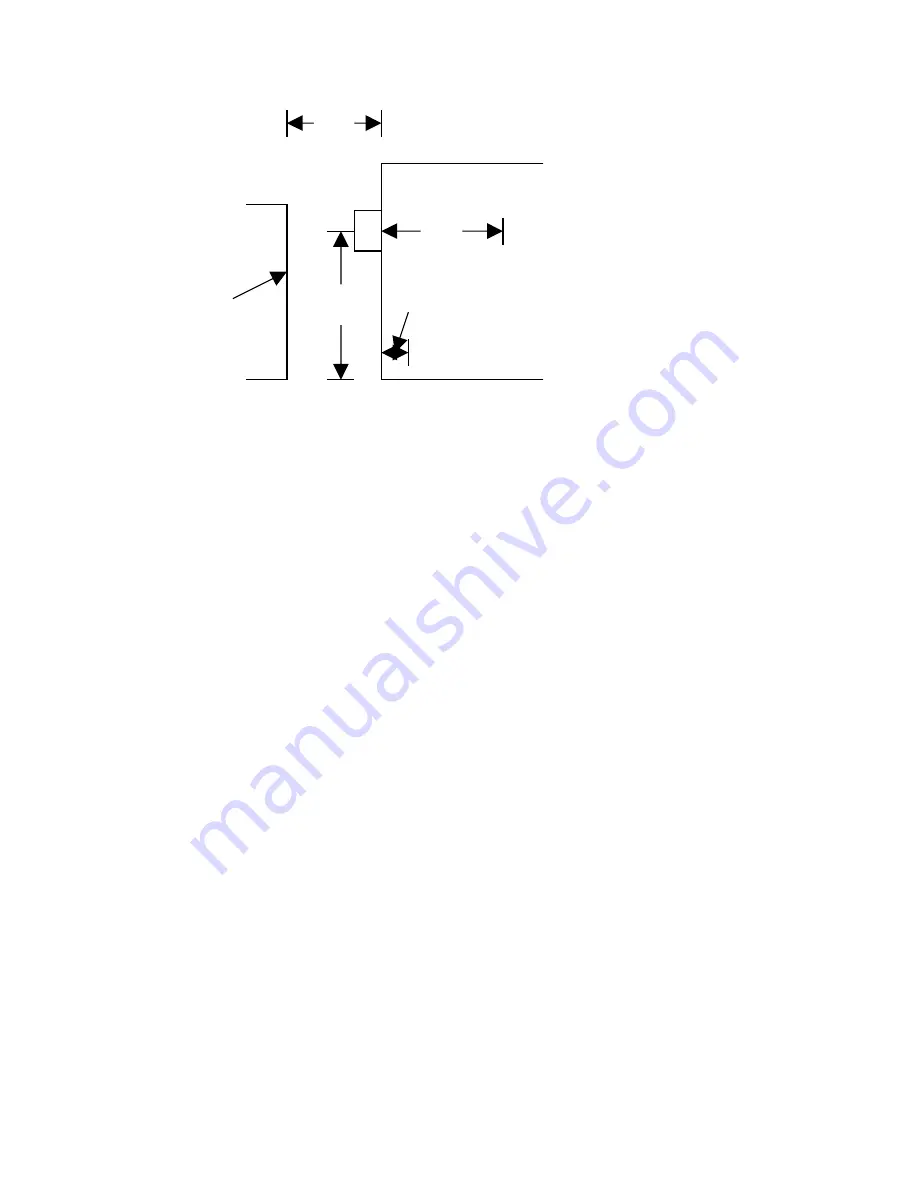
A:
Mount the heater about ¾ of
the way up on the front of the
trailer (see previous paragraph)
B:
Mount in a position there is
enough clearance to open the
door of the heater
C:
6ft distance cargo should
stand off from hot air outlet.
Cargo below hot air outlet can
be much closer (see D below)
D:
Small space with no cargo at
front of the trailer for
circulation and optional cold air
inlet
5.4 Mounting
Tape the drilling template in the desired location for the heater, checking that it is level
and flat against the trailer. Center punch the two large holes and the mounting holes
indicated on the template. Remove the template and identify the size of the holes on the
trailer. If you are cutting the larger holes with a jigsaw or saber saw, use a compass to
mark the circles on the trailer
Drill all holes to the size indicated on the template. Mount the weather seal on the back of
the heater around the perimeter of the heater, an inch or two from the edge.
Lift the heater into place and align it with the mounting holes. Once the heater is lined up,
slide ½” bolts (with a washer) into the top mounting holes you drilled. Finger tighten the
nuts with lockwashers on these bolts to keep the heater from pulling away from the wall.
If you are using duct work, place the double walled duct tubing on the hot air outlet and
adjust the position of the heater slightly if the hole is not lined up. Insert the bolts into the
remaining mounting holes and tighten all six mounting bolts.
Install the the double walled tubing (optional) and cut it so it is slightly below the surface
of the trailer. Slide a few small pieces of fiberglass insulation in the spaces remaining
around this tubing to insulate it and prevent vibration.
Drill a 9/16” hole through the back wall of the heater shell and the wall of the trailer to
for the thermostat probe. This hole should be drilled in the open area to the left of the
thermostat and below the blower (on a recirculating style heater you may need to move
the blower out of the way). Trim the included plastic tube to 1/8” more than the length of
the hole through the wall of the trailer. Insert the trimmed tubing and fix and seal it into
place with a high quality sealant such as a silicone caulk. When pulling the thermostat
probe into the trailer, be careful not to damage the tubing or probe on the end. Never use
a vise-grip or plier to grip the probe as this can cause the temperature dial on the
thermostat to permanent switch at an incorrect temperature or otherwise break the
thermostat. Mount the thermostat probe on a nonmetal surface on the front wall of the
trailer about 2 to 3 feet off the floor. The probe should be attached with plastic
17
Drawing 1: Placement of Heater
Back of
Tractor
A
B
C
D
Trailer


