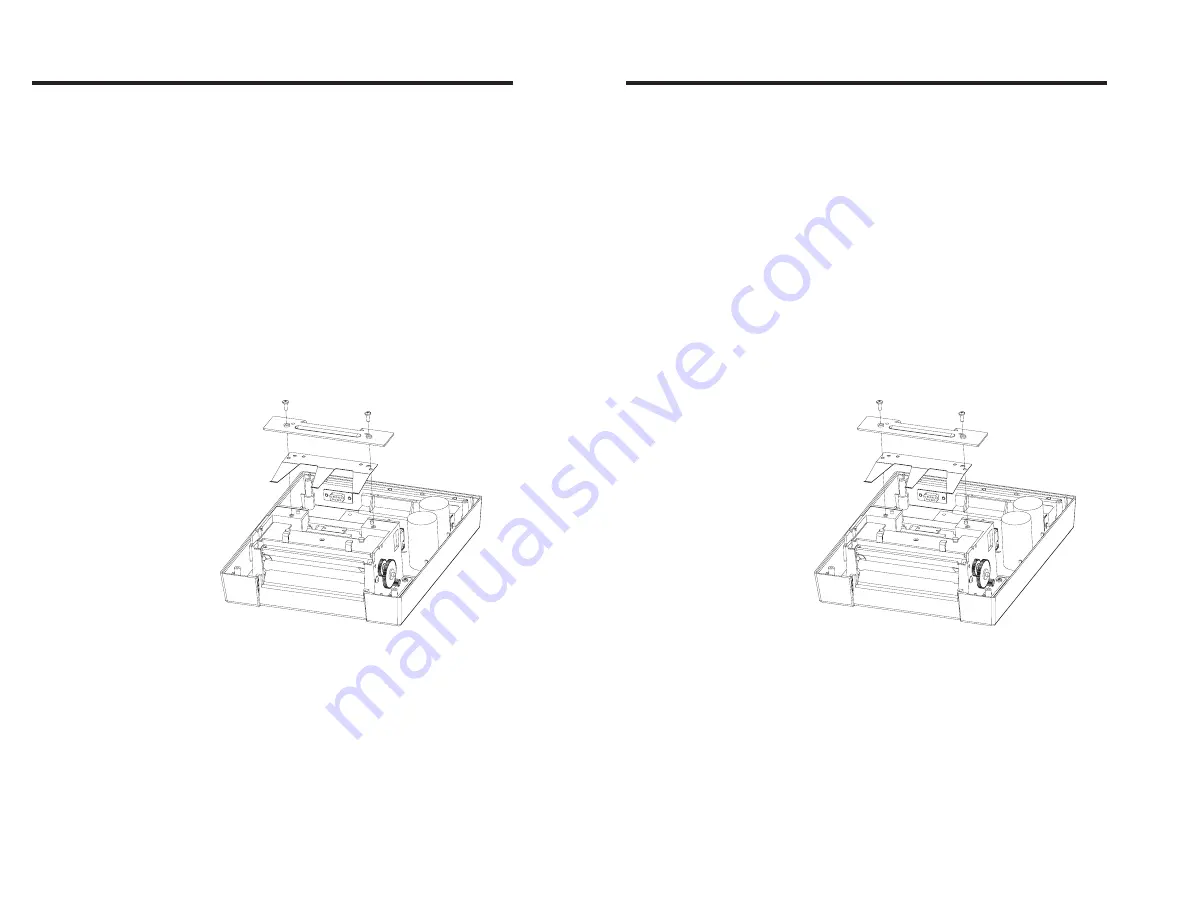
Step
➌
Install The Print
Head
To install the print head, first position it back
over the platen. Lift the front slightly and insert
the tension release rod under the metal tabs at
the front edge. Lower the head down so that
the ends of the rod drop into the slots on the
sides of the carriage.
Next, install the head tension spring aligning it
with the two posts on the print carriage. Ensure
that the label guide near the rear of the print
carriage is fully seated. Install the top head
bracket on top of the spring, aligning it with the
two posts on the print carriage. Insert the two
screws removed earlier and tighten to secure
the print head.
Troubleshooting
46
980090-001 Rev. B
Summary of Contents for LAB+ Series
Page 2: ......
Page 6: ...vi 980090 001 Rev B vi 980090 001 Rev B ...
Page 32: ...26 980090 001 Rev B 26 980090 001 Rev B ...
Page 44: ...38 980090 001 Rev B 38 980090 001 Rev B ...
Page 56: ...Troubleshooting 50 980090 001 Rev B Troubleshooting 50 980090 001 Rev B ...
Page 58: ...Accessories 52 980090 001 Rev B Accessories 52 980090 001 Rev B ...


