background image

OmniFocus 200 Series Installation and Operation Guide

200 Series 

Overview

Introduction

This guide covers the installation and operation of the 200 Series projection system, as well 
as an overview of operation. Please read through this entire guide before following the in-
structions. This will familiarize you with the process of setup for the 200 Series Projection 
System.  The 200 Series is a variation of the 200 Series using the same lens but with a dif-
ferent projector and mounting system.

Equipment List

1.  Canon WUX4000 projector with Elumenati lens mount attached and aligned

2.  OmniFocus 200 Series lens (straight or folded version)

3.  Video and power cables, remote w/ batteries, projector manual, and quick start guide

4.  200 Series stand (optional)

Immersive Projection Design - 

www.elumenati.com


Elumenati, GeoDome OmniFocus and OmniMap are all trademarks of The Elumenati LLC.

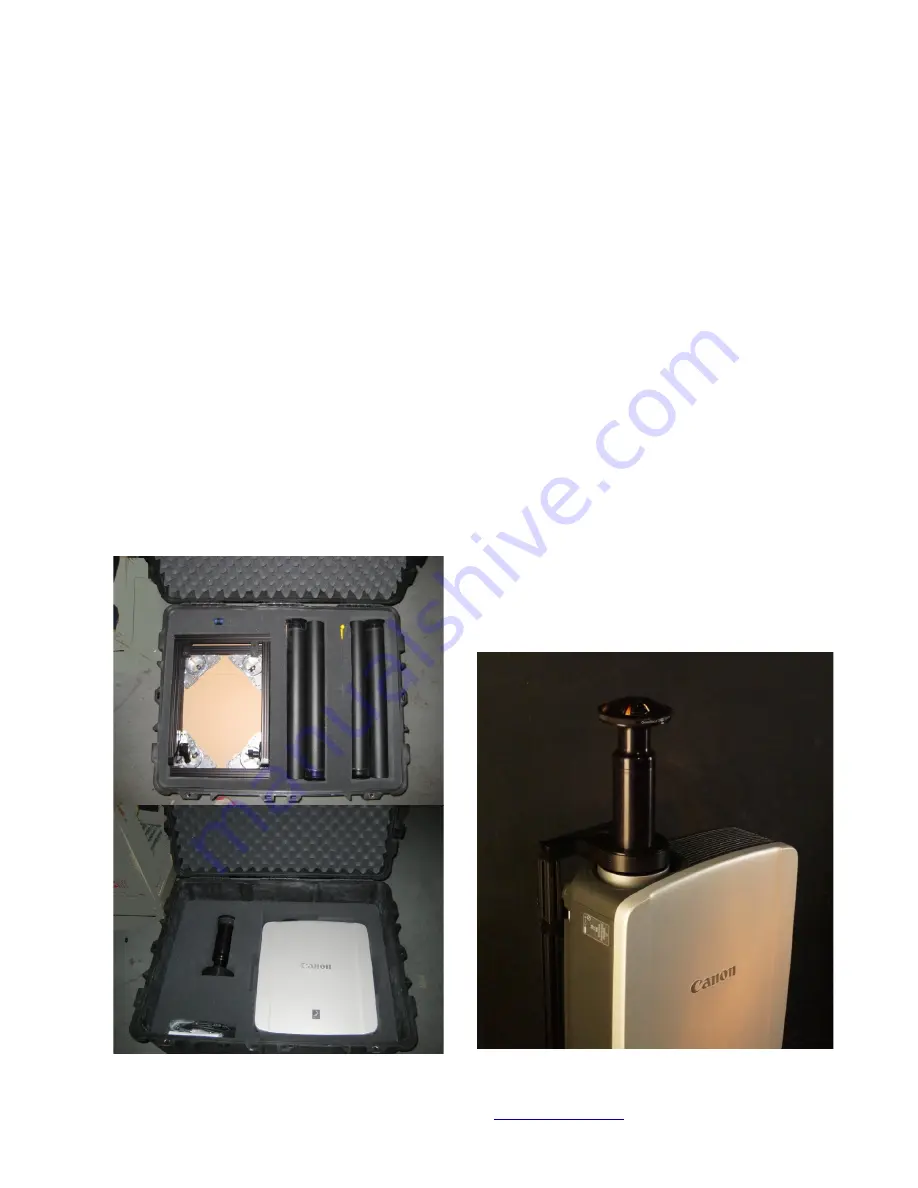
(Fig. 1) Case has two layers: Stand (top) 

and Projection System (bottom)

(Fig. 2) Assembled 30200 on stand

Summary of Contents for OmniFocus 200 Series

Page 1: ...hroughout Differences are noted where applicable Elumenati OmniFocus 200 Series 1 Installation and Operation Guide 1 200 Series Overview 2 Introduction 2 Equipment List 2 200 Series Setup 3 Projector Connection 3 Lens Installation 4 First Light 5 Projector Settings Adjustment 5 Stand Assembly Optional 7 200 Series Information 8 Maintenance 8 Troubleshooting 8 Product Support 8 200 Series Product S...

Page 2: ...es is a variation of the 200 Series using the same lens but with a dif ferent projector and mounting system Equipment List 1 Canon WUX4000 projector with Elumenati lens mount attached and aligned 2 OmniFocus 200 Series lens straight or folded version 3 Video and power cables remote w batteries projector manual and quick start guide 4 200 Series stand optional Immersive Projection Design www elumen...

Page 3: ...I or HDMI cable from the computer to the projector Fig 3 Con nect power cable Turn on the projector and aim at any flat surface more than three 3 feet away 2 Turn on your computer 3 Press the input button on the remote control or the projector control panel and choose Digital PC input signal You may need to adjust the focus and or zoom at first in order to read the image On the control panel cycle...

Page 4: ...f you wish though it is not neces sary Lens Installation 1 If you have purchased a 200 Series stand please assemble it according to the directions located at the end of this manual If you are not using the stand place the projector on a flat sturdy surface to allow mounting of the lens 2 The lens is secured using a magnetic bayonet mount Remove the small lens cap on the projector side of the lens ...

Page 5: ...ector Settings Adjustment With the 200 Series the stock lens not only has Focus and Zoom adjustment but also Lens Shift This added capability allows optimization of the projected image The system is already delivered in a nearly optimal state so any adjustments to be made will be minor 1 Use the projector remote control or control panel to make any needed adjustments The following images show the ...

Page 6: ...is continuously variable from 112 to 165 Adjust vertical Lens Shift so that the cross at the center of the concentric circles is projected directly out of the optical axis Then adjust the physical height of the projector so that the outer circle of the align ment pattern Fig 8 runs the extent of and is parrallel to the screen edge Use Lens Shift to make final minor adjustments to the alignment Imm...

Page 7: ...ming on the 200 Series project allows for multiple mounting options 1 4 20 bolts and t nuts are provided for mounting using the 90 brackets as desired Option 1 Use the mounting plate and carriage bolt arrangement for maximum height adjustment up to 9 Option 2 With no mounting plate there is still about 3 of height adjustment Option 3 The easiest to assemble but with a fixed height setting Immersiv...

Page 8: ...ity camera optics cleaning fluid will work Do not use acetone based solvents Tip In an emergency Windex and a soft cotton t shirt will work but be careful 3 Apply the cleaning fluid directly onto the tissue until moistened Wipe gently until the lens is clean To avoid scratching the lens make sure that the tissue is always moist and do not scrub with excessive force 4 When the lens is clean finish ...

Page 9: ...eo mini jack Stereo audio input Wireless IR remote control and built in keypad Mouse Control Receiver USB RS 232C Control Terminal Optional LAN Adaptor DIMENSIONS Weight 22 0 lbs 10 0 kg Size 680 mm L x 392 mm W x 184 mm H LAMP 300W NSHA lamp Lamp life 1500 hours normal 2000 hours quiet POWER REQUIREMENTS Line voltage 100 240 VAC 10 50 60 HZ Power consumption 410W 365W 1 7W normal quiet standby ST...

Page 10: ...ction Design www elumenati com Elumenati GeoDome OmniFocus and OmniMap are all trademarks of The Elumenati LLC Fig 11 30200 straight lens minimizes interference in traditional planetarium installations Fig 12 30210 features a folded lens minimizing the overall fm factor ...

Reviews: