background image

Cleaning

21

© 2020, Elon Group AB. All rights reserved.

CLEANING

Make sure to clean your product regularly to make it last longer and keep a good appearance.

WARNING!

Do not let children clean the product without supervision.

WARNING!

Risk of electric shock!

Before cleaning, disconnect the product from the mains.

Do not use steam cleaners or high pressure cleaners to clean the product, as this may result in electric
shock.

CAUTION!

Always wait for the product to cool down before cleaning.

Clean the hob surface

Always clean your hob's glass-ceramic surface in the correct way to ensure long lasting operation and appearance.

CAUTION!

• Do not use steel wool, coarse cleaning sponges, or abrasive powder as they may scratch the surface.

Aggressive spray cleaners, descaling agents, and other unsuitable liquid cleaners may also damage the
surface.

After cleaning, make sure to thoroughly remove any cleaner residue from the surface, since it may
damage the surface when you heat up the cooking zones next time.

CAUTION!

If sugar, or food with high sugar content, is spilled over the surface when it is hot - immediately use a wipe or
a scraper to remove the sugar from the hot surface. Otherwise the surface might become damaged.

Never use detergents or other cleaners to clean a hot surface.

• When cleaning the hob, use special care products that create a protective film that prevents dirt from sticking to the

surface.

• Remove minor impurities with a damp, soft cloth and wipe the surface dry.
• Remove water stains with a mild solution of vinegar. Make sure not to use this solution on the frame as it may lose its

shine.

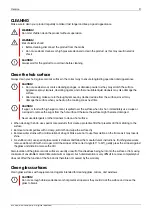
• For stubborn dirt, use special glass-ceramic cleaners and follow the manufacturer's instructions. If nothing else works,

remove stubborn dirt with a scraper. Hold the scraper at the correct angle (45° to 60°), gently press the scraper against
the glass and slide it to remove the dirt.

Discolouration of the glass-ceramic surface is usually a result of food residues being burnt onto the surface or from using
cookware of unsuitable material (like aluminium or copper). Such discolouration is very difficult to remove completely but
does not affect the function of the hob and is therefore not covered by the warranty.

Clean glass surfaces

Clean glass surfaces with equipment and agents intended for cleaning glass, mirrors, and windows.

CAUTION!

Do not use rough abrasive cleaners or sharp metal scrapers as they could crack the surface and cause the
glass to break.

Summary of Contents for CIS5623V

Page 1: ...User manual Induction cooker CIS5623V...

Page 2: ...d transport damage please contact the seller from which you purchased the product or the regional warehouse from which it was supplied Language en GB Publication date 2020 09 07 This document and its...

Page 3: ...b surface 11 Hob operating principle 11 Suitable cookware 11 Basic hob operation 12 Turn on the hob 12 Turn on a cooking zone 12 Turn off a cooking zone 12 Hob power levels 12 Turn off the hob 13 Use...

Page 4: ...ss steel surfaces 22 Clean enamel surfaces 22 Clean plastic parts and lacquer coated surfaces 22 Clean the oven 22 Use the WaterClean programme 22 TROUBLESHOOTING 24 General troubleshooting 24 Hob tro...

Page 5: ...Contents 5 2020 Elon Group AB All rights reserved EU directives and standards 33...

Page 6: ...ly let the following groups use the product if they are supervised or if instructions are provided to them about how to use the appliance in a safe way They must understand the hazards involved Childr...

Page 7: ...pliances at a safe distance so that they are not caught in the oven door as the cords may become damaged and cause short circuit CAUTION Do not line the oven walls with aluminium foil Aluminium foil p...

Page 8: ...ashing sponges or stain removers 4 Heat up the oven without food to 275 C for 60 minutes Ventilate the room as the cooker will omit the characteristic smell of a new appliance WARNING Make sure all pa...

Page 9: ...e bridged and used as one See section Use the bridged cooking zone page 14 Oven controls Turn the selectors to control the oven A Cooking mode selector B Operation indicator light yellow C Temperature...

Page 10: ...arted 2020 Elon Group AB All rights reserved Shallow trays For baking pastries or as a drip tray Extra deep tray For roasting large amounts of vegetables and meat or preserving food Grid For grilling...

Page 11: ...is operating by the principle of induction This means that heat is produced directly in the bottom of the cookware and that the hob surface is heated only indirectly when the cookware gets hot No heat...

Page 12: ...ld lock is activated Turn on a cooking zone 1 Place the cookware in the centre of the selected cooking zone 2 Touch for cooking zone you want to use 3 Touch or to select power level Touch first to sta...

Page 13: ...ower boost to quickly boil water or heat the frying pan WARNING Do not leave the cooker unattended while using power boost Power boost is extremely powerful 1 Touch for cooking zone you want to use 2...

Page 14: ...coustic signal stops when you remove the object or wipe up the spilt liquid Automatic cooking zone power off If you do not change the power level for a cooking zone it is automatically turned off afte...

Page 15: ...is indicated by a decimal point next to the power value When the time expires an acoustic alarm sounds and the cooking zone is turned off Turn off the alarm by touching any key If no key is touched t...

Page 16: ...nded temperature 50 275 C Top and bottom heater Use this oven mode to cook meat or pastry that can only be baked or roasted at a single height level The top and bottom heaters will radiate heat evenly...

Page 17: ...ood soft and juicy Recommended temperature 180 C Defrost Use this oven mode to defrost food such as cakes with heavy cream or butter based cream cakes and pastry bread and rolls deep frozen fruit Remo...

Page 18: ...ge oven cooking mode Select the suitable cooking mode for what you are cooking 1 Turn the cooking mode selector clockwise or anticlockwise to switch between the available modes The cooking mode can al...

Page 19: ...you to choose between 4 different levels when you insert a grid or a tray into the oven The levels guides are counted from the bottom and up The oven is safe to use both with and without the guides C...

Page 20: ...ooking to prevent the meat from burning Cover the meat to keep it juicy Baking recommendations Use these recommendations when baking Preheating is recommended You can bake biscuits and cookies in shal...

Page 21: ...remove the sugar from the hot surface Otherwise the surface might become damaged Never use detergents or other cleaners to clean a hot surface When cleaning the hob use special care products that cre...

Page 22: ...alcohol based cleaners Clean the oven Clean the oven cavity regularly CAUTION Do not lean against the open door when cleaning the oven cavity Never stand on the open oven door and do not let children...

Page 23: ...Cleaning 23 2020 Elon Group AB All rights reserved 4 Let the programme run for 30 minutes The food residues will soften 5 Clean the oven enamel walls with a damp cloth...

Page 24: ...on Normal noise during cooking with the hob page 25 Problem Cause Solution The display is frozen and the touch symbols does not work Disconnect the product from the mains power for a few minutes Then...

Page 25: ...induction Induction causes molecules in the cookware to oscillate This can cause more or less noise depending on the cookware material Transformer like buzz Occurs when cooking at high power levels V...

Page 26: ...NG Use protection when you remove the old light bulb to avoid burning yourself CAUTION Do not damage the enamel surface 5 Install the cover 6 Connect to cooker to the mains power Replace the oven door...

Page 27: ...door glass pane if it is broken or if you want to clean it 1 Remove the oven door from the appliance section Replace the oven door page 26 2 Lift the supports a little and pull them out 3 Lift up the...

Page 28: ...ubleshooting 2020 Elon Group AB All rights reserved 1 Pull the bottom side of the guides out from the oven wall 2 Pull out the guides from the holes at the upper side Install the guides in the reverse...

Page 29: ...ls are temperature resistant to at least 90 C Do not install the product behind a decorative door as it may become overheated WARNING The product is intended to be placed directly on the floor without...

Page 30: ...llation on the wall 2 Position the cooker to the bracket and fasten it Adjust the height of the cooker You can adjust the height of the cooker from 850 mm to 940 mm 1 Lay the cooker down on the floor...

Page 31: ...5 1 5 mm2 cord marked H05VV F 5G1 5 or better Do not use external timers or separate remote control systems to control the product CAUTION Carefully read the instructions for use before connecting the...

Page 32: ...et maximum hob power Maximum hob power is 7200 W by default If the available power or the fuse size is limited set a lower maximum power 1 Connect the cooker to the mains 2 Touch and hold for 1 second...

Page 33: ...l connection rating 10 500 W Cooking zone Diameter Power Front left 18 cm 2 kW Rear left 18 cm 2 kW Rear right 21 cm 2 kW Front right 14 5 cm 1 6 kW EU directives and standards This product fulfills t...

Page 34: ...Elvita products are distributed and marketed by ELON Group AB Elon Group AB B cklundav gen 1 702 03 rebro Sweden ELON GROUP 46 0 10 220 40 00 ELONGROUP SE Support and service ELVITA SE...

Reviews: