54
X
Slightly lift up the grass ejection chute (
1
) and slide it off the two pins welded to the frame
of the mowing deck. Then either move the chute approx. 10 cm backwards (
2
) and secure
it in place, or completely take it out through the rear plate.
6.3.9a
X
Unscrew two nuts and washer from the drive belt tensioning mechanism on the mowing
deck. This will release the spring and the belt. Remove the belt from the pulley wheels.
6.3.7c
X
Turn the pulley wheel assembly so that you get access to the bolts on the rear side of the
mowing deck. Unscrew the bolts.
6.3.7d
X
It is not necessary to remove the bolts on the front side of the mowing deck, it is enough
to unhook the deck from the holding bracket
6.3.9b
X
Slowly pull the mowing deck out of the machine.
6.3.9c
6.3.10 MAINTENANCE OF STEERING
Regularly check that there is not excessive looseness between the cogged steering segment
and the steering wheel pinion. If higher looseness is identified, it is necessary to limit it.
6.3.10
Neglecting this maintenance may result in damage to steering components.
Procedure for limiting (adjusting) looseness:
X
Open the hood of the machine.
X
Loosen two nuts M12 (
1
) on the bolt of the eccentric.
X
Place a suitable wrench on to the hexagon of the eccentric (
2
) and turn it until looseness
is limited to a minimum.
X
Tighten both nuts M12 (
1
) using a torque of 35 - 45 Nm.
6.3.11 CHECKING AND ADJUSTING THE TRAVEL DRIVE BELT
Regularly check the condition and tension of the travel drive belt. As soon as the belt starts to slip
through or even produce an odour, it is necessary to tension or replace it.
X
Take off the mowing deck cover (
6.3.7
and
6.3.7b
).
X
By tightening the nuts on the bolt, set the spring to a length of
55 ± 1 mm
.
6.3.11
Do not over-tension the belt above this level, this will reduce its lifetime and may
also cause damage to the transmission!
X
Reattach the mowing mechanism cover.
6.3.12 REPLACING BELTS
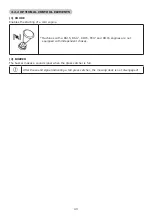
Replacing drive belts is a relatively demanding operation, which needs to performed by an authorised
service centre.
6.3.13 REPLACING WHEELS
Before replacing one of the wheels, park the tractor on a horizontal and rigid surface, turn off the engine
and remove the key from the ignition. Perform the replacement as follows:
Summary of Contents for EF 92
Page 2: ......
Page 4: ...4 ...
Page 6: ...6 1 3 2b MAX 10 o 1 3 2c 1 3 2d R N F 1 3 2e ...
Page 7: ...7 3 1 3 3 1a 3 3 1b ...
Page 8: ...8 3 3 1c 3 3 1d ...
Page 9: ...9 3 3 2a 2 4 5 6 1 9 3 7 8 10 12 11 3 3 2b 1 2 3 5 6 7 8 12 4 4 3 3 2c 11 10 ...
Page 10: ...10 3 3 2d M5 x 16 M5 6x 3 3 2e M5 x 16 M5 2x 3 3 2f M5 x 25 M5 4x ...
Page 11: ...11 3 3 2g 3 3 2h M5 x 25 M5 2x ...
Page 12: ...12 3 3 2i M10 2x 11mm Ø 3 3 2j M5 x 12 M5 1x ...
Page 13: ...13 3 3 2k ST6 3x32 6x 3 3 2l 3 3 2m ...
Page 14: ...14 4 1 5 6 7 8 3 4 2 10 11 12 13 1 9 5 4 3 ...
Page 15: ...15 5 6a 2 1 5 6b 6 2 2 6 3 3a 6 3 6a ...
Page 16: ...16 6 3 6b 6 3 7a A B C C 6 3 7b ...
Page 17: ...17 6 3 7c 6 3 7d 6 3 9a ...
Page 18: ...18 6 3 9b 6 3 9c 6 3 10 1 2 ...
Page 19: ...19 6 3 11 6 3 13 ...
Page 20: ...20 6 4 ...
Page 314: ...314 ...
Page 315: ......


