51
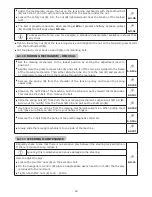
When replacing a
light bulb that has a bayonet
simply turn (loosen) the burnt-out bulb
and remove it from the socket. Then insert a new bulb into the socket and turn it until it
locks.
6.3.3a
When replacing the
halogen light bulbs
first press the tab (1) and slide the bulb out of
the socket (2). For installation proceed in the reverse sequence.
6.3.3b
6.3.4 REPLACING FUSES
If a fuse fails, the engine will immediately quit, the mowing mechanism will stop, and all gauges on the
instrument panel will go dark. In that case, it is necessary to seek out the blown fuse and replace it with
a new one. Never replace a faulty fuse with one of a higher current rating!
The fuses are located on the steering column and can be accessed by lifting the cover and removing the
protective fuse cover.
Remove the fuse and insert a new fuse of the same rating as the original one, i.e.,
15A
or
5A
. If the
engine or the mowing mechanism cannot be started after fuse replacement, contact your authorized
service centre.
Some models of machines are equipped with a central electrical installation distribution box. Never
tamper with this distribution box, except to change fuses.
6.3.5. RAISING THE MACHINE
If you want to raise the lawn mower, use a jack and supports.
Proceed as follows:
Place the jack under the transmission on the rear axle and raise the machine’s rear end.
Insert two supports under the ends of the axle inside the rear wheels.
Lift the front end of the machine and insert two supports under each end of the front wheel pins.
Never tilt the machine to the side where the engine’s carburettor is located. This could make
oil seep into the air filter!
6.3.6 MOWING MECHANISM - SHARPENING AND CHANGING BLADES
SHARPENING BLADES
The cutting blades must be sharp, statically balanced and straight. Blunt, improperly sharpened or
damaged blades uproot grass, damage the lawn and don’t allow the catcher to collect grass properly.
- Never repair a deformed or otherwise damaged blade. Always replace it
immediately.
- Whenever handling the blades, wear solid work gloves.
Sharpening process:
Remove the grass catcher, tilt the machine to the right side, and place appropriate pads
under it. We recommend having another person help, in order to avoid injury and damage
to the machine.
Unbolt both blades and clean them. If the machine is equipped with
TRIPLEX
blades,
remove each blade from the holder.
First sharpen the blades with a grinder, and then with a file. For
TRIPLEX
blades, grind
each separately.
In the case of a three rotor 110 cm mowing mechanism every pair of knives is secured by
three screws (the knives are not equipped with shear pins).We recommend that the knives
should be marked before disassembly to ensure absence of problems on reassembly.
6.3.6a
Do not sharpen the blades directly on the mowing mechanism.
After sharpening, do not reinstall the blades yet, but check their balance. See the procedure below.
Summary of Contents for EF106J Starjet
Page 2: ...2 1 2 1 3 1 1 3 2a ...
Page 3: ...3 1 3 2b 1 3 2c 1 3 2d ...
Page 4: ...4 3 1 3 3 1a 3 3 1b ...
Page 5: ...5 3 3 1c 3 3 1d 3 3 2a ...
Page 6: ...6 3 3 2b 3 3 2c 3 3 2d ...
Page 7: ...7 3 3 2e 3 3 2f 3 3 2g ...
Page 8: ...8 3 3 2h 3 3 2i ...
Page 9: ...9 3 3 2j 3 3 2k ...
Page 10: ...10 3 3 2l 3 3 2m 3 3 2n ...
Page 11: ...11 3 3 2o 3 4 5 ...
Page 12: ...12 3 4 6 4 1a ...
Page 13: ...13 4 1b 4 2 1a ...
Page 14: ...14 4 2 1b 5 6a 5 6b 6 2 2 ...
Page 15: ...15 6 3 3a 6 3 3b 6 3 6a 6 3 6b 6 3 7a ...
Page 16: ...16 6 3 7b 6 3 7c 6 3 7d ...
Page 17: ...17 6 3 7e 6 3 8 6 3 9a 6 3 9b ...
Page 18: ...18 6 3 9c 6 3 10a 6 3 10b 6 3 10c ...
Page 19: ...19 6 3 10d 6 3 10e 6 3 10f 6 3 11 ...
Page 20: ...20 6 3 12a 6 3 12b 6 3 14 ...
Page 21: ...21 6 4 ...
Page 341: ...341 ...
Page 342: ...342 ...
Page 343: ...343 ...

