background image

15

EMBASSY® HOME™ EL1

How to Use Your EMBASSY

®


HOME

 Electronic Door Lock

How to UNLOCK the Door

From outside, use any 

of the following:


x

the Master Code


x

a User Code


x

the One-Time Code


x

the physical key

From inside:


x

use the thumb turn.

When unlocking with a 

code, enter the code then 

press the 

 Lock button.

How to LOCK the Door

From outside, automatically 

or manually.


x

Auto Lock Mode:  

Locks automatically 30 

seconds after unlocking 

(timing adjustable).


x

Manual Lock Mode:  

Press and hold any 

button on the keypad 

for 2 seconds.


x

Lock button:  

Press the lock button for 

2 seconds in any mode. 


x

The physical key locks 

the door as well.

From inside:


x

use the thumb turn.

How to Perform Auto-Handing 
for Your Lock

Your new EMBASSY

®


electronic door lock is 

non-handed and will work 

on left-handed or right-

handed doors. During 

the initial installation and 

after a factory reset, your 

EMBASSY

®

 door lock will 

automatically detect (based 

on where the bolt finds 

room to move) whether 

you have installed it on 

a left- or a right-handed 

door (see page 16).

Summary of Contents for HOME EL1

Page 1: ...Everything you need to know to install program and use your EMBASSY HOME Electronic Door Lock EL1 User s Manual ...

Page 2: ...for the EL1 at EmbassyHardware com EL1 Tips for Use with Kids Recording Codes Warranty requires registration Register Your Lock Installation Video User Manual as PDF User Manual Additional Tools Required for New Door Installations 2 54mm Hole saw 1 25mm Hole saw 2 5mm Drill bit Chisel Hammer Template for Boring included ...

Page 3: ...e manufacturer s warranty x Accurate alignment during your door prep is critical for proper functioning and security of this product This will ensure smooth functioning and prevent both performance degradation and reduced security Do not install the 4 AA batteries until the lock is completely installed on your door IMPORTANT ...

Page 4: ... Installation 7 Installing your Embassy EL1 Electronic Door Lock 8 13 How to Use Your EMBASSY HOME Electronic Door Lock 14 15 How to Reset to Factory Default Settings 16 Codes Overview 17 Features List 18 Master Code 18 Programming Mode 18 Auto Lock Mode 18 Manual Lock Mode 19 Wrong Entry Limit 19 Vacation Mode 19 One Time User Code 20 ...

Page 5: ... 22 How to Enter Programming Mode 22 How to Change the Master Code 23 How to Delete a User Code 23 How to Add a User Code 23 How to Mute or Unmute Keypad Beeping 23 How to Set Auto Lock or Manual Lock Mode 24 How to Set Vacation Mode 24 How to Set a One Time Code 24 How to Customize the Timing of Auto Lock 24 Free Lost Key Service 25 Customer Support 25 ...

Page 6: ...g Unlocking Button E Exterior Assembly F Door G Tailpiece H Wiring Cable I Bolt J 7 8 23mm Latch Screws K 1 1 2 38mm Strike Plate Screws L Door Frame Strike Plate M Interior Mounting Plate N 2 3 8 60mm Through Bolt Mounting Screws O Interior Assembly P Battery Cover Q Interior Assembly Screws R OPTIONAL Round Faceplate ...

Page 7: ...4 Installation Guide M N Q A C B I H G J K L D E F O P R Parts Identification ...

Page 8: ...mbly Interior Assembly Deadbolt Item Specifications Exterior Assembly H 5 1 8 130mm x W 3 76mm x D 1 3 16 30mm Interior Assembly H 5 9 16 142mm x W 2 3 4 70mm x D 1 3 4 44mm Batteries included AA Alkaline battery x4 Operation voltage 4 6 4 0V Lasts up to one year 10 unlock lock cycles per day cylinder keypad ...

Page 9: ...nstall Collar Door Preparation for Installation For doors which have pre existing deadbolt installed 2 1 3 1 25mm DOOR EDGE A Ensure that bore is 2 1 8 54mm wide B Confirm which face plate shape is required for your door C Optional If necessary change faceplate to Round Faceplate part R C No change needed 2 1 8 54mm DOOR EDGE B A ...

Page 10: ...n If the centerpoint in your door bore is 2 3 8 away from the edge of the door see drawing A then you are ready to install the bolt If the centerpoint in your door bore is 2 3 4 away from the edge of the door See drawing B you can adjust the deadbolt by turning the boltcase and pulling it out to extend to the 2 3 4 70mm backset position See pictures 1 and 2 φ2 3 8 60mm φ2 3 8 60mm φ2 3 4 70mm A B ...

Page 11: ...tronic Door Lock 1 Install Deadbolt into edge of door IMPORTANT Make sure that the arrow at the tail end is pointing upwards 2 Use a Phillips Screwdriver to test if deadbolt functions smoothly 3 Install strike plate part J on door frame Part K DOOR FRAME WALL DEADBOLT ...

Page 12: ...rior mounting plate by first routing the cable and connector through the mounting plate s cable hole 5 Hold the exterior assembly flush to the door pull the key tailpiece part G and wiring cable part H through the door hole NOTE Cable must go through door bore under the bolt NOTE The tailpiece part G should be kept in a horizontal position Installing your Embassy EL1 Electronic Door Lock ...

Page 13: ...t N Tighten securely with a 2 Phillips screwdriver 8 Attach cable assembly to the interior assembly by lining up notches on top of Cable Connector to slots on Board Connector Attach Cable Connector firmly until completely connected 2 3 8 60mm through bolt screw part J Board Connector Cable Connector Installing your Embassy EL1 Electronic Door Lock ...

Page 14: ...11 Install 3 three AA batteries Keep the lock in unlocked position insert 3 three AA batteries in battery compartment first 10 Secure the interior assembly onto the mounting plate with the 3 Interior Assembly Screws part Q NOTE Before installing the batteries test lock by using the Manual Over ride Key and Interior Thumbturn If the locking and unlocking works smoothly proceed to next step Part Q I...

Page 15: ...down the Reset button for several seconds until you hear a beeping sound You can now release the Reset Button If handing was successful the bolt will extend on its own into the locked position Your lock is now ready to be programmed If the bolt did not extend try repeating the last two steps 12 Activate the automatic handing process of the deadbolt A B C Installing your Embassy EL1 Electronic Door...

Page 16: ...ing it into place Ensure that it is firmly inserted into the slots You have successfully installed your EMBASSY EL1 Electronic Door Lock You are now ready to proceed to the Programming steps Congratulations Installing your Embassy EL1 Electronic Door Lock ...

Page 17: ...14 User s Manual How to Use Your Electronic Door Lock OUTSIDE OF DOOR keypad lock button key override battery cover thumb turn INSIDE OF DOOR How to Use Your EMBASSY HOME Electronic Door Lock ...

Page 18: ...after unlocking timing adjustable x Manual Lock Mode Press and hold any button on the keypad for 2 seconds x Lock button Press the lock button for 2 seconds in any mode x The physical key locks the door as well From inside x use the thumb turn How to Perform Auto Handing for Your Lock Your new EMBASSY electronic door lock is non handed and will work on left handed or right handed doors During the ...

Page 19: ...the reset button briefly remove one battery from the battery box and then replace the battery back into its normal position 5 Keep holding the reset button for 5 more seconds until you hear a long beeping sound The beep indicates you have successfully reset your EMBASSY door lock to factory default settings CAUTION Performing the reset operation will delete all user settings and all codes The Mast...

Page 20: ...or delete User Codes at any time page 23 24 3 Coding Rules Both the Master Code and the unique User Codes are restricted by a few rules to ensure better security for your home To prevent overly simple codes the following code patterns cannot be programmed Existing Code Rule Explained To help your User Codes remain unique a new User Code cannot contain a code sequence that an existing User Code alr...

Page 21: ...mming Mode using the Lock button and your Master Code A green light will indicate that you are in Programming Mode page 22 Then follow the simple steps to program a specific feature from the Programming Instructions page 23 24 X Auto Lock Mode One of the most common ways that burglars enter a home is through unlocked doors With the Auto Lock Mode on your new EMBASSY door lock misplaced keys and fo...

Page 22: ...cking your code with unlimited consecutive attempts X Vacation Mode Having up to 20 User Codes is very convenient for everyday use especially with a busy family However when your family is away on vacation or an extended stay too many usable codes presents a potential security risk to your home While set to Vacation Mode all User Codes are temporarily disabled page 24 How It Works Before leaving y...

Page 23: ...nlock your door In effect you have the benefit of using a longer code that is harder to capture by outsiders but with the benefit of a shorter code the actual code that is easier to remember For more on Code Concealment please read the guide Tips for Use with Kids Recording Codes X Silent Mode By default the keypad will beep each time a button is pressed If you prefer you can mute the beeping by a...

Page 24: ...ipe all the codes and settings from your EMBASSY door lock Or you may need to re trigger the automatic handing of the lock For either of these situations you will need to perform a full reset of your lock page 16 How It Works Performing the reset operation will delete all user settings and all codes including the Master Code The Master Code will be restored to the default 1 2 3 4 5 6 7 8 A reset w...

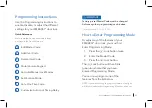
Page 25: ...just any of the features of your EMBASSY door lock you must first Enter Programming Mode 1 Press the Lock button twice 2 Enter the Master Code 3 Press the Lock button The Lock button will then blink green to indicate that you have entered Programming Mode You can now program one of the features from the list below NOTE If you wait too long to program a feature a red light will blink to indicate th...

Page 26: ... the User Code that you want to delete 4 Press the Lock button to confirm How to Add a User Code 1 Enter Programming Mode page 22 2 Press button 2 3 Enter a new User Code 4 10 digits followed by the Lock button 4 Enter the new User Code again followed by the Lock button to confirm NOTE You can store up to 20 User Codes We recommend that you write down all your codes and store them in a safe place ...

Page 27: ... 5 and then the Lock button will set your Auto Lock timing delay to 15 seconds How to Set a One Time Code 1 Enter Programming Mode page 22 2 Press button 7 3 Enter One Time Code 4 10 digits followed by the Lock button 4 Enter One Time Code again followed by the Lock button to confirm NOTE Only one 1 One Time Code can be added After it is used it is automatically deleted and a new or same One Time ...

Page 28: ...ce of mind we offer a free Lost Key Service for this EMBASSY HOME electronic door lock Register your EMBASSY door lock s physical key on our website If yours gets lost we ll make you a new one for free Visit EmbassyHardware com EL1 Customer Support Give us a Call 1 888 737 6515 Send us an email Sales HomebuildersHardware com BY HOMEBUILDERS HARDWARE AIRMONT NEW YORK ...

Reviews: