5
Installation steps:
Review and complete the Celerra worksheets (see pages 19 and 20), and verify that the site is
1.
properly prepared for the installation of your Celerra NS20.
About 20 minutes.
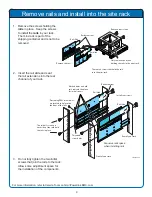
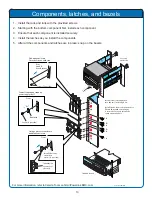
If your Celerra NS20 is to be installed in a customer-supplied rack, use this document to unpack
2.
the system from the disposable mini-rack shipping container, and install the system in your available
rack.
About 40 minutes.
Note:
If your Celerra NS20 system arrives at your site in a pre-installed cabinet and is previously
cabled, verify the cabling before you begin the use of your system.
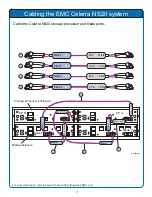
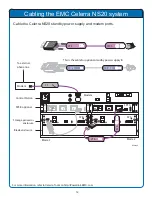
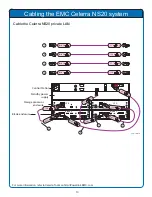
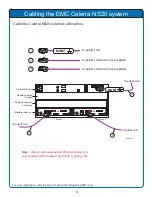
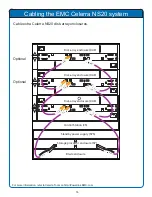
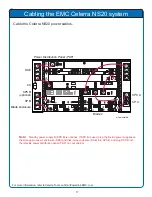
Cable your system according to the instructions and illustrations contained in this document.
Ensure that all of your cables are seated securely.
About 45 minutes.
When you install your Celerra NS20, use the Celerra Startup Assistant (CSA) to confi gure your
3.
system. The CSA is on the Celerra Applications & Tools CD. The CSA will help create CIFS shares,
NFS exports, or iSCSI LUNs and to register your Celerra system.
About 15 minutes.
Register your system with the service provider. If you do not register your system now, using the
4.
Celerra Startup Assistant, your request for support from EMC
®
Customer Service will be delayed.
About 5 minutes.
Implementation step:
5.
After you have registered your Celerra NS20 system, you must confi gure the system for
production. There are several documented implementation procedures based on common
usages. You can confi gure your system manually using Celerra Manager, or follow the common
implementations listed below.
Common implementations:
Create CIFS shares
•
Create iSCSI LUNs
•
Create NFS exports
•
Perform Common Post-CSA tasks
•
At the end of each implementation, your system will be usable and ready for production.
Note:
Confi gure your system using these procedures to create basic implementations.
To confi gure additional implementations, follow the Celerra user documentation on Powerlink
®
.
Installation steps
For more information, refer to Celerra Tools on http://Powerlink.EMC.com


