3
Replacing or Adding a Disk Module
3-15
Servicing and Upgrading a Deskside DPE
Installing a Disk
Module
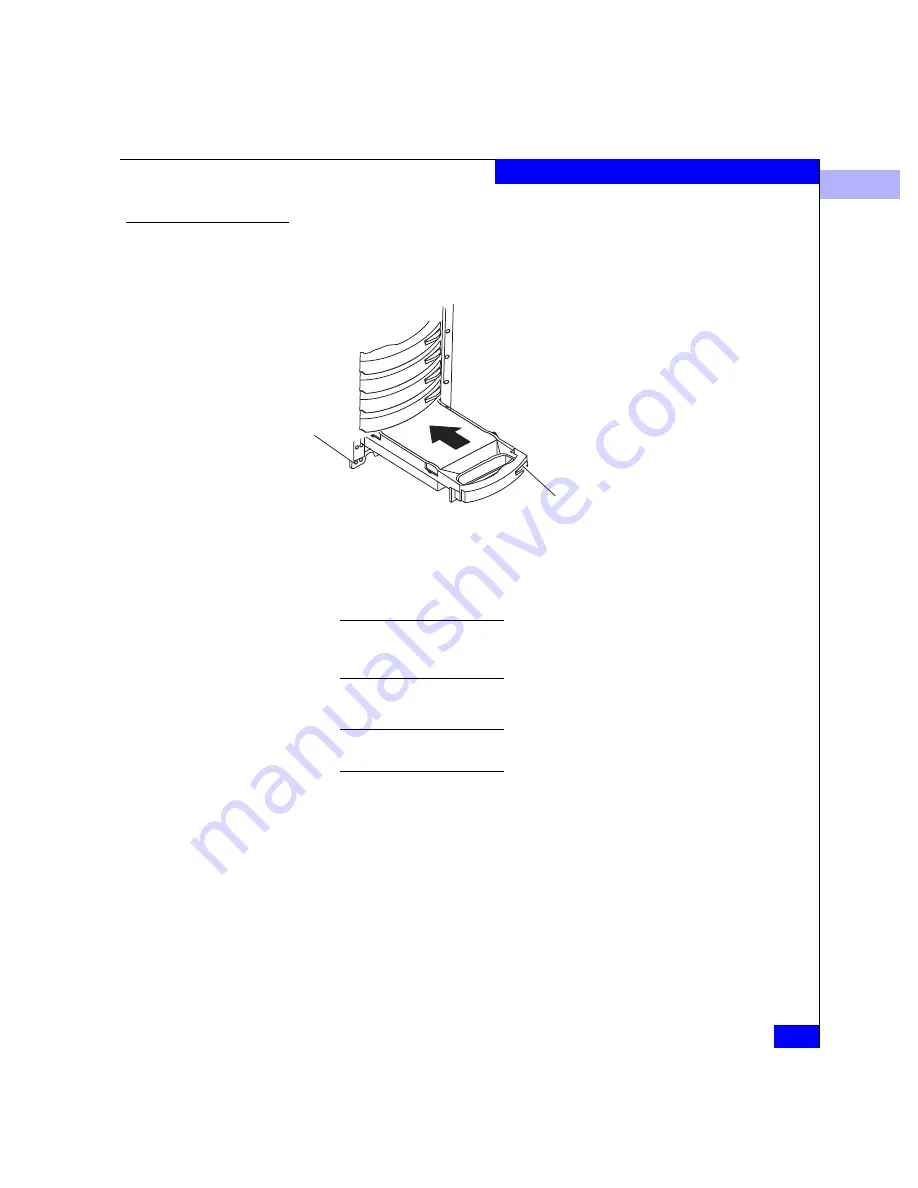
1. Gently insert the add-on or replacement disk module as follows:
Figure 3-6
Installing a Disk Module
The disk module’s Active light flashes to reflect the disk’s spin-up
sequence (see page 3-3).
After inserting a disk module, wait for the activity lights on the other
drives to resume a steady flicker before inserting another module. The
activity lights show that the LIC has rediscovered the FC loop.
2. Remove and store the ESD wristband.
The door must be closed for EMI compliance when the DPE is powered
up. Open it only to replace or add a disk module.
3. Close and lock the front door as shown below.
A.
Grasp the disk module’s handle
with one hand and support the
module with your other hand.
B.
Align the module with the
guides in the slot.
C.
Gently push the
module into the slot
until the latch engages.
Latch


