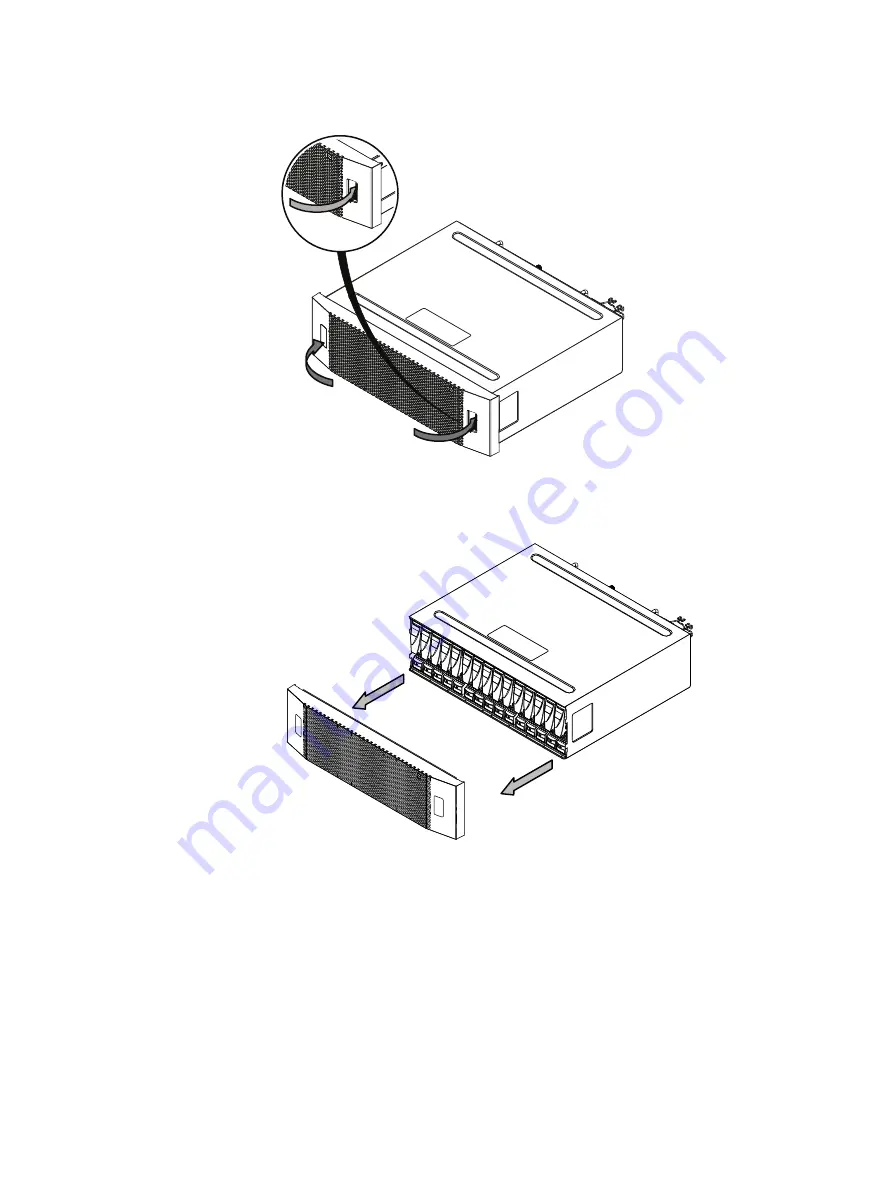
Figure 5 Releasing the front bezel
CL4560
3. Pull the bezel off and put it on a clean, static-free surface (
).
Figure 6 Removing the front bezel
CL4561
Removing a disk filler module
Refer to
while performing the procedure that follows.
Procedure
1. Locate the slot where you want to install the disk.
2. Grasp the disk filler with you thumb in the cutout on the front of the filler and your
finger on the top of the filler and pull the module from the slot.
Disk Replacement for a DAE Shelf
30
EMC CloudBoost 100
2.0
Hardware Component Replacement Guide
Summary of Contents for CloudBoost 100
Page 1: ...EMC CloudBoost 100 Version 2 0 Hardware Component Replacement Guide P N 302 002 471 REV 02 ...
Page 6: ...FIGURES 6 EMC CloudBoost 100 2 0 Hardware Component Replacement Guide ...
Page 8: ...TABLES 8 EMC CloudBoost 100 2 0 Hardware Component Replacement Guide ...
Page 14: ...CloudBoost 100 Overview 14 EMC CloudBoost 100 2 0 Hardware Component Replacement Guide ...
Page 20: ...Disk Drive Replacement 20 EMC CloudBoost 100 2 0 Hardware Component Replacement Guide ...


