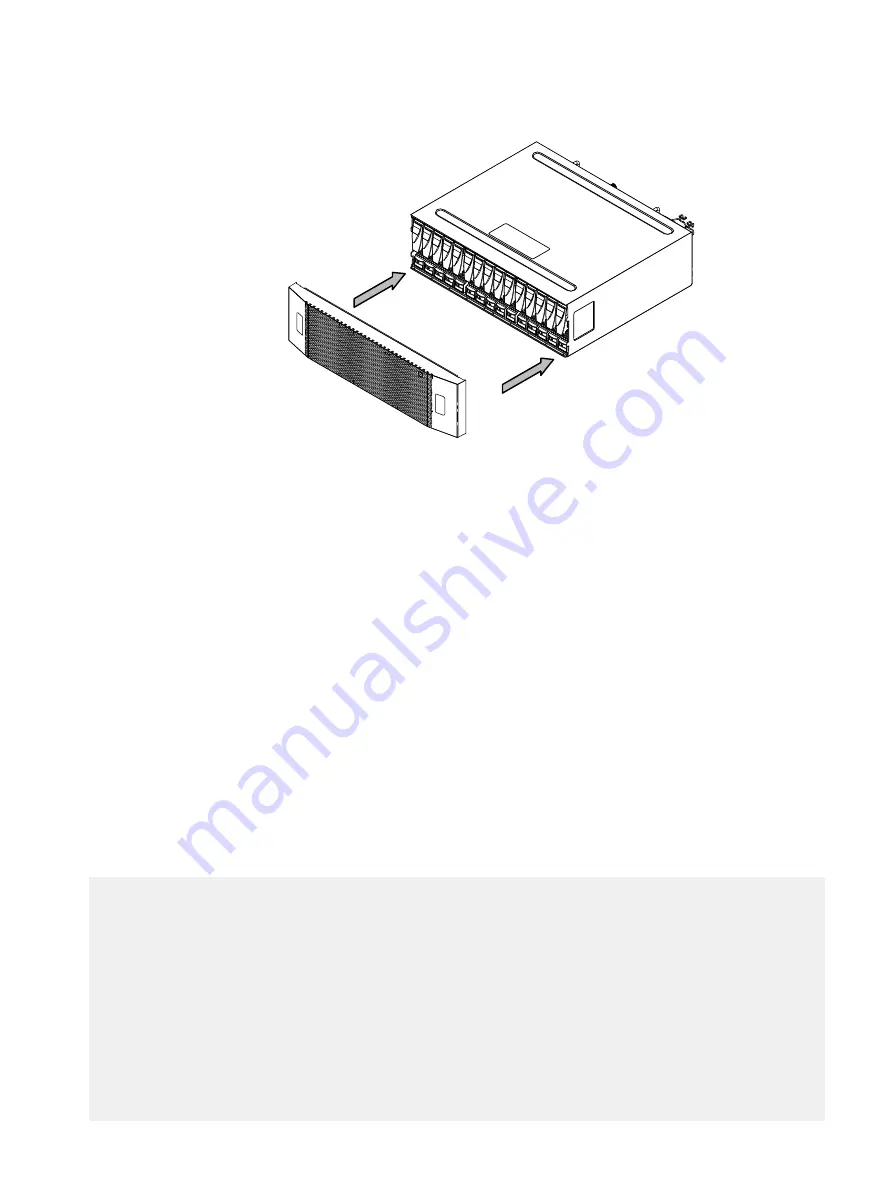
Figure 9 Installing the front bezel
CL4562
Closing the console
If you opened the console for access to the enclosure with the part you added or
replaced, close the console using the procedure that follows.
Procedure
1. Grasp the free side of the console, and swing the console to the right to close it
2. Gently push on the console until it is closed.
Verify the replacement disk
A replacement disk drive that is inserted into the system is recognized as a failed disk
drive and is noted as failed when first installed. An auto-spare process should change the
status to OK in a few minutes.
Procedure
1. At the CLI for the CloudBoost appliance, type
support system-report
, then after
the system report is displayed, type
disk
.
The state of all disk drives is displayed. Note the status line in the command output.
Enter the data item to view details, or press <ENTER> to return
System Report>
disk
- id: Viper LCC
scsi_name: /dev/sg34
disks:
- slot_id: 0
scsi_name: /dev/sg19
host: 8
dev_name: /dev/sdr
vendor: HITACHI
model: HUS72403CLAR3000
revision: c250
sas_address: 0x5000cca05837e626
status: OK
insert: 0
remove: 0
Disk Replacement for a DAE Shelf
Closing the console
33
Summary of Contents for CloudBoost 100
Page 1: ...EMC CloudBoost 100 Version 2 0 Hardware Component Replacement Guide P N 302 002 471 REV 02 ...
Page 6: ...FIGURES 6 EMC CloudBoost 100 2 0 Hardware Component Replacement Guide ...
Page 8: ...TABLES 8 EMC CloudBoost 100 2 0 Hardware Component Replacement Guide ...
Page 14: ...CloudBoost 100 Overview 14 EMC CloudBoost 100 2 0 Hardware Component Replacement Guide ...
Page 20: ...Disk Drive Replacement 20 EMC CloudBoost 100 2 0 Hardware Component Replacement Guide ...


