

®
HP Series Remote Heads for Hazardous Locations
2/2
Emergi-Lite®
Tel: (888) 552-6467
Fax: (800) 316-4515
www.emergi-lite.com
11/17 750.0024 Rev. A
6. Thread the wire conduit(s) tightly into the conduit fitting(s) ensuring a
water-tight seal. If necessary, seal with silicone or equivalent caulking
(not provided) to prevent water from leaking into the cabinet.
7. Take the unit cover with lamps and hang it temporarily from the hook
located inside the back box.
8. Attach one of the ground wires to each screw located on the nut of the
conduit fitting.
9. Connect the left over ground wire(s) to the incomming wire conduit
ground wire.
10. Respecting the proper polarity {red (+) and black (-)}, connect the lamp
wires to the emergency circuit (low-voltage 12-24Vdc) using wire nuts.
11. Verify that the gasket is installed and well aligned in the groove of the
cover.
12. Unhook and install the cover onto the back box with the lamp heads
pointing downwards. Tighten the four screws to prevent water
infiltration.
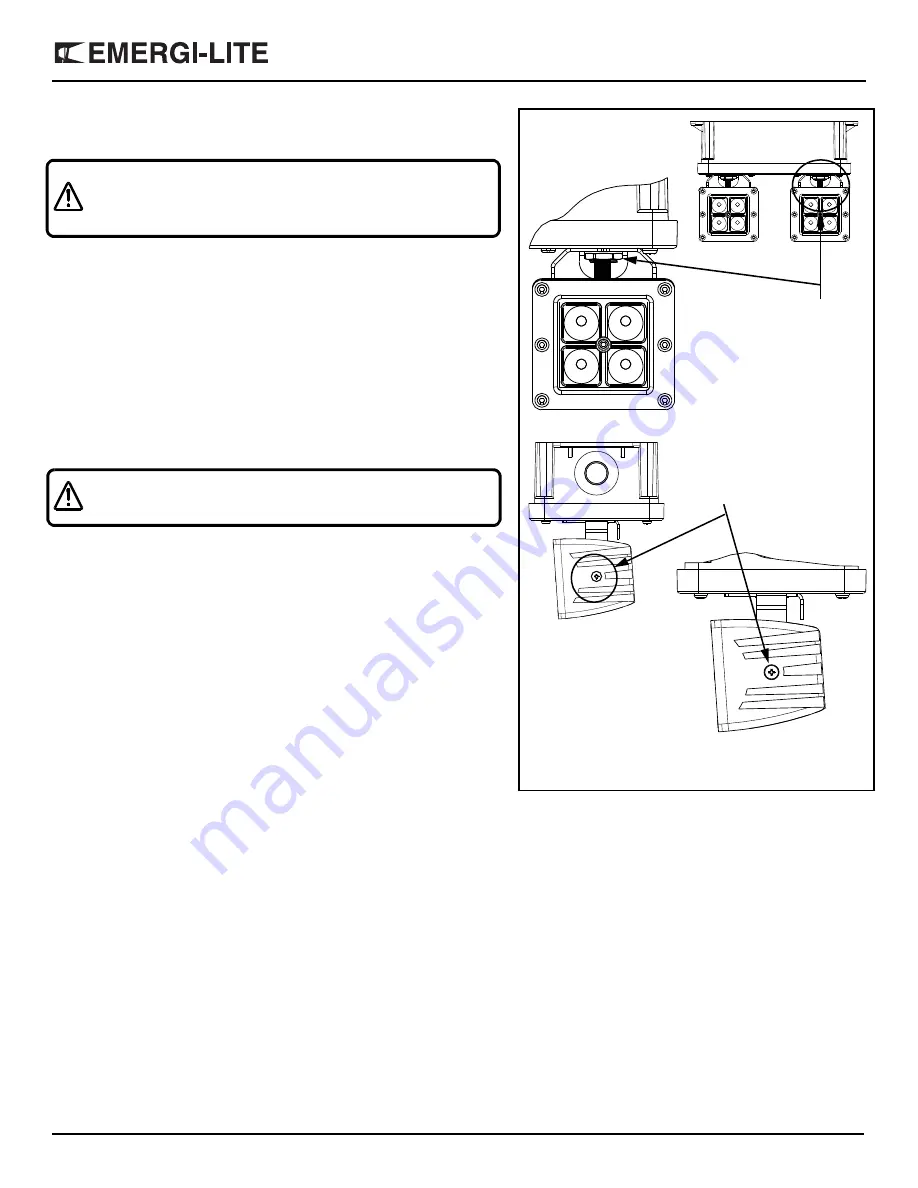
13. Adjust the lamp head assemblies:
- Rotation: hold the lamp assembly and turn it to either side.
- Tilting: hold the lamp assembly and tilt it up or down.
If the lamp heads become loose: tighten the screws located on each side
of the lamp heads and the nut located at the base of the bracket
(See figure 3).
Warranty:
For the complete warranty information, please
refer to the landing page of our website (
http://www.emergi-lite.com/usa/)
.
WARNING:
FAILURE TO ENSURE A WATER-TIGHT
INSTALLATION OF THE CONDUIT(S) AND
FITTING(S) WILL VOID THE MANUFACTURER
WARRANTY.
WARNING:
SCREWS MUST BE TORQUED TO AT LEAST
12INLB TO ENSURE A WATER-TIGHT SEAL
BETWEEN THE COVER AND HOUSING.
Figure 3
Two screws
Nut
(located on both sides
of the lamp head)


