background image

Instructions for Use

Instructions for Use

1. 

Read all material, warning stickers, 
and labels.

2. 

Unpack all listed contents from the 
packaging. Please make sure that 
your appliance has been shipped with 
the components that you ordered. 
Some accessories listed may be sold 
separately. Check everything carefully 
before use. If any part is missing or 

damaged, do not use this product. 
Contact HPC Brands, LLC using the 
customer service number located on the 
back of this manual.

3. 

Remove all packing materials, stickers, 
and labels from the appliance. Remove 
any clear or blue protective film on 
the components before use. Wash the 
components with soap and water.

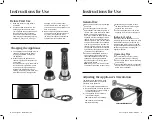
Before First Use

Charging the Appliance 

General Use

1. 

The appliance can be charged either by 
loading it into the Charging Base or  
by plugging a USB-C charger into 
the appliance.

2. 

When charging the appliance, the 
Indicator Lights show the appliance’s 
power level: 

a)

  Three Indicator Lights: 100% power. 

b)

  Two Indicator Lights: 75% power. 

c)

  One Indicator Light: 40% power. 

d)

  When the last Indicator Light is 

flashing, the battery power is less than 
30% and should be recharged soon.


ƒ

Make sure the appliance is fully charged 
prior to use.


ƒ

To start the appliance, first press the 
Unlock Button. The Indicator Lights will 
turn red. Then, press and hold the Power 
Button. The Indicator Lights will turn 
blue. If you release the Power Button, the 
appliance will stop operating but remain 
ready to use for 10 seconds. While the 
Indicator Lights are blue, you can release 
and press the Power Button as needed, 
such as to pulse. After 10 seconds, the 
Indicator Lights will turn off. In this state, 
you will need to press the Unlock Button 
again before pressing the Power Button 
to continue using the appliance.


ƒ

Use the Variable Speed Controller to 
set the speed of the appliance. Set 
the Variable Speed Controller to a low 
speed before starting the appliance.  
Once the appliance is running, adjust 
the speed as needed. 

NOTE: 

During use, it is normal for suction 

to increase at the bottom of the container.


ƒ

When blending is complete, release 
the Power Button before removing the 
appliance from the mixture.


ƒ

The recommended time of use for the 
appliance is 1 minute of continuous use.

Indicator Lights

When you press the Unlock Button, one 
Indicator Light will turn red. When you press 
the Power Button within 10 seconds, the 
Indicator Lights will turn blue. The number 
of lights displayed indicates the appliance’s 
battery charge (see the “Charging the 
Appliance” section).

Operating Tips


ƒ

Cut solid foods into ½-inch (13 mm) 
pieces for easier mixing or chopping.


ƒ

Use an up and down motion for blending 
and pureeing.


ƒ

If using the blender directly in a saucepan, 
be sure to remove the pan from the heat 
before using the blender.

Adjusting the Appliance’s Orientation

The appliance can be angled to make 
different activities easier. To adjust the 
orientation of the appliance:

1. 

Press the Angle Adjustment Button.

2. 

Rotate the bottom half of the appliance 
until the appliance clicks into place in 
the desired orientation.

3. 

The appliance can be rotated to  
three different angles:

180°:

 Ideal for immersion blending.

135°:

 Ideal for whisk blending.

90°:

 Ideal for beating.

ANGLE ADJUSTMENT BUTTON

8


Emeril Lagasse

 Blender & Beyond

Emeril Lagasse

 Blender & Beyond


9

Summary of Contents for Blender & Beyond HB2248S

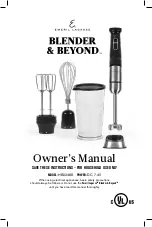
Page 1: ...EHOLD USE ONLY MODEL HB2248S POWER DC 7 4V Owner s Manual When using electrical appliances basic safety precautions should always be followed Do not use the Emeril LagasseTM Blender BeyondTM until you have read this manual thoroughly ...

Page 2: ... 2000mAh 7 4V DC 10 000 15 000 r min 800 mL C Table of Contents Unit Specifications 2 IMPORTANT SAFEGUARDS 4 Parts Accessories 6 Instructions for Use 8 Before First Use Charging the Appliance General Use Adjusting the Appliance s Orientation Using the Blender 8 8 9 9 10 Using the Accessories 11 Using the Beaters Using the Whisk Using the Frother Using the Chopper Using the Slicer Spiralizer and Sh...

Page 3: ...that they do not play with the appliance 12 Close supervision is necessary when any appliance is used by or near children 13 Keep hands and utensils out of the container while blending to reduce the risk of severe injury to persons or damage to the appliance A scraper may be used but must be used only when the appliance is not running 14 Do not attempt to defeat the cover interlock mechanism 15 Ke...

Page 4: ...rd I Storage Guard J Whisk Holder K Whisk L Beater Gear Box M Beaters N Frother O To Go Cup P To Go Cup Lid Q USB AC Adaptor R USB C Power Cord S Charging Base T Blending Jar Lid U Blending Jar 800 mL V Chopper Bowl Lid W Chopper Bowl 500 mL X Chopper Blade Y Chopper Bowl Feet Z Masher Holder AA Masher Shaft AB S Blade AC Food Processor Bowl AD Food Processor Bowl Feet AE Slicer AF Spiralizer AG S...

Page 5: ... as needed such as to pulse After 10 seconds the Indicator Lights will turn off In this state you will need to press the Unlock Button again before pressing the Power Button to continue using the appliance Use the Variable Speed Controller to set the speed of the appliance Set the Variable Speed Controller to a low speed before starting the appliance Once the appliance is running adjust the speed ...

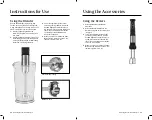
Page 6: ...ress the Unlock Button and then press and hold the Power Button to start Adjust the Variable Speed Controller as needed 4 When you are done release the Power Button to stop After 10 seconds the Indicator Lights will turn off Caution Blade is sharp Blending Guard Using the Beaters 1 Attach the Beaters to the Beater Gear Box 2 Attach the Beater Gear Box to the Motor Housing and twist until they lock...

Page 7: ...hts will turn off Using the Chopper Do not use the chopper to chop extremely hard food such as ice cubes nutmeg coffee beans and grains 1 Before chopping carefully remove the plastic cover from the blade The blade is very sharp so always hold the blade by the upper plastic part 2 Place the Chopper Blade on the center pin of the Chopper Bowl Press down on the blade and lock the blade in place Alway...

Page 8: ...shred more than 17 oz 500 g of food at once Do not use these attachments with meat 1 Place the Shredder Disc on the center pin of the Food Processor Bowl Press down on the blade and lock the blade in place Always place the Food Processor Bowl on the anti slip base 2 To spiralize attach the Spiralizer to the top of the Shredder Disc To slice attach the Slicer to the top of the Shredder Disc To shre...

Page 9: ...ng shredding food and vegetables such as carrots High 500 g vegetables such as carrots cabbage potatoes IMPORTANT The Slicer and Shredder Disc are not suitable for cutting hard meat and cheese N A Until a batch is shredded Choosing a Speed for All Functions Using the Masher 1 Attach the Masher Shaft to the Masher Holder and twist until they lock into place 2 Attach the Masher Holder to the Motor H...

Page 10: ...ent appliance or the remainder of the existing guarantee whichever is later HPC Brands LLC reserves the right to replace the appliance with one of equal or greater value RETURN POLICY If for any reason you would like to replace or return the product under the money back guarantee your order number can be used as the return merchandise authorization number RMA If the product was purchased in a reta...

Page 11: ...uct has been manufactured to the highest standards Should you have any questions our friendly customer service staff is here to help you To contact us call us at 973 287 5132 Distributed by HPC Brands LLC Middleton WI 53562 2022 HPC BRANDS LLC All rights reserved PXL BB_IB_RTL_ENG_V1_220520 ...

Reviews: