background image

10

   Emeril Lagasse Power Grill 360

Emeril Lagasse Power Grill 360  


11

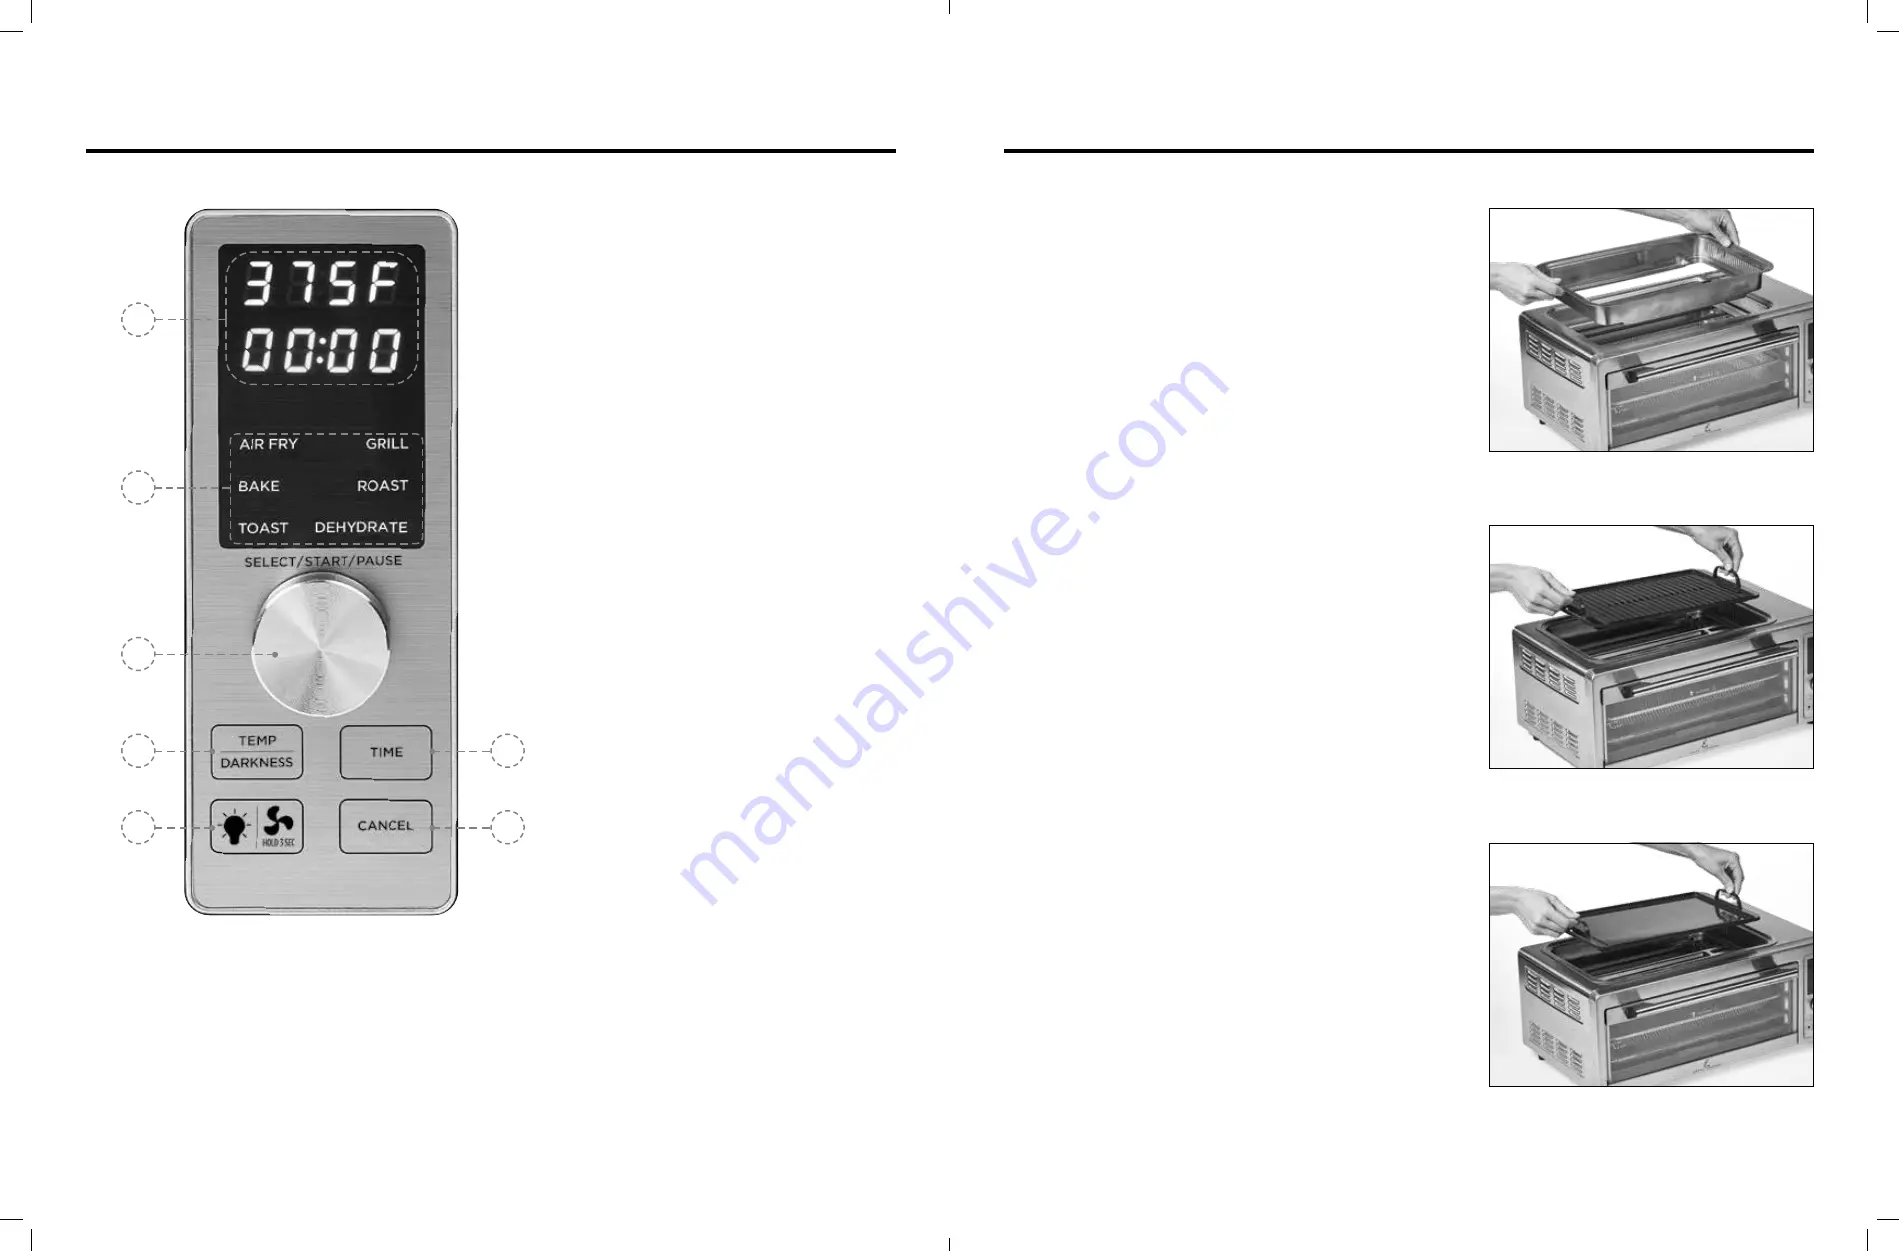
The Control Panel

A. 

TIME/TEMPERATURE DISPLAY: Displays the 
current cooking temperature and cooking time.

B. 

COOKING PRESETS: Displays the cooking 
presets. Turn the Control Knob to scroll through 
the presets.

C. 

CONTROL KNOB: Turn clockwise or 
counterclockwise to change the appliance’s 
cooking settings. Press to confirm the cooking 
settings and begin the cooking process. When 
the cooking process is active, press to pause the 
cooking process. Press the Control Knob again 
to resume the cooking process.

D. 

TEMP/DARKNESS BUTTON: Press the Temp/
Darkness Button and then turn the Control Knob 
to adjust the cooking temperature. When using 
the Toast function, use the Temp/Darkness Button 
to select your desired darkness.

E. 

TIME BUTTON: Press the Time Button and then 
turn the Control Knob to adjust the cooking time.

F. 

LIGHT/FAN BUTTON: Press to turn the 
appliance’s internal light on or off. Press and hold 
for 3 seconds to turn the fan on or off.

G. 

CANCEL BUTTON: When the cooking process 
is active, press to cancel the cooking process.

B

C

D

E

A

F

G

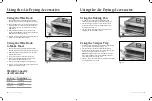
Using the Grilling Accessories

Fig. ii

Fig. iii

Fig. i

Using the Grill

1. 

Place the Grill Drip Tray in the top of the appliance  
(see Fig. i).

2. 

Use the handles on the Grill Plate or Griddle Plate  
to lower the plate over the Grill Drip Tray (see Fig. ii  
and Fig. iii).

3. 

To remove the Grill Plate or Griddle Plate, use the 
handles to lift the plate upward. The plate will be hot  
after cooking, so let the appliance and accessories cool 
before moving them. Use oven mitts when handling hot 
accessories.

4. 

After use, remove the Grill Drip Tray carefully to avoid 
spilling any accumulated liquid or crumbs.

Summary of Contents for Power Grill 360 AFGO-01

Page 1: ...the Emeril Lagasse AirFryer Power Grill 360TM until you have read this manual thoroughly SAVE THESE INSTRUCTIONS FOR HOUSEHOLD USE ONLY Owner s Manual Visit TristarCares com for tutorial videos produ...

Page 2: ...Accessories 11 Using the Wire Rack Using the Wire Rack to Make Toast Weight Capacity of Accessories Using the Baking Pan Using the Crisper Tray 12 12 12 13 13 Preset Information 14 Preset Chart 14 Coo...

Page 3: ...RDS PREVENT INJURIES CAREFULLY READ ALL INSTRUCTIONS BEFORE USE When using electrical appliances basic safety precautions should be followed including the following SAVE THESE INSTRUCTIONS 19 NEVER im...

Page 4: ...drape over the countertop or tabletop where it can be pulled on by children or tripped over Overheating Protection Should the inner temperature control system fail the overheating protection system w...

Page 5: ...le Plate 12 Baking Pan 14 Crisper Tray 11 Air Fryer Drip Tray 8 Grill Drip Tray 7 Glass Lid 2 Glass Door 6 Power Cord 3 Door Handle 4 Exhaust Fan Filter WARNING The glass and metal components of this...

Page 6: ...to select your desired darkness E TIME BUTTON Press the Time Button and then turn the Control Knob to adjust the cooking time F LIGHT FAN BUTTON Press to turn the appliance s internal light on or off...

Page 7: ...s Using the Air Frying Accessories Fig iv Fig v Weight Capacity of Accessories Using the Wire Rack Using the Wire Rack to Make Toast Accessory Weight Limit Wire Rack 12 lb 5443 g Crisper Tray 10 lb 45...

Page 8: ...you become familiar with the appliance you will be able to make minor adjustments to suit your taste Cooking Guidelines Internal Temperature Meat Chart Food Type Internal Temp Beef Veal Ground 160 F 7...

Page 9: ...lp you select the correct temperature and time for best results As you become more familiar with the appliance s cooking process you may adjust these settings to suit your own personal tastes NOTE Kee...

Page 10: ...e cooking process is complete and the cooking time has elapsed the appliance will beep several times When starting with a cold appliance add 3 minutes to the cooking time to allow the appliance to pre...

Page 11: ...Storage Problem Possible Cause Solution The appliance does not work The appliance is not plugged in Plug power cord into wall socket The appliance has not been turned on by setting the preparation ti...

Page 12: ...of purchase return the product or the component part for replacement with a functionally equivalent new product or part The original proof of purchase is required and you are responsible to pay to ret...

Page 13: ...Lagasse Power Grill 360TM This product has been manufactured to the highest standards Should you have any questions our friendly customer service staff is here to help you For parts recipes accessori...

Reviews: