background image

18

   Emeril Lagasse Power Grill 360 Plus


ƒ

When the cooking process is complete and the cooking 
time has elapsed, the appliance will beep several times.


ƒ

When starting with a cold appliance, add 3 minutes to the 
cooking time to allow the appliance to preheat.


ƒ

NEVER use the appliance’s door as a place to rest 
accessories filled with food. The accessories could 
damage the door or cause the appliance to tip. Personal 
injury could result.


ƒ

During the cooking process, the cooking accessories will 
become very hot. When you remove the accessories to 
check the food, make sure you have a trivet or a heat-
resistant surface nearby to set it down on. NEVER place 
the accessories directly on a countertop or table.


ƒ

All surfaces inside and outside of the appliance will be 
extremely hot. To avoid injury, wear oven mitts. Allow 
at least 30 minutes for the appliance to cool before 
attempting cleaning or storing.


ƒ

Grilling with the Glass Lid on the appliance is 
recommended because it maintains the cooking 
temperature, seals in flavor, and prevents splatter.

1. 

Read all material, warning stickers, and labels.

2. 

Unpack all listed contents from the packaging. Please 
make sure that your appliance has been shipped with 
the components that you ordered. Some accessories 
listed may be sold separately. Check everything carefully 
before use. If any part is missing or damaged, do not use 
this product. Contact Tristar using the customer service 
number located on the back of this manual.

3. 

Remove all packing materials, stickers, and labels from 
the appliance. Remove any clear or blue protective film on 
the components before use.

4. 

Wipe the inside and outside of the cooking appliance 
with a warm, moist cloth and mild detergent. Rinse 

with a clean, moist cloth. Never submerge this 
appliance in water or liquids of any kind. Handwash all 
cooking accessories.

5. 

Place the appliance on a dry, stable, horizontal, and level 
surface that is heat resistant. Ensure that the appliance is 
used in an area with good air circulation and away from 
hot surfaces and any combustible materials. Do not place 
on a stove top.

6. 

Before cooking food, preheat the appliance for a few 
minutes to allow the appliance to burn off the 
manufacturer’s protective coating of oil. Wipe the 
appliance with warm, soapy water and a dishcloth after  
this burn-in cycle.

Before First Use

Instructions

Summary of Contents for POWER GRILL 360 PLUS AFGO-01

Page 1: ...pliances basic safety precautions should always be followed Do not use the Emeril Lagasse Power Grill 360 Plus until you have read this manual thoroughly SAVE THESE INSTRUCTIONS FOR HOUSEHOLD USE ONLY...

Page 2: ...efore you begin it s very important that you read this entire manual making certain that you are totally familiar with this appliance s operation and precautions Unit Specifications Model Number Suppl...

Page 3: ...acity of Accessories Using the Baking Pan Using the Crisper Tray 12 12 12 13 13 Preset Information 14 Preset Chart 14 Cooking Guidelines 15 Internal Temperature Meat Chart Grilling Guidelines Air Fryi...

Page 4: ...y control to off and then remove the plug from the electrical outlet 14 DO NOT use this appliance for anything other than its intended use 15 A short power supply cord is provided to reduce the risks...

Page 5: ...ecommend protecting your surface by placing a hot pad or trivet under the appliance for heat protection Your manufacturer or installer may recommend that hot pans pots or electrical appliances should...

Page 6: ...iance unless it is thoroughly cooled 39 The appliance s outer surfaces and accessories may become hot during use Wear oven mitts when handling the appliance during and after use and to protect against...

Page 7: ...function Should this happen unplug the appliance Allow time for the appliance to cool completely before restarting or storing Electromagnetic Fields This appliance complies with all standards regardi...

Page 8: ...8 Emeril Lagasse Power Grill 360 Plus 5 Control Panel 1 Main Unit 2 Glass Door 6 Power Cord 3 Door Handle 4 Exhaust Fan Filter...

Page 9: ...Baking Pan 14 Crisper Tray 11 Air Fryer Drip Tray 8 Grill Drip Tray 7 Glass Lid WARNING The glass and metal components of this appliance will get extremely hot during use Great care should be taken t...

Page 10: ...tive press to pause the cooking process Press the Control Knob again to resume the cooking process D TEMP DARKNESS BUTTON Press the Temp Darkness Button and then turn the Control Knob to adjust the co...

Page 11: ...r Griddle Plate to lower the plate over the Grill Drip Tray see Fig ii and Fig iii 3 To remove the Grill Plate or Griddle Plate use the handles to lift the plate upward The plate will be hot after coo...

Page 12: ...ooking high moisture food on the upper shelf position slide the Baking Pan into the shelf position below the Wire Rack to catch any drippings 4 After use remove the Air Fryer Drip Tray carefully to av...

Page 13: ...lly to avoid spilling any accumulated liquid or crumbs 1 Insert the Air Fryer Drip Tray below the bottom heating elements at the very bottom of the appliance see Fig iv 2 Use the markings on the door...

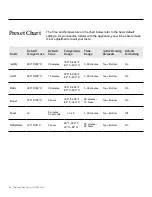
Page 14: ...n Bake 320 F 160 C 30 minutes 180 F 450 F 82 C 232 C 1 90 minutes Top Bottom On Roast 275 F 135 C 2 hours 180 F 325 F 82 C 163 C 30 minutes 12 hours Top Bottom On Toast L3 5 minutes 50 seconds L1 L5 1...

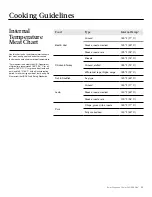
Page 15: ...160 F 71 C Steaks roasts medium 140 F 60 C Steaks roasts rare 130 F 54 C Pork Chops ground ribs roasts 160 F 71 C Fully cooked ham 140 F 60 C Use this chart and a food thermometer to ensure that meat...

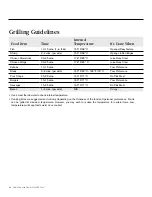
Page 16: ...illing Guidelines Food Item Time Internal Temperature It s Done When Fish 12 15 mins 1 in thick 155 F 68 C Opaque Flaky Texture Shrimp 2 4 mins per side 155 F 68 C Opaque Red Edges Chicken Drumsticks...

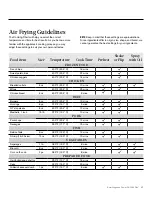
Page 17: ...C 18 mins Sweet potato fries 400 F 204 C 22 mins Chicken nuggets 400 F 204 C 14 mins CHICKEN Breaded cutlets 6 oz 400 F 204 C 10 mins Wings 400 F 204 C 25 mins Chicken breast 6 oz 400 F 204 C 8 mins B...

Page 18: ...ng stickers and labels 2 Unpack all listed contents from the packaging Please make sure that your appliance has been shipped with the components that you ordered Some accessories listed may be sold se...

Page 19: ...reheat foods Simply set the temperature and time to however warm you want your food Be careful not to transfer germs from raw meat to cooked meat Use separate utensils and platters for raw and cooked...

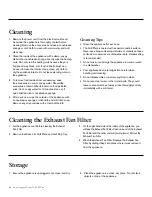
Page 20: ...h Cleaning Tips Clean the appliance after each use The Grill Plate is coated with a special nonstick surface Never use abrasive cleaning materials or utensils on these surfaces Accessories are dishwas...

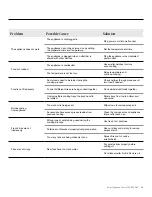
Page 21: ...ocess and turn food if needed Foods of different sizes are being cooked together Cook similar sized foods together If using multiple cooking trays the trays need to be rotated Rotate trays from top to...

Page 22: ...The pizza should be cooked close to the heating element for best results When cooking frozen pizza use a lower cooking temperature than the packaging suggests for a conventional oven because the rapid...

Page 23: ...er the money back guarantee your order number can be used as the return merchandise authorization number RMA If the product was purchased in a retail store return the product to the store or use RETAI...

Page 24: ...l 360 Plus This product has been manufactured to the highest standards Should you have any questions our friendly customer service staff is here to help you To contact us call us at 973 287 5132 Distr...

Reviews: