Supported IPMI Commands
ATCA-7368 Installation and Use (6806800M12C
)
102
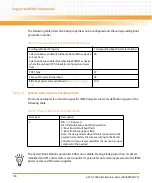
This timer specifies how long the IPMC waits for the payload to shut down gracefully. If the
payload software does not configure its OpenIPMI library to be notified for graceful shutdown
requests, the IPMC shuts down the payload when the timer expires.
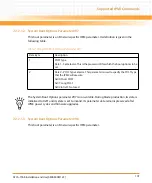
7.2.7.1.4 System Boot Options Parameter #100
The system boot options parameter #100 allows you to send multiple boot options to the
blade’s boot firmware and thus control the boot process. The boot options which you can
configure using this parameter are typically a subset of the boot options which you can
configure in the boot firmware directly, for example, using a setup menu. Details are given in
this section.
The IPMC contains a storage area where the boot parameters are stored. When the blade
boots, the boot firmware reads out the storage area, interprets the parameters and executes
the boot process accordingly. Note that the boot parameters in the IPMC storage area have
higher priority than the same boot options which may be configured in the firmware itself, for
example, using the setup menu.
The storage area is divided into two parts: the default area and the user area. The user area can
be read and written by an IPMI user and, by default, is the area which the boot firmware reads
out and uses during the boot process. The default area can only be read (by both the IPMI user
and the boot firmware.). Its purpose is to store factory-programmed default boot options
which can be used to restore the standard settings. If you want the boot firmware to read out
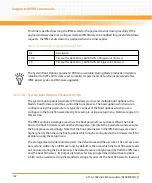
Table 7-11 System Boot Options Parameter #98
Bit Description
15:8
Timeout for GRACEFUL_SHUTDOWN, LSB (given in 100 msec)
7:0
Timeout for GRACEFUL_SHUTDOWN, MSB (given in 100 msec)
The System Boot Options parameter #98 is non-volatile. During blade production its data is
initialized to 0xFF and its state is set to invalid. Its parameter data remains preserved after
IPMC power cycles and firmware upgrades.
Summary of Contents for ATCA-7368
Page 8: ...ATCA 7368 Installation and Use 6806800M12C Contents 8 Contents Contents ...
Page 14: ...ATCA 7368 Installation and Use 6806800M12C 14 List of Figures ...
Page 50: ...Hardware Preparation and Installation ATCA 7368 Installation and Use 6806800M12C 50 ...
Page 88: ...Functional Description ATCA 7368 Installation and Use 6806800M12C 88 ...
Page 210: ...Replacing the Battery ATCA 7368 Installation and Use 6806800M12C 210 ...
Page 221: ......


