background image

Installation, Operation and Maintenance Manual 

DOC.IOM.RG.US Rev. 11


November 2021

13

Section 7: Scheduled Maintenance and Operational Testing

Scheduled Maintenance and Operational Testing

e. 

Place both filter/strainer seals item (2) on to the ends of the reassembled outer 
and inner filters and insert into the manifold body item (1).

f. 

Using a generous amount of grease or hydraulic fluid on the two hex cap o-rings 

item (6) screw the hex caps into the body until the hex cap bottoms out. No 

specific torque is required for tightening since the hex cap design is a straight 

thread/o-ring sealing designed component. 

Note:

 before re-installing the hex caps (2) and o-rings (6), visually inspect the 

o-rings (6) for any nicks or abrasions. Replace o-rings if worn or cuts are observed.

Notes:

Recommended replacement period for both filter/strainer elements 5 years.


Recommended cleaning for both filter/strainer elements annually, or more often based on


power gas cleanliness.

2. 

Drain contaminants from gas/hydraulic tank(s) and refill to proper tank levels.


Refer to Figure 6.

NOTE: 

If equipped with additional gas filters, check elements and consider replacing them as it may be 

clogged with contaminants.

3. 

Refer to Section 2 to ensure that proper method of operation is followed.

4. 

Check manual operation with handpump, refer to Section 2.

a. 

There should be noticeable suction on the suction stroke, decreasing as the pump 

cylinder fills, indicating suction lines are open and full of fluid.

b. 

Handle effort on the pressure stroke will depend on line pressure and line 
valve position.

c. 

Pressure stroke should be smooth and feel solid, not spongy, indicating pressure 

lines are open and full of fluid.

d. 

At the end of operator stroke (line valve open or closed) the handle should 

stop solid on the pressure stroke, indicating no bypass flow in operator or hydraulic 

components.

e. 

Test by applying 150 lb force for two minutes to the pump handle provided with 

the unit.

f. 

Press relief knob to move clevis and handle in the down position.

Summary of Contents for BETTIS 107 DH

Page 1: ...Installation Operation and Maintenance Manual DOC IOM RG US Rev 11 November 2021 Bettis Rotary Gas Hydraulic Operator Scotch Yoke Valve Operator ...

Page 2: ...Installation Operation and Maintenance Manual DOC IOM RG US Rev 11 Notes November 2021 This page intentionally left blank ...

Page 3: ...ocedure 2 Section 2 Operating Instructions Operating Instructions 3 Section 3 Installation 3 1 Field Mounting 5 3 2 Extended Storage 7 Section 4 Install Connections Install Connections 8 Section 5 Prestart Up Checks Prestart Up Checks 9 Section 6 Start Up Checks Start Up Checks 10 Section 7 Scheduled Maintenance and Operational Testing Scheduled Maintenance and Operational Testing 12 Section 8 Ins...

Page 4: ...7 Section 11 Operator Disassembly Operator Disassembly 20 Section 12 Operator Assembly Operator Assembly 22 Section 13 Hydraulic Fluid Hydraulic Fluid 24 Section 14 Troubleshooting Troubleshooting 25 Section 15 Drawings and Schematics Drawings and Schematics 26 Section 16 Maintenance Log Maintenance Log 36 Section 17 Rotary Gas Hydraulic Notes Rotary Gas Hydraulic Notes 37 ...

Page 5: ...h the component The operators mechanical end stops are preset at the factory for 90 travel 1 3 Start Up Checks If unit has a fail or ESD Emergency Shut Down position the fail safe or ESD controls may have to be temporarily disabled bypassed or overridden by AUTO MANUAL selector to prevent inadvertent valve operation 1 4 Maintenance and Operational Testing De pressurize operator before attempting t...

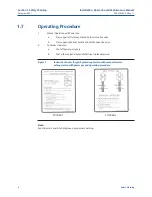
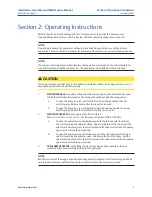
Page 6: ...e and hold to close line valve b Press upper right relay handle and hold to open line valve 2 To Disarm Operator a Shut off power gas supply b Push either upper relay handle halfway to bleed pressure Figure 1 Instruction sticker for gas hydraulic operation with manual selector safe operation with power gas and operating procedure STICKER 1 STICKER 2 Note Red characters on white background easy rel...

Page 7: ...lose the line valve press and hold the left side closing handle on the gas switching relay Release handle after the line valve is closed b To open the line valve press and hold the right side opening handle on the gas switching relay Release the handle after the line valve is open 2 WITHOUT POWER GAS and supply shut off valve closed Refer to Shafer Manual Handpump IOM Document Number MHP 01102001 ...

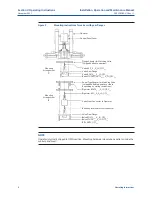
Page 8: ...stallation Operation and Maintenance Manual DOC IOM RG US Rev 11 4 Section 2 Operating Instructions Operating Instructions Figure 2 Mounting instructions for valves with gear flanges Operator Control Panel Cover Flange Adaptor for Matching Valve Shipped bolted to operator Valve KEY _X_X_LG QTY__ Valve Gear Flange Valve STUDS W NUTS ___X_LG QTY__ Valve BOLTS ___X_LG QTY__ Spool Type Adaptor for Mat...

Page 9: ...closed Damage to valve and or operator can be caused if operator tries to open or close a valve against valve internal stops Operator position can be confirmed safely by operation with handpump 3 Check mounting surfaces valve stem operator bore and orientation for any dimensional discrepancy dirt rust etc 4 It is recommended that the stem key be set in place at this point before actuator is instal...

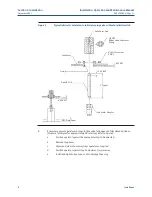
Page 10: ... Lubricator Adapter MTG Plate Spool 0 50 REF Pipe NPS 1 4 O ring Yoke Cover 0 40 REF 8 If necessary adjust operator end stops for line valve fully open and fully closed positions Stops are factory set for approximately 90 rotation Refer to Figure 5 a Position operator against the appropriate stop to be adjusted b Remove stop cover c Adjust end stop into or away from operator as required d Position...

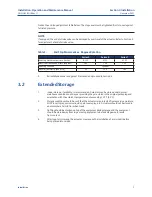
Page 11: ...l yoke cover and gasket if removed and proceed to Section 4 3 2 Extended Storage 1 Indoor storage if available is recommended Actuators can be stored under normal warehouse conditions up to a year providing they are stored in the original packaging and orientation with the ambient temperature not exceeding 125 F 52 C 2 Storage conditions should be such that the actuators are protected from excessi...

Page 12: ...ve does not interfere with pressure sensing devices that is use proper size of tubing for flow and pressure purposes 2 In the case of a volume tank power gas storage bottle with inlet check user should confirm that the tank is rated and or protected against any possible supply overpressure or thermal expansion overpressure 3 Electrical connection s to junction box if any are as per wiring diagram ...

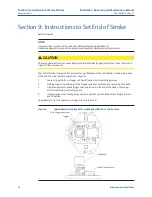
Page 13: ...g position as per schematic and wiring diagram 5 If removed yoke cover limit switch or end of stroke valve must be re installed and secured 6 Limit switch shaft centerline aligned with yoke cover operator stem centerline 7 In case of valve stem lubricator two piece yoke cover set screws are secured and stem section is centered in yoke cover There is a gap between top of yoke cover hub and limit sw...

Page 14: ...t switches and end of stroke valves are actuated the correct position refer to Sections 8 and 9 2 Apply power gas supply Confirm power gas supply pressure a Gas Hydraulic rotary or linear maximum operating pressure as per tank and operator Nameplates minimum as specified by user Consult factory for minimum pressures lower than 300 psi 3 Check connections for leaks with soapy water Check a For leak...

Page 15: ...led to simulate AUTO operation unless required to operate ESD device Refer to wiring diagram 6 Emergency shutdown fail position operation check out a Ensure operator is in normal operating position b Apply remove the required ESD signal to operate the unit c Apply power gas supply to the unit it should operate to ESD Fail position 7 Restore all tubing and wiring as per normal operating conditions ...

Page 16: ...r elements items 3 and 4 can be easily replaced by removing the two hex head end caps item 5 The hex caps can be removed using conventional tools such as 1 7 16 inch socket wrench or standard adjustable wrench c Carefully remove the filter strainer elements items 3 and 4 including the strainer seals item 2 from the manifold body item 1 Note item 3 element is 25 microns item 4 is 140 microns Item 4...

Page 17: ...ually or more often based on power gas cleanliness 2 Drain contaminants from gas hydraulic tank s and refill to proper tank levels Refer to Figure 6 NOTE If equipped with additional gas filters check elements and consider replacing them as it may be clogged with contaminants 3 Refer to Section 2 to ensure that proper method of operation is followed 4 Check manual operation with handpump refer to S...

Page 18: ...s flow in operator or gas hydraulic components d There should be no leaks of gas or hydraulic fluid e Upon releasing relay handle there should be a momentary rush of gas from exhaust port as the pressurized gas hydraulic tank is vented 6 Operating with power gas check remote automatic operation NOTE Ensure that adequate pressure and flow of gas and correct hydraulic fluid levels are present a Shut...

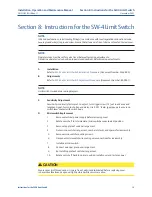
Page 19: ...red as per wiring diagram C Sensitivity Adjustment Sensitivity is normally factory set To adjust turn trigger screw 13 out to advance and lengthen signal Turn in to shorten and delay Use 0 001 feeler gap gauge to ensure no switch lever contact with switch body D Microswitch Replacement 1 Remove electrical power supply before removing cover 2 Rotate cam shaft to intermediate microswitches unactuate...

Page 20: ...igger Valve ensures that gas hydraulic tanks and cylinders are de pressurized at the end of each automatic operation as required 1 Loosen trigger bolts so trigger can be slid forward to actuate trigger valve 2 Holding trigger in position such that trigger valve has switched and sealed tighten bolts 3 Operate operator to check trigger valve operation At the end of the stroke the trigger valve shoul...

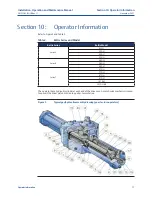
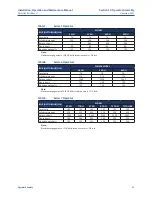
Page 21: ...Table 2 Bettis Series and Model Bettis Series Bettis Model Series 3 23 SH 33 DH 43 DH 53 DH Series 6 46 DH 56 DH 66 DH Series 7 67 DH 77 DH 87 DH 97 DH 107 DH 107DH 8B The operator has a hydraulic cylinder at each end of the drive case A scotch yoke mechanism is used to convert the linear piston motion to quarter turn rotation Figure 5 Typical gas hydraulic assembly drawing quarter turn operators ...

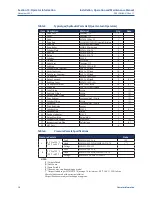
Page 22: ...r SAE 1060 Plated 16 V 23 Snap Ring SAE 1075 Heat Treated 2 24 Yoke O Ring Nitrile 1 Y 25 End Stop O Ring Nitrile 2 Y 26 Piston Center O Ring Nitrile 2 Y 27 Drive Rod Seal Urethane MoS2 Nitrile 2 Y 28 Cylinder O Ring Nitrile 4 Y 29 Piston Seal Urethane MoS2 Nitrile 4 Y 30 Drive Rod Guide Acetal 2 31 Yoke Bushing C1020 2 C 32 Yoke Bearing Nylon 1 34 Position Indicator C1010 1 35 Piston Wear Ring Ny...

Page 23: ... metal parts may help if all else fails and location is noted or sketched Table 5 Description Operator Repair Kit Minor Soft Parts Table 6 Description Operator Repair Kit Major Note Major operator repair kit includes minor repair kit Item Qty Description Material 24 1 O Ring Yoke Nitrile 26 2 O Ring Piston Center Nitrile 27 2 Drive Rod Seal Nitrile 25 2 O Ring End Stop Nitrile 36 2 Polypak Cylinde...

Page 24: ...n 3 4 Hex Key Other tools that are also required includes A set of standard imperial size wrenches and sockets through 1 1 2 Hex keys size 1 16 through 5 8 A pair of 8 or longer screwdrivers A container funnel 10 micron filter flexible hose and fittings to drain and salvage hydraulic fluid Solvent Sealant eg Silicone Lubricant petroleum grease petroleum jelly hydraulic fluid Anaerobic adhesive eg ...

Page 25: ...er plate ring cylinder plate bolts and cylinder plate itself Note the location and number of seals 7 Remove drive rod seal polypak from cylinder plate NOTE There is no drive rod seal in the drive case only a guide All pressure containing parts can now be inspected and replaced as necessary It is a good practice to replace all seals even if they appear serviceable Proceed with cylinder assembly in ...

Page 26: ...tion 8 Re install tanks with handpump and manifold assembly B Cylinder assembly 1 Install drive rod seal in cylinder plate and slide cylinder plate over drive rod into position with port in correct orientation 2 Install tighten and TORQUE cylinder plate bolts 3 Install cylinder plate ring s and 2 different seals 4 Lubricating with hydraulic fluid install wear ring and replace piston seals on pisto...

Page 27: ... 120 120 BOLT NUT TORQUE ft lb SERIES 6 MODEL 46 DH 56 DH 66 DH Cover bolts 76 76 76 Cylinder plate bolts 110 110 110 Piston nut bolt 1500 1500 1500 Stay rod nuts 100 100 100 Mounting plate bolts 120 120 120 Note Maximum engagement of 5 8 NC bolts into drive case is 1 1 2 inch Table 9 Series 7 Operator Note Maximum engagement of 1 NC bolts into drive case is 1 3 4 inch BOLT NUT TORQUE ft lb MODEL ...

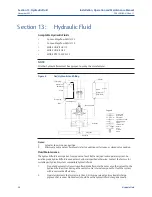
Page 28: ...ators systems that cycle more than 2 3 times per week unit suction discharge pig launcher receiver block valves should have the hydraulic fluid changed annually Section 13 Hydraulic Fluid Acceptable Hydraulic Fluids Conoco Megaflow AW HVI 22 Conoco Megaflow AW HVI 15 MOBIL UNIVIS HVI 13 MOBIL UNIVIS N22 MOBIL DTE 10 EXCEL 22 NOTE All other hydraulic fluids must be approved to use by the manufactur...

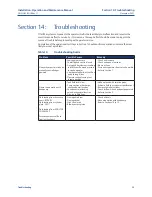
Page 29: ...resulting in insufficient flow and pressure to stroke operator Contaminated fluid will not flow easily through lines Operator and valve stops not in same position Check and increase Check and open a few turns Blow out lines Disconnect operator from valve if possible Refer to Section 7 Slow or no operation with handpump Tank fluid levels low Pump suction or discharge check valve malfunction Speed c...

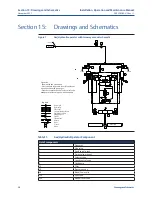
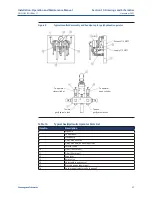
Page 30: ...o terminal enclosure Field connection Plugged port Signal Instrument Return Vent Closed Open Table 11 Gas Hydraulic Operator Component List of components 1 Operator 2 Line valve 3 Gas hydraulic tank 4 3 way valve manual 6 Selector valve 7 Speed control valve 9 Handpump 10 Filter 19 Pressure gauge 40 Bleed Drain valve 126 Vent tube 130 Manual relief valve Operation Shown with line valve open Press ...

Page 31: ...erator open cylinder To open gas hydraulic tank To close gas hydraulic tank To operator close cylinder Table 12 Typical Gas Hydraulic Operator Parts List Item No Description 1 Manifold 2 Control panel 3 Handpump 4 3 way manual relay 5 3 way manual with diaphragm relay 6 Selector valve 10 Filter 140 microns 11 Filter 25 microns 12 Regulator 13 Relief valve 14 Adjustable speed control 15 Pressure ga...

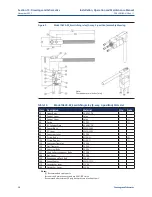
Page 32: ...Y 50 M Cylinder Plate AL 6061 T6 1 60 Spacer Block ESMA 2202 1 70 M Lever ESMA 2202 1 80 Capscrew Lever SS 304 1 90 O ring Body BUNA N 2 Y 100 O ring Poppet BUNA N 1 Y 110 Capscrew Operator SS 304 1 120 Nut Operator SS 304 1 130 Capscrew Body SS 304 4 131 High Collar Lockwasher Body SS 18 8 4 140 Nut Lever SS 304 1 150 Roundheaded Push Bolt SS 304 1 160 Poppet Spacer ESMA 1732 1 170 Lockwasher Lev...

Page 33: ... 30 Diaphragm Cap AL 6061 T6 1 40 M Lever AL 6061 T6 1 50 Cylinder Plate AL 6061 T6 1 70 Poppet Lower Nylon 1 Y 80 Poppet Upper Nylon 1 Y 90 Spring SS 302 1 130 O ring Body Nitrile 2 Y 140 O ring Poppet Nitrile 2 Y 160 Capscrew Operator SS 304 1 170 Nut Operator SS 304 1 180 Capscrew Cap SS 304 6 190 Capscrew Body SS 304 4 191 High Collar Lockwasher Body SS 18 8 4 200 Nut Lever SS 304 1 210 Roundh...

Page 34: ...TF Controlled flow inlet Free flow inlet Table 15 Flow Control Assembly 1 4 NPTF Parts List Item Description Material Qty 1 Flow Control Body AL 6061 Hard Anodized 1 2 Flow Control Cap AL 6061 Hard Anodized 1 3 Flow Control Stem SS 303 1 4 Flow Control Poppet SS 303 1 5 Spring SS 302 1 6 Hex Nut 1 4 20 UNC LH Thread SS 304 1 7 Knob Phenolic 1 8 O Ring Buna N 1 9 O Ring Buna N 1 ...

Page 35: ...TF Controlled flow inlet Free flow inlet Table 16 Flow Control Assembly 1 2 NPTF Parts List Item Description Material Qty 1 Flow Control Body AL 6061 Hard Anodized 1 2 Flow Control Cap AL 6061 Hard Anodized 1 3 Flow Control Stem SS 303 1 4 Flow Control Poppet SS 303 1 5 Spring SS 302 1 6 Hex Nut 1 4 20 UNC LH Thread SS 304 1 7 Knob Phenolic 1 8 O Ring Buna N 1 9 O Ring Buna N 1 ...

Page 36: ...002 Center Body AL 6061 T6 1 3 906 003 Lower Body AL 6061 T6 1 4 906 004 Lower Spring SS 302 1 5 906 005 Upper Spring CR VAN 1 6 906 006 O ring Body BUNA N 2 Y 7 906 007 O ring Poppet BUNA N 1 Y 8 906 008 Poppet PVC 1 Y 9 906 009 Plunger PVC 1 Y 10 906 010 Poppet Spacer Alloy steel 1 11 906 011 Capscrew Trigger Gr 5 PL 1 12 906 012 Nut Trigger Gr 5 PL 1 13 906 013 Capscrew Body Gr 5 PL 4 14 906 01...

Page 37: ...ockwasher 1 4 SS 304 2 15 Spring washer 1 16 Flatwasher 5 8 SAE SS 304 3 17 Cam for limit switch delrin 4 18 Spacer for limit switch delrin 5 20 Hex jam nut 1 21 Hex spacer 125 4 22 Hex spacer 50 4 23 Micro switch w 3 leads 4 1 2 NPT 6 Places 1 1 2 NPT 2 Places Top view cover removed Item Description Qty 24 Lockwasher 6 SS 304 20 25 Flatwasher 6 large o D SS 304 16 26 Stud 4 27 Hex locknut 8 28 Up...

Page 38: ...awingsandSchematics Figure 15 Manifold filter assembly drawing Table 19 Manifold Parts List Item Description Qty 1 Manifold body 1 2 Seal 4 3 Instrument gas filter 25 microns SS 1 4 Power gas strainer 140 microns SS 1 5 Cap 2 6 O ring 2 7 Flush plug level seal 7 8 Flush plug level seal 4 NOTE For Shafer Handpump drawings please refer to MHP 01102001 www emerson com ...

Page 39: ...ator valve travel is open closed fully or partially how far E Checklist for often overlooked causes Tank fluid levels are correct for operation Power gas of sufficient pressure and flow is present ESD Linebreak system is reset Operator travels fully and smoothly Speed controls are more than 25 open Correctly mounted on valve ie valve open operator open stops sets Exhausts not restricted or vented ...

Page 40: ...mber 2021 Installation Operation and Maintenance Manual DOC IOM RG US Rev 11 36 Section 16 Maintenance Log MaintenanceLog Section 16 Maintenance Log DATE TEMP PRESSURES POINTS CHECKED OR MAINTENANCE DONE BY ...

Page 41: ...Installation Operation and Maintenance Manual DOC IOM RG US Rev 11 November 2021 37 Section 17 Rotary Gas Hydraulic Notes RotaryGas HydraulicNotes Section 17 Rotary Gas Hydraulic Notes ...

Page 42: ...3 09 50 Strada Biffi 165 29017 Fiorenzuola d Arda PC Italy T 39 0523 944 411 For complete list of sales and manufacturing sites please visit www emerson com actuationtechnologieslocations or contact us at info actuationtechnologies emerson com www emerson com bettis VCIOM 13909 EN 2021 Emerson All rights reserved The Emerson logo is a trademark and service mark of Emerson Electric Co BettisTM is a...

Reviews: